AUDIO / VIDEO AMPLIFIER ANTENNA REMOVAL
CAUTION / NOTICE / HINT
The necessary procedures (adjustment, calibration, initialization or registration) that must be performed after parts are removed and installed, or replaced during amplifier antenna assembly removal/installation are shown below.
| Replaced Part or Performed Procedure | Necessary Procedures | Effect/Inoperative Function When Necessary Procedures are not Performed | Link |
|---|---|---|---|
| Disconnect cable from negative auxiliary battery terminal | Perform steering sensor zero point calibration | Lane Tracing Assist System | ( ) |
| Pre-collision System | |||
| Memorize steering angle neutral point | Parking Assist Monitor System | ()
|
|
| Panoramic View Monitor System | ()
|
- CAUTION:
-
-
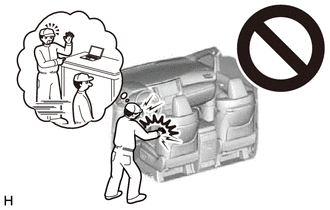
Some of these service operations affect the SRS airbag system. Read the precautionary notices concerning the SRS airbag system before servicing.
-
Click hereVehicle Interior>SUPPLEMENTAL RESTRAINT SYSTEMS>AIRBAG SYSTEM>PRECAUTION
PROCEDURE

 1. PRECAUTION (w/ Rear Seat Side Airbag)
- NOTICE:
-
After turning the power switch off, waiting time may be required before disconnecting the cable from the negative (-) auxiliary battery terminal. Therefore, make sure to read the disconnecting the cable from the negative (-) auxiliary battery terminal notices before proceeding with work.
-
Click hereGeneral>INTRODUCTION>REPAIR INSTRUCTION>PRECAUTION
64718C
2.REMOVE LUGGAGE TRIM SERVICE HOLE COVER (w/ Rear Seat Side Airbag)
3.DISCONNECT CABLE FROM NEGATIVE AUXILIARY BATTERY TERMINAL (w/ Rear Seat Side Airbag)
Click hereGeneral>MAINTENANCE>AUXILIARY BATTERY>REMOVAL
- CAUTION:
-
- ·
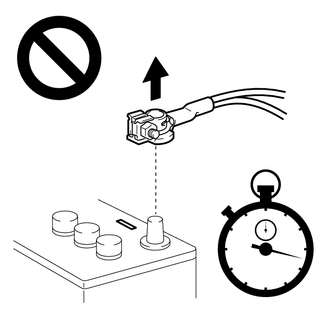
Wait at least 90 seconds after disconnecting the cable from the negative (-) auxiliary battery terminal to disable the SRS system.
·If an airbag deploys for any reason, it may cause a serious injury.
73350C
4.DISCONNECT REAR CENTER SEAT OUTER BELT ASSEMBLY (for Fold Down Seat Type)
5.REMOVE REAR SEAT CUSHION ASSEMBLY (for Fold Down Seat Type)
72693
6.REMOVE REAR SEAT CUSHION LOCK HOOK (for Fold Down Seat Type)
62332A
7.DISCONNECT REAR DOOR OPENING TRIM WEATHERSTRIP LH (for Fold Down Seat Type)
8.REMOVE REAR SIDE SEATBACK ASSEMBLY LH (for Fold Down Seat Type)
62331A
9.DISCONNECT REAR DOOR OPENING TRIM WEATHERSTRIP RH (for Fold Down Seat Type)
- HINT:
-
Use the same procedure as for the LH side.
10.REMOVE REAR SIDE SEATBACK ASSEMBLY RH (for Fold Down Seat Type)
- HINT:
-
Use the same procedure as for the LH side.
71940A
11.REMOVE REAR SEAT HEADREST ASSEMBLY (for Reclining Seat Type)
73350C
12.DISCONNECT REAR CENTER SEAT OUTER BELT ASSEMBLY (for Reclining Seat Type)
13.REMOVE REAR SEAT CUSHION ASSEMBLY (for Reclining Seat Type)
72693
14.REMOVE REAR SEAT CUSHION LOCK HOOK (for Reclining Seat Type)
72996A
15.REMOVE REAR SEATBACK COVER (for Reclining Seat Type)
16.REMOVE REAR SEATBACK ASSEMBLY LH (for Reclining Seat Type)
62332A
17.DISCONNECT REAR DOOR OPENING TRIM WEATHERSTRIP LH (for Reclining Seat Type)
18.REMOVE REAR SIDE SEATBACK ASSEMBLY LH (for Reclining Seat Type)
19.REMOVE REAR SEATBACK ASSEMBLY RH (for Reclining Seat Type)
62331A
20.DISCONNECT REAR DOOR OPENING TRIM WEATHERSTRIP RH (for Reclining Seat Type)
- HINT:
-
Use the same procedure as for the LH side.
21.REMOVE REAR SIDE SEATBACK ASSEMBLY RH (for Reclining Seat Type)
- HINT:
-
Use the same procedure as for the LH side.
62472A
22.REMOVE INNER ROOF SIDE GARNISH LH
62471A
23.REMOVE INNER ROOF SIDE GARNISH RH
- HINT:
-
Use the same procedure as for the LH side.
86300C
24.REMOVE NO. 2 AMPLIFIER ANTENNA ASSEMBLY
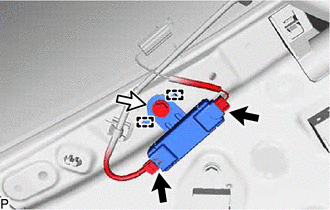
Disconnect the 2 connectors.
Remove the bolt.
Disengage the 2 guides to remove the No. 2 amplifier antenna assembly.
86300B
25.REMOVE NO. 1 AMPLIFIER ANTENNA ASSEMBLY
- HINT:
-
Use the same procedure as for the No. 2 amplifier antenna assembly.
86101S
26.REMOVE ANTENNA CORD SUB-ASSEMBLY
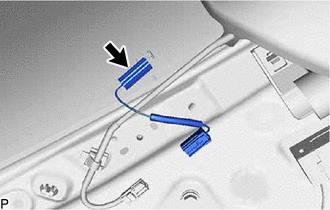
Disconnect the connector to remove the antenna cord sub-assembly.
- HINT:
-
Use the same procedure for the RH side and LH side.