BM2850E
_01
Vehicle Exterior
_075893
BODY PANEL
_0369080
ROOF PANEL NO.6
F
BODY PANEL ROOF PANEL NO.6 ASSEMBLY REPLACEMENT
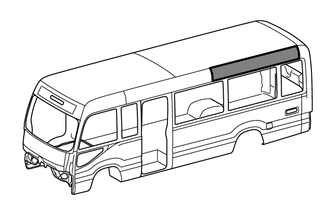
With the roof panel No.7 removed.
REMOVAL
| Symbol Meaning | |
|---|---|

|
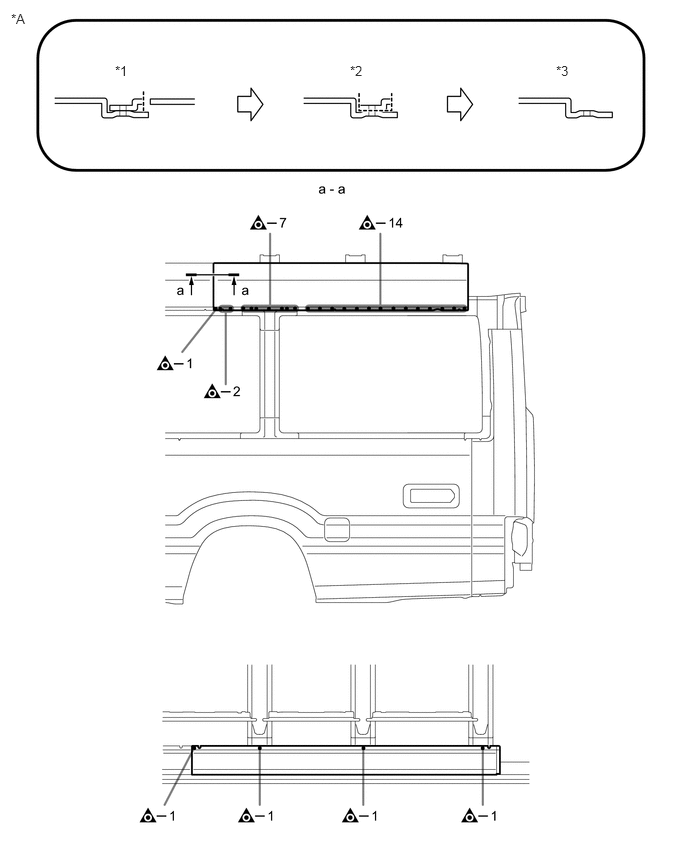
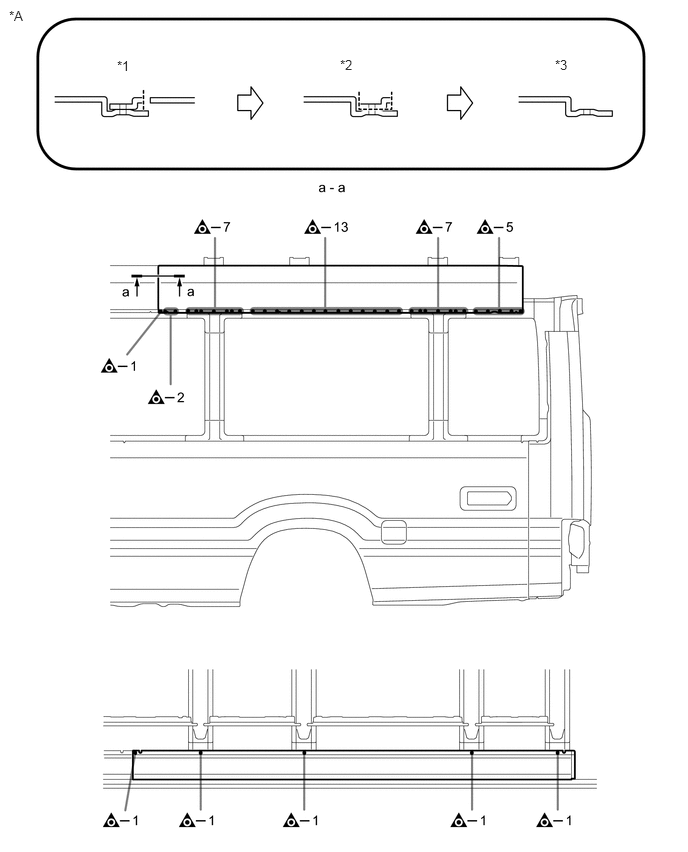
Remove Weld Points |
0.115,0.115 0.427,0.271
0.313,0.156
10
false
*A
1.198,0.656 1.51,0.813
0.313,0.156
10
false
*1
3.646,0.656 3.958,0.813
0.313,0.156
10
false
*2
5.792,0.656 6.104,0.813
0.313,0.156
10
false
*3
| *A | for Standard Body | - | - |
| *1 | Rough Cut Panel | *2 | Grind |
| *3 | After Removing | - | - |
0.094,0.083 0.406,0.24
0.313,0.156
10
false
*A
1.219,0.604 1.531,0.76
0.313,0.156
10
false
*1
3.542,0.594 3.854,0.75
0.313,0.156
10
false
*2
5.781,0.594 6.094,0.75
0.313,0.156
10
false
*3
| *A | for Long Body | - | - |
| *1 | Rough Cut Panel | *2 | Grind |
| *3 | After Removing | - | - |
INSTALLATION
| Symbol Meaning | |
|---|---|

|
Plug Weld |

|
Plug Weld |
INSTALLATION POINT
1.
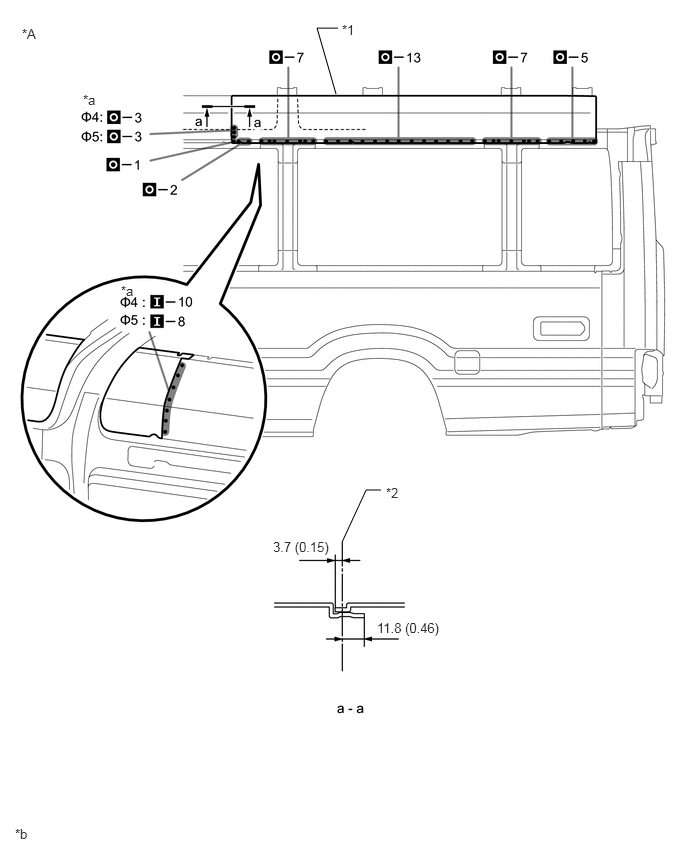
Inspect the fitting of the related parts around the new parts before welding. This affects the appearance of the finish.
2.
Temporarily install the new parts and measure each part of the new parts in accordance with the body dimension diagram. (See the body dimensions)
3.
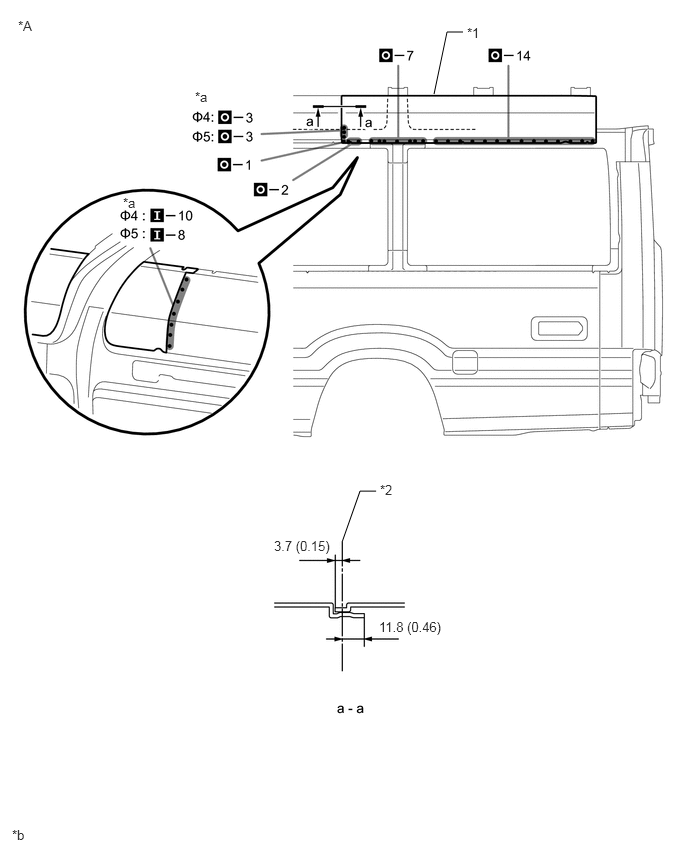
Follow the welding conditions when welding *a to assure sufficient weld strength.
| Plug Diameter | Welding Wire Diameter | Plug Welding Hole Pitch | Shield Gas |
|---|---|---|---|
| 4 mm (0.16 in.) | 0.6 mm (0.02 in.) | 25 mm (0.98 in.) | Metal active gas (Ar 80% + CO2 20%)) |
| 5 mm (0.20 in.) | 0.8 mm (0.03 in.) | 30mm (1.18 in.) |
4.
After welding, apply body sealer to the corresponding parts. (See the painting / coating)
5.
After applying the top coat, apply anti-rust agent to the internal panel portion of the closed section structural weld points.
3.563,5.646 3.75,5.115
3.75,5.115 3.917,5.115
false
4.521,0.979 4.656,0.333
4.656,0.333 4.823,0.333
false
0.188,0.188 0.5,0.344
0.313,0.156
10
false
*A
3.958,5.021 4.271,5.177
0.313,0.156
10
false
*2
0.125,8.615 0.438,8.771
0.313,0.156
10
false
*b
2.854,5.604 3.5,5.823
0.646,0.219
10
false
3.7 (0.15)
3.948,6.448 4.719,6.656
0.771,0.208
10
false
11.8 (0.46)
2.031,0.927 2.344,1.083
0.313,0.156
10
false
*a
1.281,2.031 1.594,2.188
0.313,0.156
10
false
*a
4.865,0.26 5.177,0.417
0.313,0.156
10
false
*1
| *A | for Standard Body | - | - |
| *1 | ROOF SIDE RAIL OUTER NO.2 | *2 | Plug Welding Hole Center |
| *b | mm (in.) | - | - |
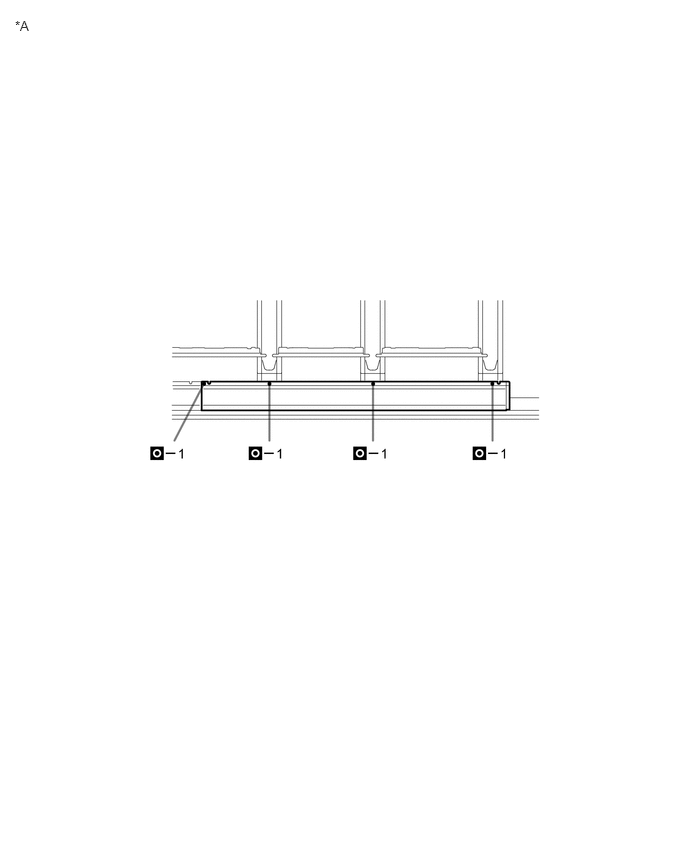
0.156,0.188 0.469,0.344
0.313,0.156
10
false
*A
| *A | for Standard Body | - | - |
3.5,0.979 3.302,0.292
3.302,0.292 3.521,0.292
false
3.563,5.646 3.813,5.104
3.813,5.104 3.969,5.104
false
0.229,0.271 0.542,0.427
0.313,0.156
10
false
*A
3.563,0.229 3.875,0.385
0.313,0.156
10
false
*1
4.021,5.052 4.333,5.208
0.313,0.156
10
false
*2
0.156,8.604 0.469,8.76
0.313,0.156
10
false
*b
2.844,5.615 3.458,5.833
0.615,0.219
10
false
3.7 (0.15)
3.927,6.458 4.646,6.719
0.719,0.26
10
false
11.8 (0.46)
1.26,2.948 1.573,3.104
0.313,0.156
10
false
*a
0.865,0.958 1.177,1.115
0.313,0.156
10
false
*a
| *A | for Long Body | - | - |
| *1 | ROOF SIDE RAIL OUTER NO.2 | *2 | Plug Welding Hole Center |
| *b | mm (in.) | - | - |
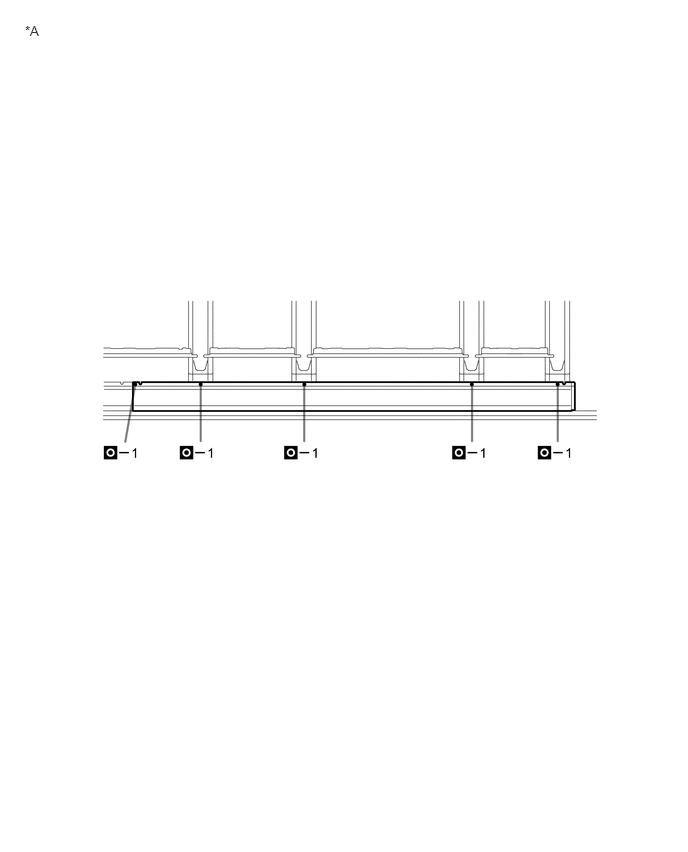
0.26,0.24 0.573,0.396
0.313,0.156
10
false
*A
| *A | for Long Body | - | - |