1HZ FUEL INJECTION NOZZLES INJECTION NOZZLES TEST
PROCEDURE

 1. INJECTION PRESSURE TEST
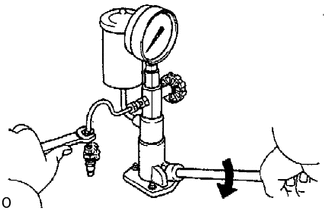
Install the injection nozzle to the injection nozzle hand tester and bleed air from the union nut.
- CAUTION:
-
Do not place your finger over the nozzle injection hole.
Pump the tester handle a few times as fast as possible to discharge the carbon from the injection hole.
Pump the tester handle slowly and observe the pressure gauge.
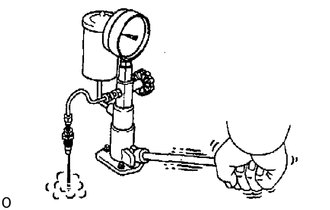
Read the pressure gauge just as the injection pressure begins to drop.
- Opening pressure:
New nozzle 14,710 - 15,690 kPa (150 - 160 kgf/cm2, 2,133 - 2,276 psi) Reused nozzle 14,220 - 15,200 kPa (145 - 155 kgf/cm2, 2,062 - 2,205 psi)
- HINT:
-
Proper nozzle operation can be determined by a swishing sound.
If the opening pressure is not as specified, disassemble the nozzle holder and change the adjusting shim on the top of the pressure spring.
- Adjusting opening pressure:
14,220 - 15,690 kPa (145 - 160 kgf/cm2, 2,062 - 2,276 psi)
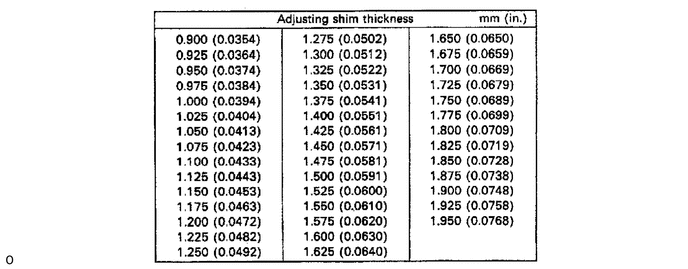
- HINT:
- ·
Varying the adjusting shim thickness by 0.025 mm (0.0010 in.) changes the injection pressure by about 539 kPa (5.5 kgf/cm2, 78 psi).
·Only one adjusting shim should be used.
There should be no dripping after injection.
2. LEAKAGE TEST
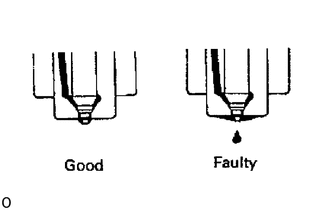
While maintaining pressure at about 981 - 1,961 kPa (10 - 20 kgf/cm2, 142 - 284 psi) below opening pressure (adjust by tester handle), check that there is no dripping for 10 seconds from the injection hole or around the retaining nut .
If the nozzle drips within 10 seconds, replace or clean and overhaul the nozzle assembly.
3. SPRAY PATTERN TEST
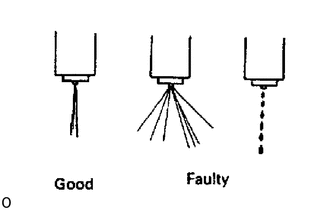
The injection nozzle should shudder at a certain pumping speed between 15 - 60 times (old nozzle) or 30 - 60 times (new nozzle) per minute .
Check the spray pattern is not correct during shuddering, the nozzle must be replaced or cleaned.