1HZ STARTING STARTER STARTER INSPECTION AND REPAIR
PROCEDURE

 1.INSPECT COMMUTATOR FOR OPEN CIRCUIT (ARMATURE COIL)
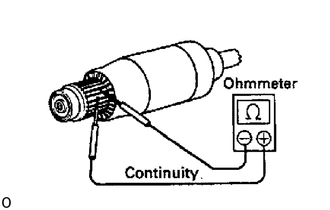
Using an ohmmeter, check that there is continuity between the segments of the commutator.
If there is no continuity between any segment, replace the armature.
2.INSPECT COMMUTATOR FOR GROUND (ARMATURE COIL)
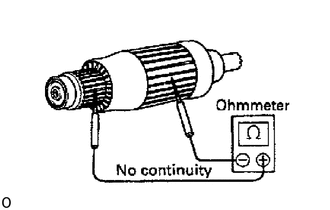
Using an ohmmeter, check that there is no continuity between the commutator and armature coil core.
If there is continuity, replace the armature.
3.INSPECT COMMUTATOR FOR DIRTY AND BURNT SURFACES (COMMUTATOR)
If the surface is dirty or burnt, correct it with sandpaper (No. 400) or on a lathe.
4.INSPECT COMMUTATOR CIRCLE RUNOUT (COMMUTATOR)
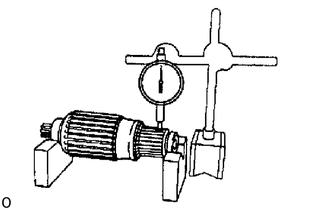
Place the commutator on V-blocks.
Using a dial gauge, measure the circle runout.
- Maximum circle runout:
0.05 mm (0.0020 in.)
If the circle runout is greater than maximum. correct it on a lathe.
5.INSPECT COMMUTATOR DIAMETER (COMMUTATOR)
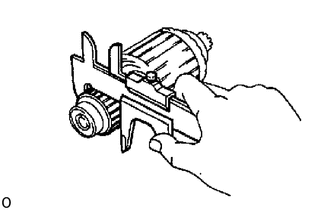
Using vernier calipers, measure the commutator diam-eter.
- Standard diameter:
36.0 mm (1.417 In.)
- Minimum diameter:
35.0 mm (1.378 in.)
If the diameter is less than minimum, replace the armature.
6.INSPECT UNDERCUT DEPTH (COMMUTATOR)
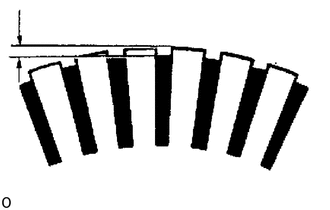
Check that the undercut depth is clean and free of foreign materials. Smooth out the edge.
- Standard undercut depth:
0.7 - 0.9 mm (0.028 - 0.035 in.)
- Minimum undercut depth:
0.2 mm (0.008 in.)
If the undercut depth is less than minimum, correct it with a hacksaw blade.
7.INSPECT FIELD COIL FOR OPEN CIRCUIT (FIELD FRAME (FIELD COIL))
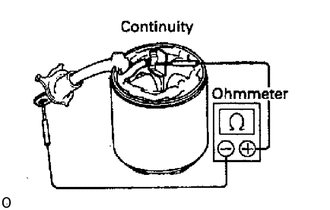
Using an ohmmeter, check that there is continuity between the lead wire and field coil brush lead.
If there is no continuity, replace the field frame.
8.INSPECT FIELD COIL FOR GROUND (FIELD FRAME (FIELD COIL))
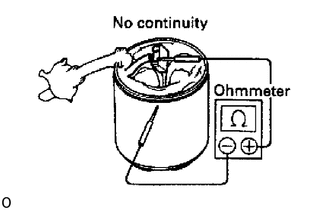
Using an ohmmeter, check that there is no continuity between the field coil end and field frame.
If there is continuity, repair or replace the field frame.
9.INSPECT BRUSH LENGTH (BRUSHES)
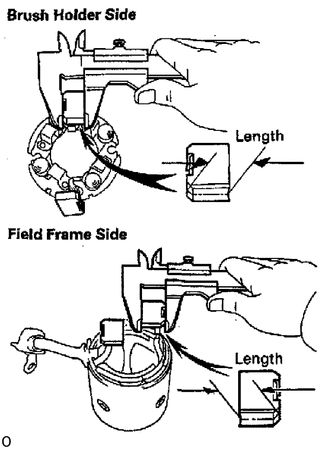
Using vernier calipers, measure the brush length.
- Standard length:
20.5 - 21.0 mm (0.807 - 0.827 in.)
- Minimum length:
13.0 mm (0.512 In.)
If the length is less than minimum, replace the brush holder and field frame.
10.INSPECT BRUSH SPRING LOAD (BRUSH SPRINGS)
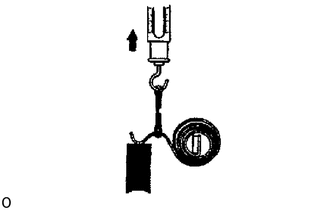
Take the pull scale reading the instant the brush spring separates from the brush.
- Spring Installed load:
18.8 - 35.3 N (1.9 - 3.8 kgf, 4.2 - 7.9 lbf)
If the installed load is not within specification, replace the brush springs.
11.INSPECT BRUSH HOLDER INSULATION (BRUSH HOLDER)
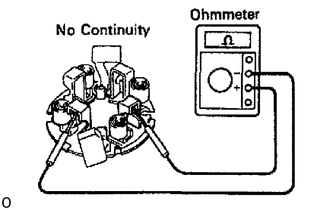
Using an ohmmeter, check that there is no continuity between the positive (+) and negative (-) brush holders.
If there is continuity, repair or replace the brush holder.
12.INSPECT GEAR TEETH (CLUTCH AND GEARS)
Check the gear teeth on the pinion gear. idle gear and clutch assembly for wear or damage.
If damaged, replace the gear or clutch assembly.
If damaged, also check the drive plate ring gear for wear or damage.
13.INSPECT CLUTCH PINION GEAR (CLUTCH AND GEARS)
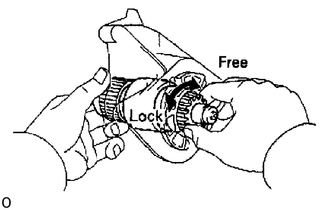
Hold the starter clutch and rotate the pinion gear clockwise, and check that it turns freely. Try to rotate the pinion gear counterclockwise and check that it locks.
If necessary, replace the clutch assembly.
14.IF NECESSARY, REPLACE CLUTCH ASSEMBLY (CLUTCH AND GEARS)
Disassemble starter housing and clutch assembly
Push down the pinion gear and starter housing.
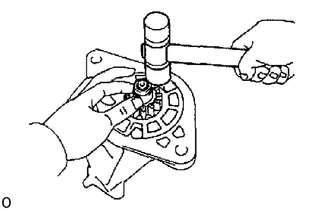
Using a plastic-faced hammer, tap down the stop collar.
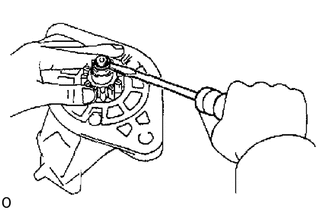
Using a screwdriver. pry out the snap ring.
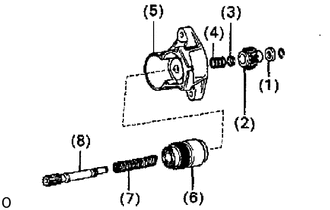
Disassemble these parts:
(1) Stop collar
(2) Pinion gear
(3) Retainer
(4) Compression spring
(5) Starter housing
(6) Starter clutch
(7) Compression spring
(8) Clutch shaft
Assemble starter housing end clutch assembly
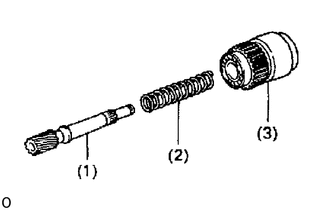
1st, assemble these parts:
(1) Clutch shaft
(2) Compression spring
(3) Starter clutch
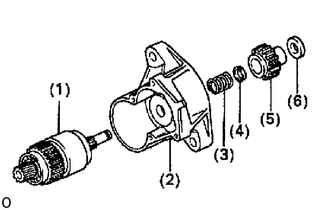
2nd, assemble these parts:
(1) Clutch shaft and starter shaft assembly
(2) Starter housing
(3) Compression spring
(4) Retainer
(5) Pinion gear
(6) Stop collar
Push down the pinion gear and starter housing.
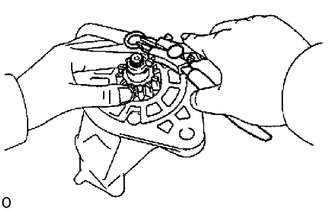
Using snap ring pliers, install a new snap ring.
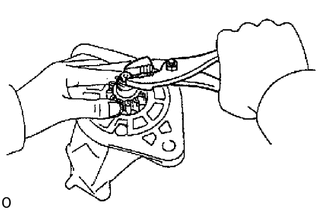
Using pliers, compress the snap ring.
Check that the snap ring fits correctly.
Using a plastic-faced hammer, tap the clutch shaft and install the stop collar onto the snap ring.
15.INSPECT BEARINGS
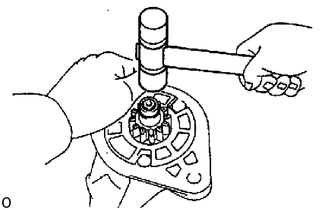
Turn the bearing by hand while applying inward force.
If resistance is felt or the bearing sticks, replace the bearing.
16.IF NECESSARY, REPLACE BEARINGS
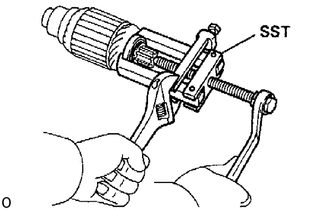
Using SST, remove the bearing.
- SST
- 09286-46011
Using a press, press in a new front bearing.
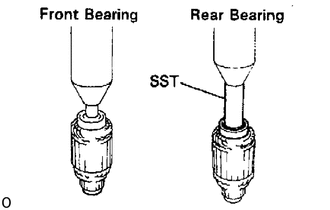
Using SST and a press, press in a new rear bearing.
- SST
- 09820-00030
17.PERFORM PULL-IN COIL OPEN CIRCUIT TEST (MAGNETIC SWITCH)
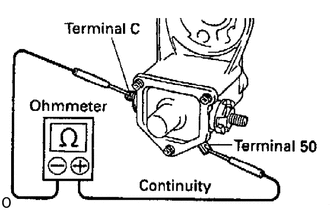
Using an ohmmeter, check that there is continuity between terminals 50 and C.
If there is no continuity, replace the magnetic switch.
18.PERFORM HOLD-IN COIL OPEN CIRCUIT TEST (MAGNETIC SWITCH)
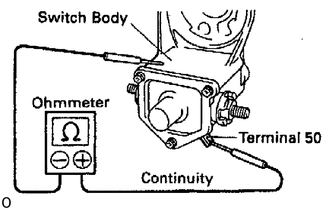
Using an ohmmeter, check that there is continuity between terminal 50 and the switch body.
If there is no continuity, replace the magnetic switch.