14B COOLING RADIATOR RADIATOR ASSEMBLY
PROCEDURE

 1.CHECK CORE PLATE FOR DAMAGE
- HINT:
-
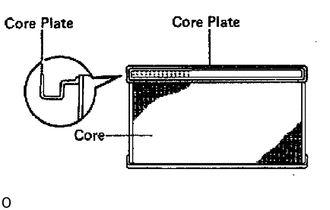
- ·
If the sides of the core plate groove are deformed, reassembly of the tank will be impossible. Therefore, first correct any deformation with pliers.
·Water leakage will result if the bottom of the core plate groove is damaged or dented. Therefore, repair or replace if necessary.
2.INSTALL TANK
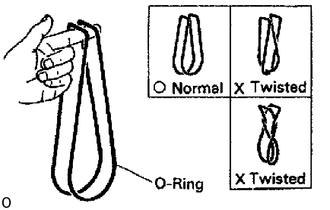
Install a new O-ring and the tank.
- HINT:
- ·
Clean the tank and core plate.
·Take out any twists.
3.INSTALL TANK PLATE
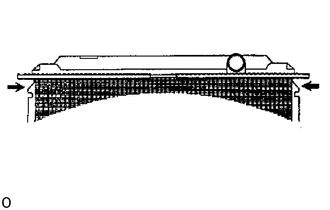
Insert new tank plates from both ends in the direction of the arrows. Firmly set the tank plates in the core plate.
4. STAKE CLAWS OF TANK PLATES
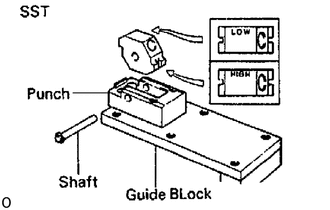
Set the punch of SST to "LOW".
- SST
- 09230-00010
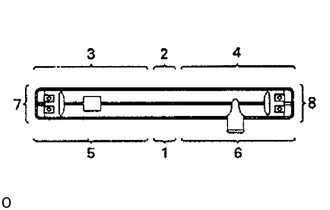
Stake the claws of the tank plates with SST in the numerical order shown in the illustration.
- NOTICE:
-
-
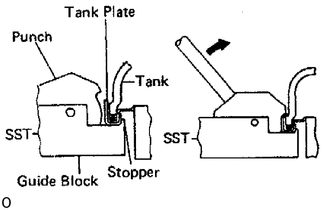
If the bottom of the core plate is staked with the SST on the guide block stopper, it may result in water leakage.
- HINT:
- ·
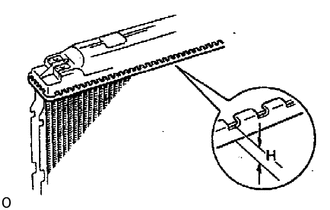
Stake with just enough pressure to leave a mark on the claw. The staked plate height (H) should be as follows:
- Plate height (H):
8.4 - 8.8 mm (0.331 - 0.346 in.)
·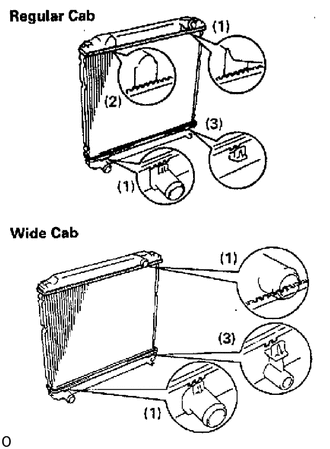
Do not stake the areas protruding around the ports (1), flange (2) and brackets (3).
·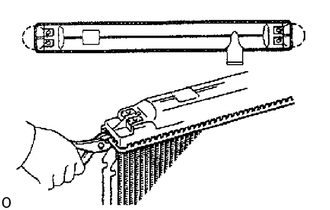
The points shown in the illustration cannot be staked with the SST. Use pliers and be careful not to damage the core plates.
5.INSTALL DRAIN PLUG
6.CHECK FOR WATER LEAKS
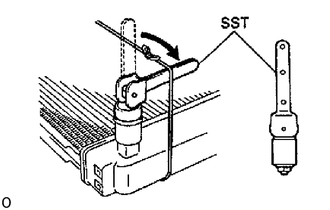
Using SST, plug the inlet and outlet pipes of the radiator.
- SST
- 09230-01010 (09231-00060)
Using a radiator cap tester, apply pressure to the radiator.
- Test pressure:
147 kPa (1.5 kgf/cm2, 21 psi)
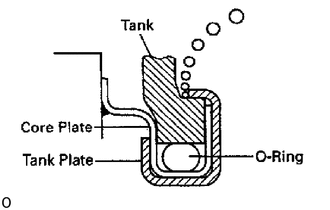
Check for water leaks.
- HINT:
-
On radiators with resin tanks, there is a clearance between the core plate and tank plate where a minute amount of air will remain, giving the appearance of an air leak when the radiator is submerged in water. Therefore. before performing the water leak test, first swirl the radiator around in the water until all air bubbles disappear.
7.PAINT TANK PLATE
- HINT:
-
If the water leak test checks out okay, allow the radiator to dry completely and then paint the tank plate.
8.INSTALL SUPPORTS
- Torque:
12.7 N*m (130 kgf*cm, 9 ft.*lbf)