M551 MANUAL TRANSMISSION / TRANSAXLE COUNTER GEAR AND REVERSE IDLER GEAR REASSEMBLY
PROCEDURE

 33342A
1.INSTALL GEAR THRUST WASHER STRAIGHT PIN
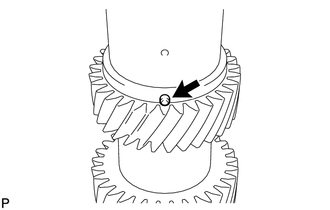
Coat the pin with MP grease and install it.
33341A
2.INSTALL 2ND GEAR THRUST WASHER
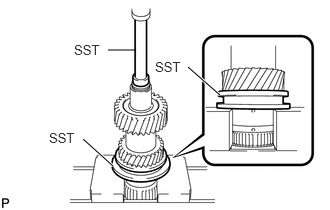
Using SST and a press, press on the 2nd gear thrust washer.
- SST
- 09502-12010
09950-70010 (09951-07100)
09950-60011 (09951-00300)
33332B
3.INSTALL 2ND GEAR NEEDLE ROLLER BEARING
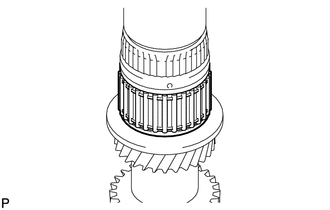
Coat the needle roller bearing with gear oil and install it.
33038E
4.INSTALL NO. 2 SYNCHRONIZER RING SET
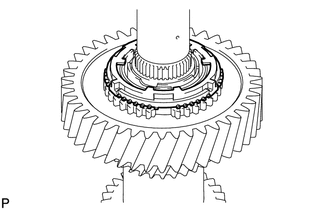
Coat the synchronizer ring with gear oil and install it.
33362
5.INSTALL NO. 2 TRANSMISSION CLUTCH HUB
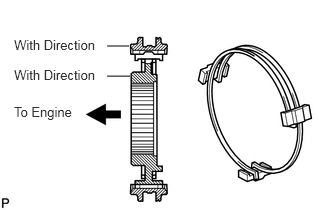
Coat the clutch hub with gear oil and install it to the hub sleeve.
- HINT:
-
Set the hub sleeve and the clutch hub in correct orientation.
Install the 2 key springs and 3 keys to the hub sleeve.
- NOTICE:
-
Do not set both opening of the shifting key springs in the same position.
6.INSTALL 2ND GEAR
Coat the 2nd gear with gear oil.
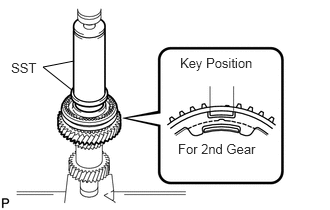
Using SST and a press, press on the 2nd gear.
- SST
- 09316-20011
09513-36040
33362A
7.INSTALL CLUTCH HUB NO. 2 SETTING SHAFT SNAP RING
Select a snap ring that allows minimum axial play.
- Standard clearance:
0.10 mm (0.0039 in.) or less
Snap ring thickness: Mark Specified Condition A 2.40 to 2.45 mm (0.0945 to 0.0965 in.) B 2.45 to 2.50 mm (0.0965 to 0.0984 in.) C 2.50 to 2.55 mm (0.0984 to 0.1004 in.) D 2.55 to 2.60 mm (0.1004 to 0.1024 in.) E 2.60 to 2.65 mm (0.1024 to 0.1043 in.) F 2.65 to 2.70 mm (0.1043 to 0.1063 in.)
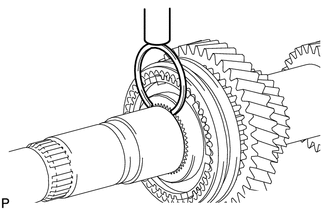
Using a brass bar and hammer, tap in a new snap ring.
33333A
8.INSTALL 3RD GEAR NEEDLE ROLLER BEARING
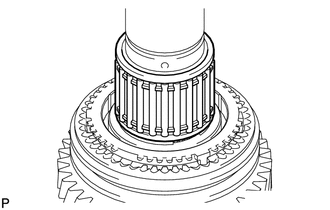
Coat the needle roller bearing with gear oil and install it.
33368G
9.INSTALL 3RD GEAR SYNCHRONIZER RING
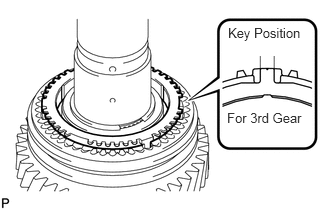
Coat the synchronizer ring with gear oil and install it.
33333
10.INSTALL 3RD GEAR
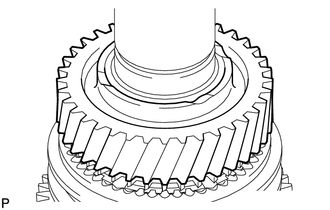
Coat the gear with gear oil and install it.
33342A
11.INSTALL GEAR THRUST WASHER STRAIGHT PIN
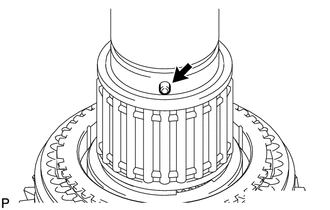
Coat the pin with MP grease and install it.
33342C
12.INSTALL 3RD GEAR THRUST WASHER
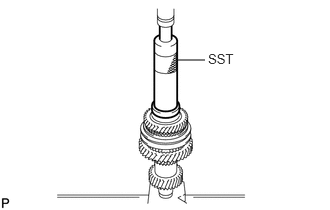
Using SST and a press, press on the thrust washer.
- SST
- 09316-60012 (09316-00011)
33342B
13.INSTALL GEAR THRUST WASHER SHAFT SNAP RING
Select a snap ring will allow the minimum axial play.
- Standard clearance:
0.10 mm (0.039 in.) or less
Snap ring thickness: Mark Specified Condition 1 2.40 to 2.45 mm (0.0945 to 0.0965 in.) 2 2.45 to 2.50 mm (0.0965 to 0.0984 in.) 3 2.50 to 2.55 mm (0.0984 to 0.1004 in.) 4 2.55 to 2.60 mm (0.1004 to 0.1024 in.) 5 2.60 to 2.65 mm (0.1024 to 0.1043 in.) 6 2.65 to 2.70 mm (0.1043 to 0.1063 in.)
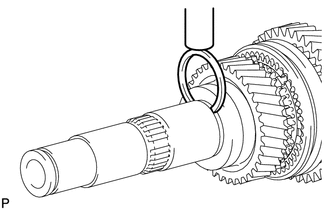
Using a brass bar and hammer, tap in a new snap ring.
33335C
14.INSTALL 1ST GEAR NEEDLE ROLLER BEARING
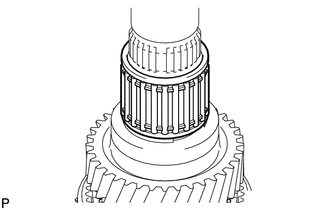
Coat the needle roller bearing with gear oil and install it.
33037B
15.INSTALL NO. 1 SYNCHRONIZER RING SET
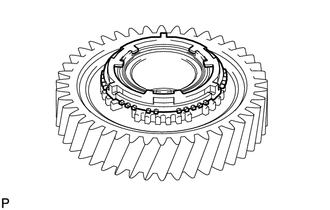
Coat the synchronizer ring with gear oil and install it on the 1st gear.
33363
16.INSTALL NO. 1 TRANSMISSION HUB SLEEVE
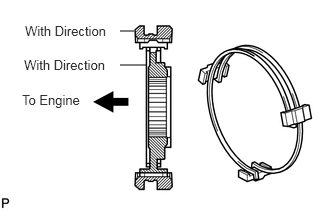
Coat the hub sleeve with gear oil and install it to the clutch hub.
- HINT:
-
Set the hub sleeve and the No. 1 transmission clutch hub in the correct orientation.
Install the 2 key springs and 3 keys to the hub sleeve.
- NOTICE:
-
Do not set both opening of the shifting key springs in the same position.
17.INSTALL 1ST GEAR
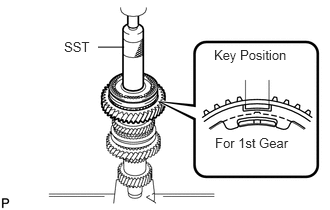
Coat the 1st gear with gear oil.
Using SST and a press, press on the 1st gear.
- SST
- 09316-60012 (09316-00011)
33361B
18.INSTALL CLUTCH HUB NO. 1 SHAFT SNAP RING
Select a snap ring that allows minimum axial play.
- Standard clearance:
0.10 mm (0.039 in.) or less
Mark Specified Condition A 2.40 to 2.45 mm (0.0945 to 0.0965 in.) B 2.45 to 2.50 mm (0.0965 to 0.0984 in.) C 2.50 to 2.55 mm (0.0984 to 0.1004 in.) D 2.55 to 2.60 mm (0.1004 to 0.1024 in.) E 2.60 to 2.65 mm (0.1024 to 0.1043 in.) F 2.65 to 2.70 mm (0.1043 to 0.1063 in.)
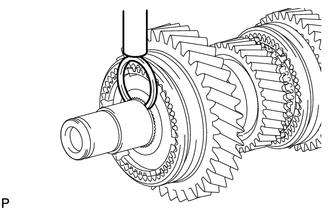
Using a brass bar and hammer, tap in a new snap ring.
33331A
19.INSTALL REVERSE GEAR BEARING
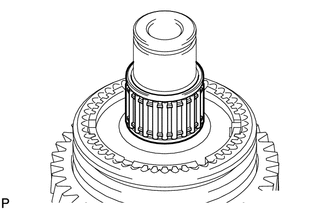
Coat the needle roller bearing with gear oil and install it.
33387A
20.INSTALL REVERSE SYNCHRONIZER RING
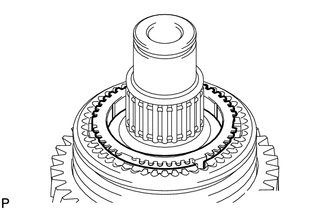
Coat the synchronizer ring with gear oil and install it to the No. 1 transmission hub sleeve.
21.INSTALL REVERSE GEAR
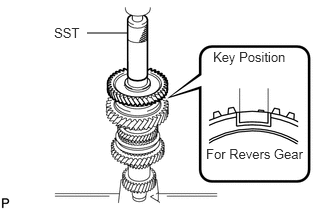
Coat the gear with gear oil.
Using SST and a press, press in the reverse gear and a new counter gear front bearing (inner race).
- SST
- 09608-06041
22.INSTALL COUNTER GEAR FRONT NO. 2 BEARING SNAP RING
Select a snap ring that will allow minimum axial play.
- Standard clearance:
0.10 mm (0.039 in.) or less
Snap ring thickness: Mark Specified Condition A 2.40 to 2.45 mm (0.0945 to 0.0965 in.) B 2.45 to 2.50 mm (0.0965 to 0.0984 in.) C 2.50 to 2.55 mm (0.0984 to 0.1004 in.) D 2.55 to 2.60 mm (0.1004 to 0.1024 in.) E 2.60 to 2.65 mm (0.1024 to 0.1043 in.) F 2.65 to 2.70 mm (0.1043 to 0.1063 in.)
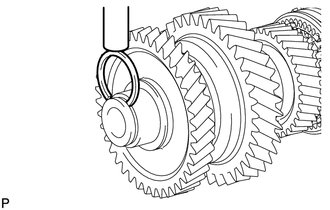
Using a brass bar and hammer, tap in a new snap ring.
23.INSPECT REVERSE GEAR THRUST CLEARANCE
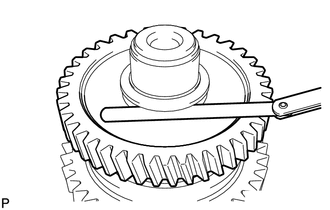
Fix the counter gear through 2 protective aluminum plates in a vise.
Using a feeler gauge, measure the gear thrust clearance.
- Standard clearance:
0.10 to 0.45 mm (0.0039 to 0.0177 in.)
- Maximum clearance:
0.45 mm (0.0177 in.)
24.INSPECT REVERSE GEAR RADIAL CLEARANCE
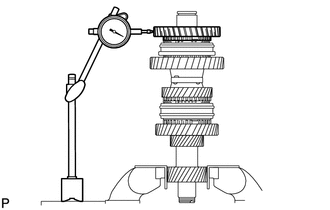
Using a dial indicator, measure the reverse gear radial clearance between the gear and shaft.
- Standard clearance:
0.015 to 0.068 mm (0.0006 to 0.0027 in.)
- Maximum clearance:
0.068 mm (0.0027 in.)
If the clearance is not as specified, replace the reverse gear needle roller bearing.
25.INSPECT 1ST GEAR THRUST CLEARANCE
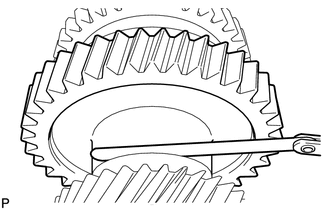
Using a feeler gauge, measure the gear thrust clearance.
- Standard clearance:
0.10 to 0.45 mm (0.0039 to 0.0177 in.)
- Maximum clearance:
0.45 mm (0.0177 in.)
26.INSPECT 1ST GEAR RADIAL CLEARANCE
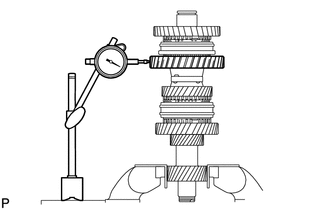
Using a dial indicator, measure the gear radial clearance between the gear and shaft.
- Standard clearance:
0.015 to 0.068 mm (0.0006 to 0.0027 in.)
- Maximum clearance:
0.068 mm (0.0027 in.)
If the clearance is not as specified, replace the 1st gear needle roller bearing.
27.INSPECT 3RD GEAR THRUST CLEARANCE
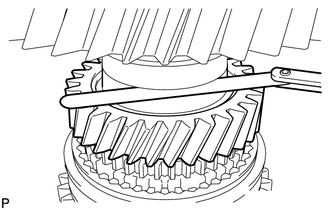
Using a feeler gauge, measure the gear thrust clearance.
- Standard clearance:
0.10 to 0.45 mm (0.0039 to 0.0177 in.)
- Maximum clearance:
0.45 mm (0.0177 in.)
28.INSPECT 3RD GEAR RADIAL CLEARANCE
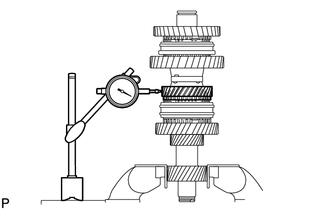
Using a dial indicator, measure the gear radial clearance between the gear and shaft.
- Standard clearance:
0.015 to 0.068 mm (0.0006 to 0.0027 in.)
- Maximum clearance:
0.068 mm (0.0027 in.)
If the clearance is not as specified, replace the 3rd gear needle roller bearing.
29.INSPECT 2ND GEAR THRUST CLEARANCE
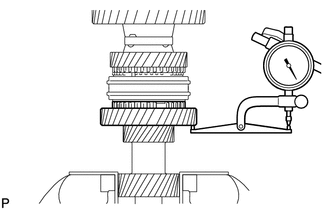
Using a dial indicator, measure the gear thrust clearance.
- Standard clearance:
0.10 to 0.35 mm (0.0039 to 0.0138 in.)
- Maximum clearance:
0.35 mm (0.0138 in.)
30.INSPECT 2ND GEAR RADIAL CLEARANCE
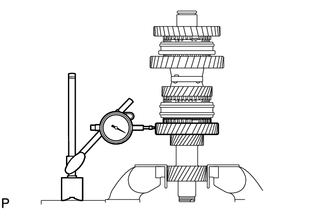
Using a dial indicator, measure the gear radial clearance between the gear and shaft.
- Standard clearance:
0.015 to 0.068 mm (0.0006 to 0.0027 in.)
- Maximum clearance:
0.068 mm (0.0027 in.)
If the clearance is not as specified, replace the 2nd gear needle roller bearing.
Remove the counter gear from the vise.