SEAT SUB SEAT ASSEMBLY DISASSEMBLY
CAUTION / NOTICE / HINT
- CAUTION:
-
Wear protective gloves. Sharp areas on the parts may injure your hands.
- HINT:
- ·
Use the same procedure for RHD and LHD vehicles.
·The procedure listed below is for RHD vehicles.
PROCEDURE

 71324A
1.REMOVE REAR SEAT CUSHION (for Single-Passenger Seat)
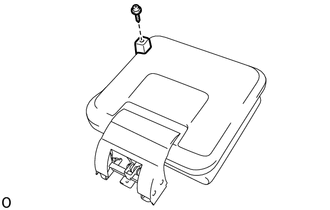
Remove the screw and rear seat cushion.
78715
2.REMOVE SUB SEAT CUSHION PANEL
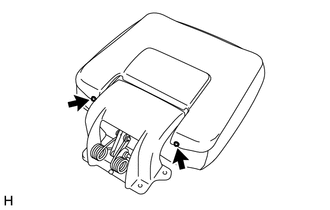
Remove the 2 screws.
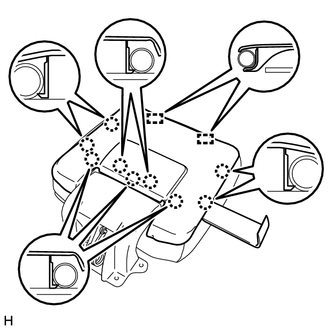
Using moulding remover D, detach the 9 claws and 2 guides and remove the sub seat cushion panel.
78705
3.REMOVE SUB SEAT CUSHION BRACKET SUB-ASSEMBLY
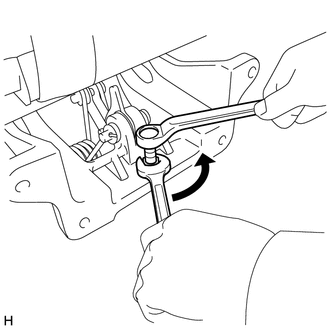
Using an offset wrench, hold the stopper bolt.
Using a wrench, loosen the nut and remove the stopper bolt.
Place your hand at the position shown in the illustration and rotate the sub seat cushion bracket.
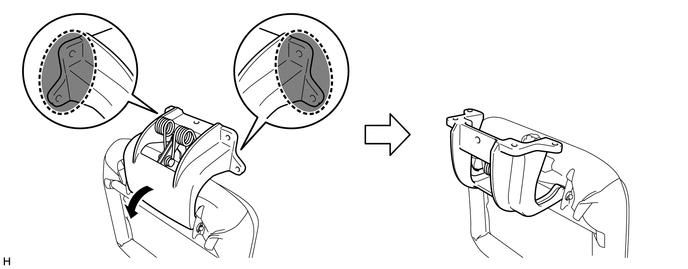

|
Place Hands Here | - | - |
- CAUTION:
-
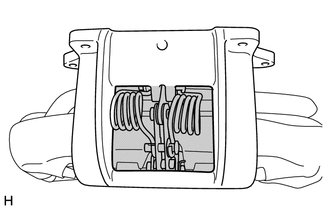
- ·
Perform the following procedure with 2 or more people as the force of the spring is strong.
·Make sure that your hands and fingers, etc., do not get caught in the gap between the moving parts.
Text in Illustration 
Gap in Moving Parts
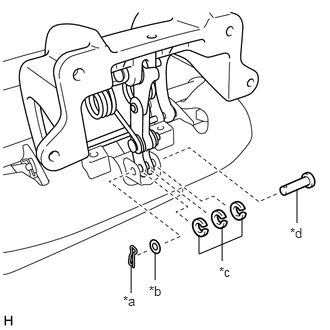
Detach the clip and washer and remove the pin and 3 spacers as shown in the illustration.
| *a | Clip |
| *b | Washer |
| *c | Spacer |
| *d | Pin |
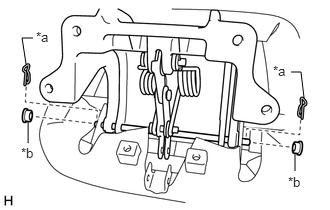
Remove the 2 clips and 2 bushes.
| *a | Clip |
| *b | Bush |
Slide the straight pin and remove the sub seat cushion bracket together with the straight pin as shown in the illustration.
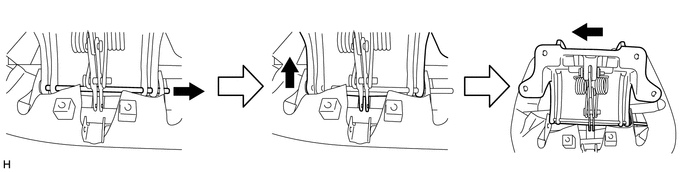
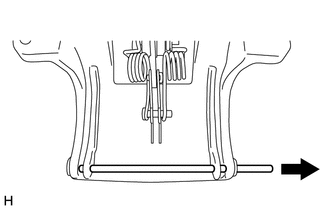
Remove the straight pin.
78726
4.REMOVE SUB SEAT CUSHION FRAME CUSHION
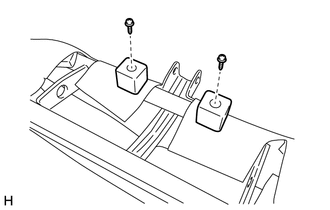
Remove the 2 screws and 2 sub seat cushion frame cushions.
78073
5.REMOVE SUB SEATBACK COVER SUB-ASSEMBLY RH
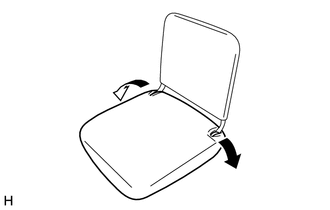
Fold up the sub seat cushion cover sub-assembly RH so that the sub seatback assembly installation bolt can be seen.
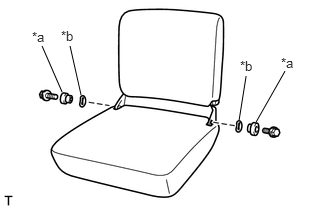
Remove the 2 bolts, 2 bushes, 2 wave washers and sub seatback assembly.
| *a | Bush |
| *b | Wave Washer |
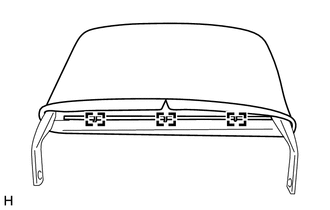
Remove the 3 hog rings.
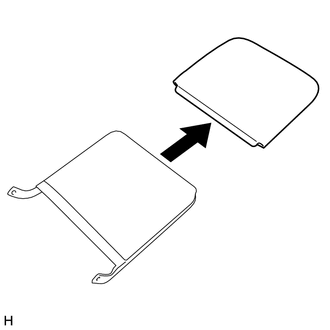
Remove the sub seatback cover sub-assembly RH.
78775A
6.REMOVE SUB SEATBACK PAD RH
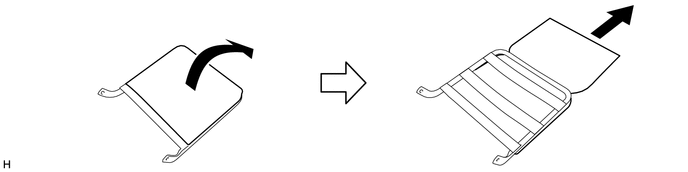
Remove the sub seatback pad RH as shown in the illustration.
78071
7.REMOVE SUB SEAT CUSHION COVER SUB-ASSEMBLY RH
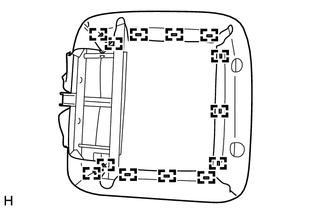
Using a screwdriver with its tip wrapped with protective tape, remove the 13 staples and sub seat cushion cover sub-assembly RH.
78735A
8.REMOVE SUB SEAT CUSHION PAD RH
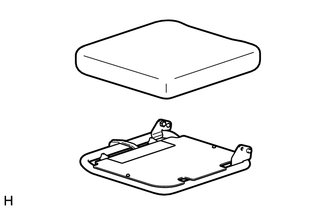
Remove the sub seat cushion pad RH.
78077B
9.REMOVE SUB SEAT CUSHION BOARD SUB-ASSEMBLY RH
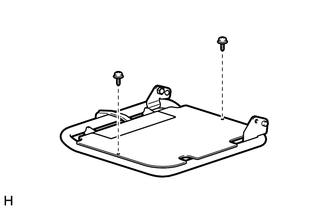
Remove the 2 screws and seat cushion board sub-assembly RH.