SEAT SUB SEAT ASSEMBLY REASSEMBLY
CAUTION / NOTICE / HINT
- HINT:
- ·
Use the same procedure for RHD and LHD vehicles.
·The procedure listed below is for RHD vehicles.
- CAUTION:
-
Wear protective gloves. Sharp areas on the parts may injure your hands.
PROCEDURE

 78077B
1.INSTALL SUB SEAT CUSHION BOARD SUB-ASSEMBLY RH
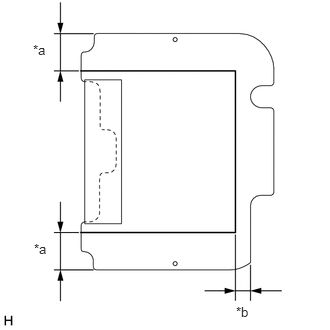
Draw a mark-off line on the sub seat cushion board sub-assembly RH as shown in the illustration.
| *a | 60 mm (2.36 in.) |
| *b | 25 mm (0.984 in.) |
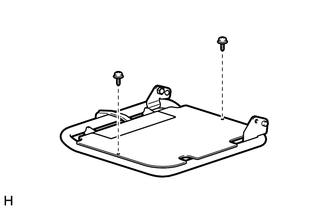
Install the sub seat cushion board sub-assembly RH with the 2 screws.
78735A
2.INSTALL SUB SEAT CUSHION PAD RH
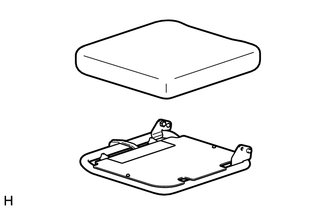
Install the sub seat cushion pad RH.
78071
3.INSTALL SUB SEAT CUSHION COVER SUB-ASSEMBLY RH
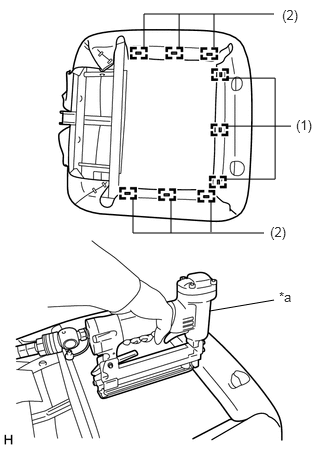
Align the end of the sub seat cushion cover sub-assembly RH to the mark-off line drawn on the sub seat cushion board sub-assembly RH and using a tacker, install the sub seat cushion cover sub-assembly RH with 9 new staples in the order shown in the illustration.
| *a | Tacker |
- HINT:
-
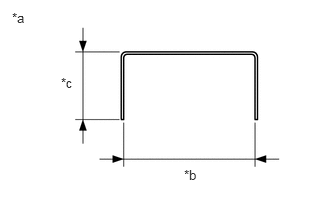
Use the same size staples as that indicated in the illustration.
| *a | Staple Size |
| *b | 10 mm (0.394 in.) |
| *c | 6 mm (0.236 in.) |
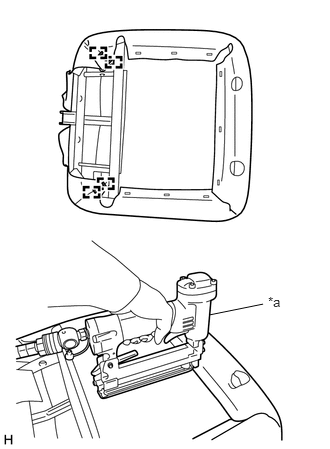
Align the end of the sub seat cushion cover sub-assembly RH to the corner of the sub seat cushion frame sub-assembly RH and using a tacker, install the sub seat cushion cover sub-assembly RH with 4 new staples.
| *a | Tacker |
- HINT:
-
Use the same size staples as that indicated in the illustration.
| *a | Staple Size |
| *b | 10 mm (0.394 in.) |
| *c | 6 mm (0.236 in.) |
78775A
4.INSTALL SUB SEATBACK PAD RH
Install the sub seatback pad RH as shown in the illustration.
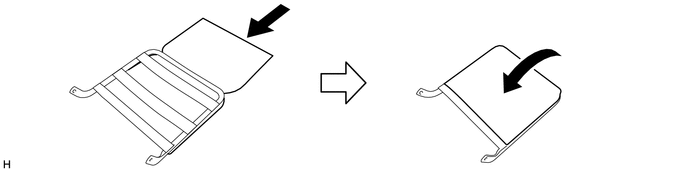
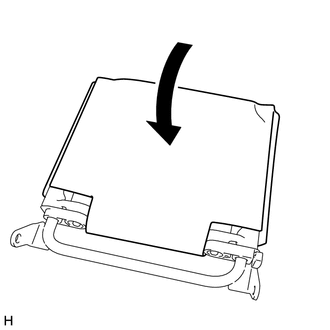
Install the sub seatback pad RH as shown in the illustration.
78073
5.INSTALL SUB SEATBACK COVER SUB-ASSEMBLY RH
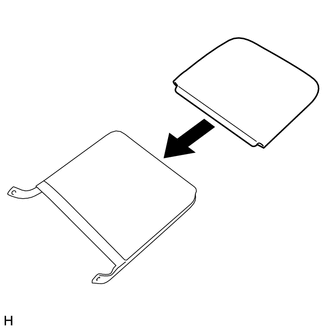
Set the sub seatback cover sub-assembly RH.
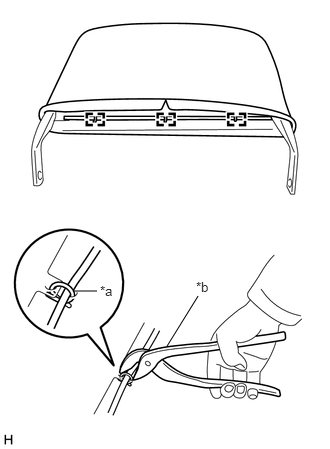
Using hog ring pliers, install the sub seatback cover sub-assembly RH with 3 new hog rings.
| *a | Hog Ring |
| *b | Hog Ring Pliers |
- NOTICE:
- ·
Do not dirty or damage the sub seatback cover sub-assembly RH.
·Be sure to securely install the hog rings as shown in the illustration while preventing wrinkles from forming on the sub seatback cover sub-assembly RH.
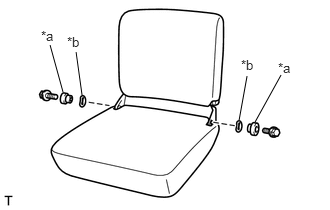
Install the sub seatback assembly with the 2 bolts, 2 bushes and 2 wave washers.
| *a | Bush |
| *b | Wave Washer |
- Torque:
18 N*m (184 kgf*cm, 13 ft.*lbf)
- NOTICE:
-
When tightening the bolt, make sure that the sub seat cushion cover sub-assembly RH is not caught between the sub seatback frame sub-assembly RH and sub seat cushion frame sub-assembly RH.
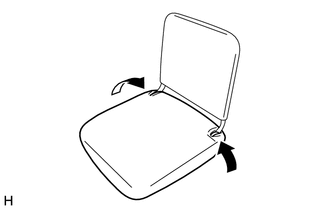
Cover the installation bolt of the sub seatback frame sub-assembly RH with the sub seat cushion cover sub-assembly RH.
78726
6.INSTALL SUB SEAT CUSHION FRAME CUSHION
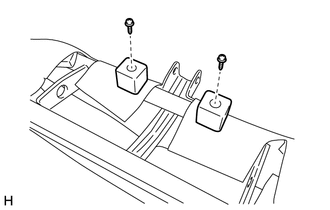
Install the 2 sub seat cushion frame cushions with the 2 screws.
78705
7.INSTALL SUB SEAT CUSHION BRACKET SUB-ASSEMBLY
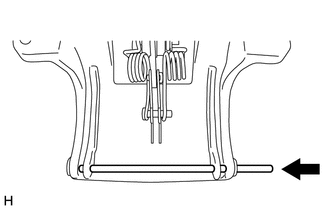
Install the straight pin.
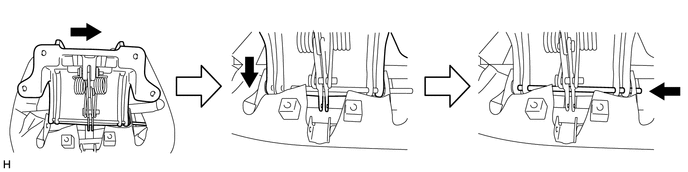
Install the sub seat cushion bracket together with the straight pin and then slide the straight pin as shown in the illustration.
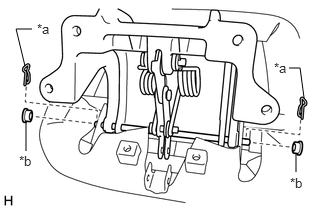
Install the 2 bushes and 2 clips.
| *a | Clip |
| *b | Bush |
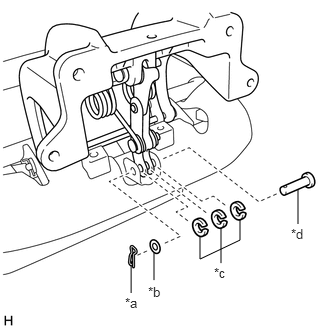
Install the 3 spacers.
Insert the pin and install the washer and clip.
| *a | Clip |
| *b | Washer |
| *c | Spacer |
| *d | Pin |
Place your hand at the position shown in the illustration and rotate the sub seat cushion bracket.
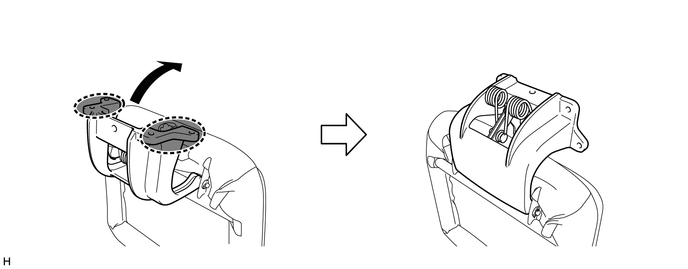

|
Place Hands Here | - | - |
- CAUTION:
-
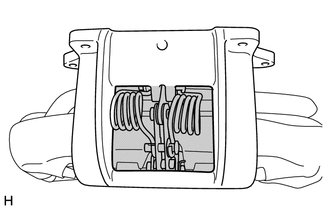
- ·
Perform the following procedure with 2 or more people as the force of the spring is strong.
·Make sure that your hands and fingers, etc., do not get caught in the gap between the moving parts.
Text in Illustration 
Gap in Moving Parts
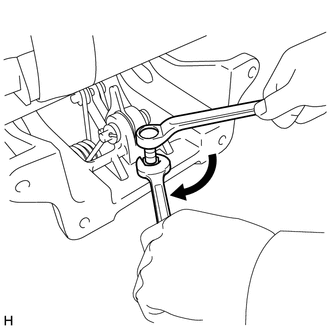
Using an offset wrench, hold the stopper bolt.
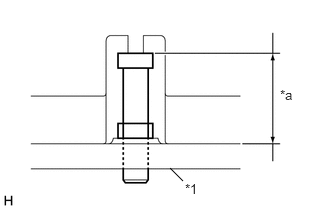
Using a wrench, tighten the nut and install the stopper bolt.
- HINT:
-
Install a stopper bolt that has the dimensions as that shown in the illustration.
| *1 | Sub Seat Cushion Bracket |
| *a | 36 to 38 mm (1.42 to 1.50 in.) |
78715
8.INSTALL SUB SEAT CUSHION PANEL
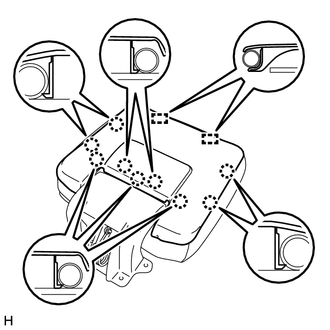
Attach the 2 guides and 9 claws to install the sub seat cushion panel.
Install the 2 screws.
71324A
9.INSTALL REAR SEAT CUSHION (for Single-Passenger Seat)
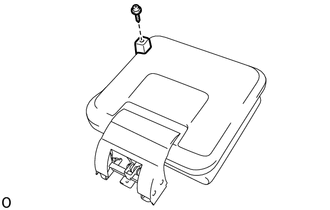
Install the rear seat cushion with the screw.