WINDOW / GLASS CENTER DOOR GLASS(for Glide Type) REMOVAL
PROCEDURE

 62384Q
1.REMOVE SIDE WINDOW CLIP CAP
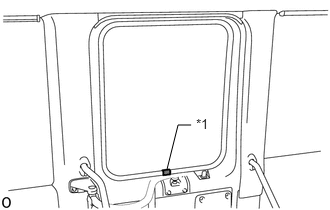
Remove the side window clip cap.
| *1 | Side Window Clip Cap |
67745
2.REMOVE CENTER DOOR TRIM MOULDING
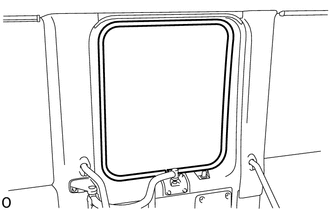
Remove the center door trim moulding.
68113C
3.REMOVE GLIDE DOOR GLASS
- NOTICE:
-
The glide door glass may fall while performing this procedure. Therefore, use suction cups to hold the glide door glass from the outside of the vehicle.
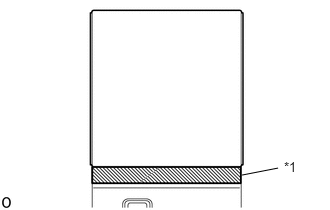
Apply protective tape to the outer surface of the door panel to prevent scratches.
| *1 | Protective Tape |
Install the suction cups to the glide door glass.
From the interior, insert a piano wire between the door panel and glass.
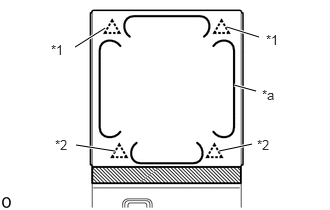
Tie objects that can serve as handles (for example, wooden blocks) to both wire ends.
- NOTICE:
-
When separating the glass from the vehicle, Do not damage the vehicle paint or interior/exterior ornaments.
| *1 | Center Door No. 2 Fix Window Pin |
| *2 | Center Door No. 1 Fix Window Pin |
| *a | Piano Wire |
Cut through the adhesive by pulling the piano wire around the glass.
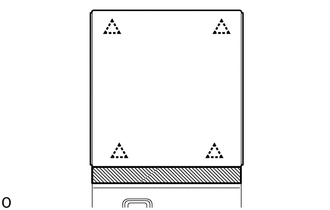
Using suction cups, disconnect the 2 center door No. 1 fix window pins and 2 center door No. 2 fix window pins remove the glide door glass.
- NOTICE:
-
Be careful not to drop the glide door glass.
68294F
4.REMOVE SIDE WINDOW ADHESIVE DAM
When reusing the glide door glass:
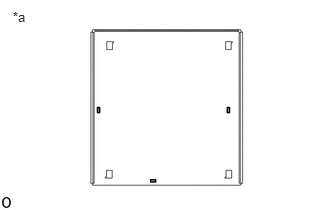
Using a gasket scraper, remove the 3 side window adhesive dams.
- NOTICE:
- ·
Do not damage the glide door glass.
·Be sure to replace the side window adhesive dam with a new one.
| *a | Back Side |
68165B
5.REMOVE GLIDE DOOR GLASS MOULDING
When reusing the glide door glass:
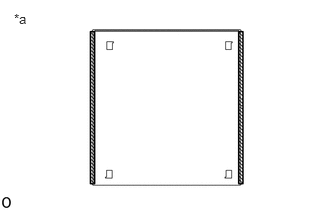
Using a gasket scraper, remove the 2 glide door glass mouldings.
- NOTICE:
- ·
Do not damage the glide door glass.
·Be sure to replace the glide door glass moulding with a new one.
| *a | Back Side |
62267U
6.REMOVE SIDE WINDOW ADHESIVE DAM
When reusing the glide door glass:
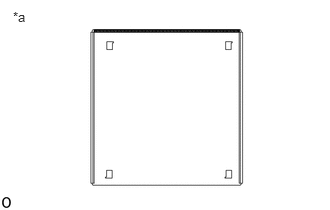
Using a gasket scraper, remove the side window adhesive dam.
- NOTICE:
- ·
Do not damage the glide door glass.
·Be sure to replace the side window adhesive dam with a new one.
| *a | Back Side |
68217G
7.REMOVE CENTER DOOR NO. 2 FIX WINDOW PIN
When reusing the glide door glass:
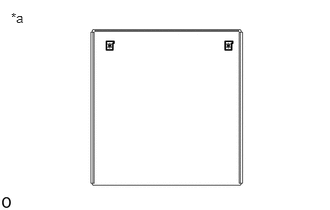
Using a gasket scraper, remove the 2 center door No. 2 fix window pins.
- NOTICE:
- ·
Do not damage the glide door glass.
·Be sure to replace the center door No. 2 fix window pin with a new one.
| *a | Back Side |
68217F
8.REMOVE CENTER DOOR NO. 1 FIX WINDOW PIN
When reusing the glide door glass:
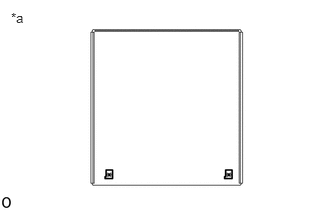
Using a gasket scraper, remove the 2 center door No. 1 fix window pins.
- NOTICE:
- ·
Do not damage the glide door glass.
·Be sure to replace the center door No. 1 fix window pin with a new one.
| *a | Back Side |