WINDOW / GLASS REAR SIDE WINDOW GLASS(for No. 2 RH) REASSEMBLY
CAUTION / NOTICE / HINT
- HINT:
- ·
Use the same procedure for RHD and LHD vehicles.
·The procedure listed below is for RHD vehicles.
PROCEDURE

 1.CLEAN REAR SIDE FRONT WINDOW GLASS RH
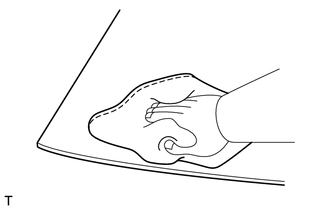
Clean the outer edge of the rear side front window glass RH with non-residue solvent.
- NOTICE:
- ·
Do not touch the rear side front window glass RH surface after cleaning it.
·Do not damage the glass.
·Even if using a new rear side front window glass RH, clean the rear side front window glass RH with non-residue solvent.
62269H
2.INSTALL SIDE WINDOW FRAME FILM
- NOTICE:
-
Perform the following procedures when replacing the side window frame film.
- HINT:
-
Remove the double-sided tape remaining on the installation surface of the side window frame film of the rear side front window glass RH.
Using non-residue solvent, clean the installation surface of the side window frame film of the rear side front window glass RH.
Remove the peeling paper on a new side window frame film while making sure not to touch the adhesional surface.
Install the 10 pieces of side window frame film at the positions shown in the illustration.
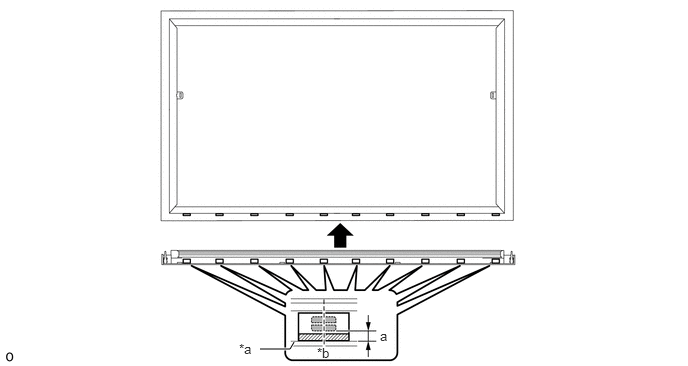
| *a | Specified Application Position | *b | Align the lateral center of the side window frame film with the center of the hole in the rear side front window glass RH. |

|
Tape | - | - |
- Standard:
Area Specified Condition a 4.6 mm (0.181 in.)
62451G
3.INSTALL REAR SIDE WINDOW RUN RH (for Slide Type)
- NOTICE:
-
Perform the following procedures when replacing the rear side window run RH.
- HINT:
-
Remove the adhesive remaining on the installation surface of the rear side window run RH of the rear side front window glass RH.
Using non-residue solvent, clean the installation surface of the rear side window run RH of the rear side front window glass RH.
Apply adhesive to the installation surface of the rear side window run RH of the rear side front window glass RH.
- NOTICE:
- ·
Make sure that the adhesive does not contact any other areas outside of the application area.
·Clean any protruding adhesive.
·Apply adhesive to the entire circumference.
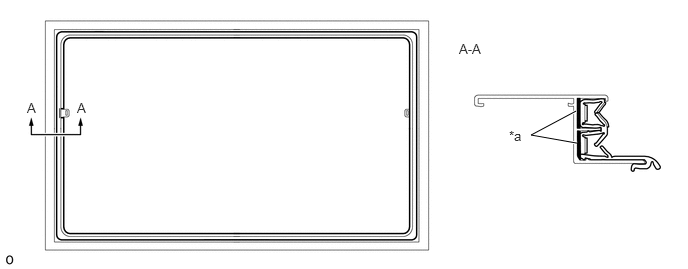
| *a | Adhesive | - | - |
Install a new rear side window run RH to the rear side front window glass RH.
62746G
4.INSTALL QUARTER WINDOW PACKING (for Slide Type)
- NOTICE:
-
Perform the following procedures when replacing the quarter window packing.
- HINT:
-
Clean any adhesive from the installation surface of the quarter window packing on the side window center frame sub-assembly RH.
Using non-residue solvent, clean the installation surface of the quarter window packing of the side window center frame sub-assembly RH.
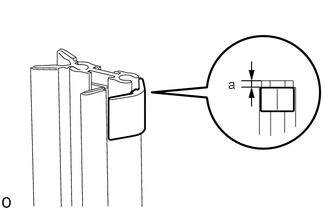
Install a new quarter window packing to the side window center frame sub-assembly RH and keep it in the position shown in the illustration.
- Standard:
Area Specified Condition a 3.0 mm (0.118 in.)
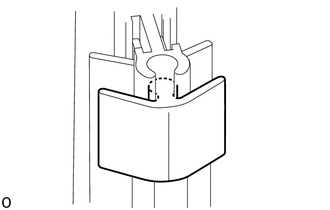
Apply instant adhesive to the fitting surface (dotted line) on the quarter window packing and side window center frame sub-assembly RH to secure the quarter window packing.
- NOTICE:
-
Make sure that instant adhesive does not contact any other areas outside of the application area.
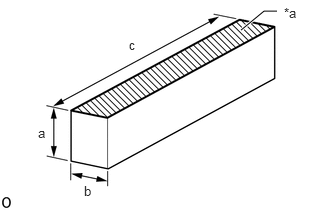
Prepare an EPT sealer with the dimensions shown in the illustration.
- HINT:
-
A generic EPT sealer can be used.
| *a | Seal Area |
- Standard:
Area Specified Condition a 5.0 mm (0.197 in.) b 4.0 mm (0.157 in.) c 30 mm (1.18 in.)
Remove the peeling paper and install the EPT sealer to the side window center frame sub-assembly at the position shown in the illustration.
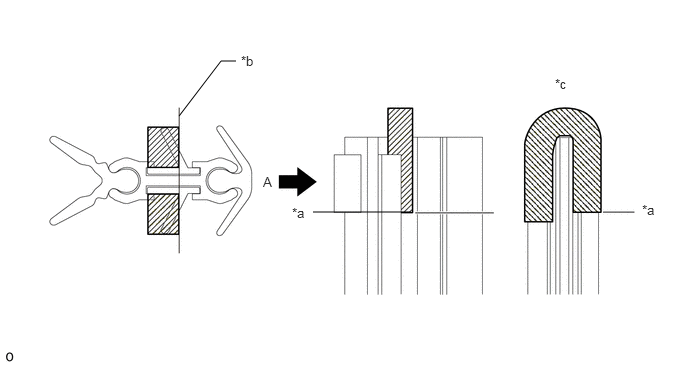
| *a | Application Reference Line a | *b | Specified Application Position b |
| *c | View A | - | - |
62910Q
5.INSTALL SIDE WINDOW LOCK ASSEMBLY (for Slide Type)
- HINT:
-
Use the same procedure for each of the side window lock assemblies.
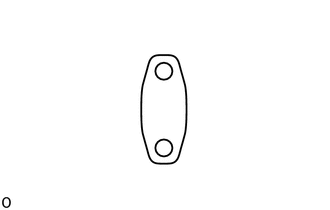
Install the side window lock packing.
- NOTICE:
-
If there is extreme damage to the side window lock packing, replace it with a new one.
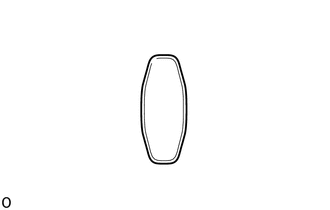
Install the side window lock retainer.
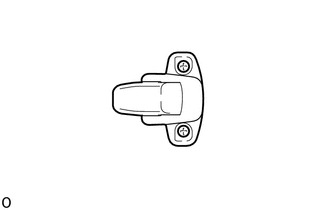
Install the side window lock assembly with 2 screws.
Before applying adhesive, clean off any old adhesive from the threaded portion of the screw.
Using non-residue solvent, clean and remove any oil, water or foreign matter from the threaded portion of the side window lock packing.
Apply adhesive to the threaded portion of the screw.
Install the side window lock assembly with the 2 screws.
62777D
6.INSTALL SIDE WINDOW CENTER SASH CAP (for Slide Type)
- NOTICE:
-
Perform the following procedures when replacing the side window center sash cap.
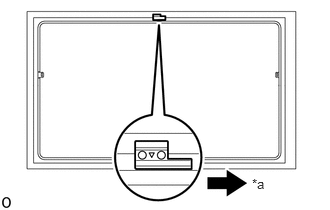
Install a new side window center sash cap to the rear side front window glass RH at the position shown in the illustration.
| *a | Vehicle Front |
62211K
7.INSTALL REAR SIDE WINDOW GLASS RH (for Slide Type)
- NOTICE:
- ·
Do not damage the rear side front window glass RH.
·Do not damage the window frame
·Do not damage the rear side window glass RH.
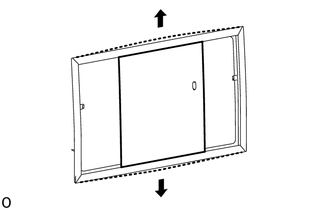
Widen top and bottom of the window frame using your hands and install the rear side window glass RH.
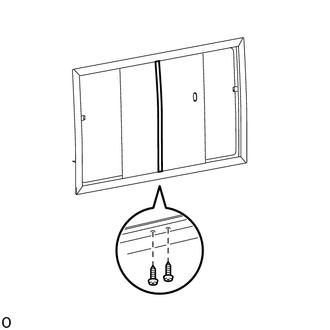
Install the center side window frame sub-assembly.
Install the screw:
Before applying adhesive, clean off any old adhesive from the threaded portion.
Using non-residue solvent, clean and remove any oil, water or foreign matter from the threaded portion of the rear side window glass RH.
Apply adhesive to the threaded portion.
Install the 2 screws.
62211J
8.INSTALL FRONT SIDE WINDOW GLASS RH (for Slide Type)
- NOTICE:
- ·
Do not damage the rear side front window glass RH.
·Do not damage the window frame.
·Do not damage the front side window glass RH.
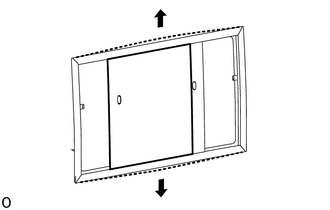
Widen top and bottom of the window frame using your hands and install the front side window glass RH.
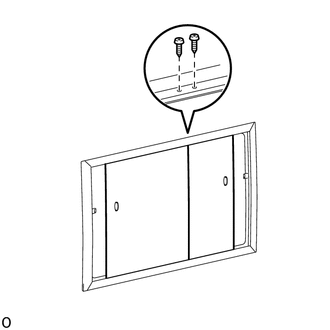
Install the screw:
Before applying adhesive, clean off any old adhesive from the threaded portion.
Using non-residue solvent, clean and remove any oil, water or foreign matter from the threaded portion of the rear side front window glass RH.
Apply adhesive to the threaded portion.
Install the 2 screws.
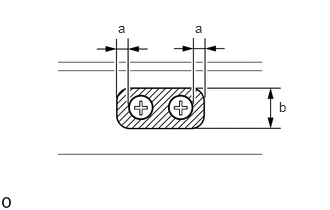
Apply sealant (water proof) to the head of the screw in the area shown in the illustration.
- Standard:
Area Specified Condition a 3.0 mm (0.118 in.) b 12.2 mm (0.480 in.)
62391E
9.INSTALL NO. 1 SIDE WINDOW STOPPER
Install the No. 1 side window stopper.
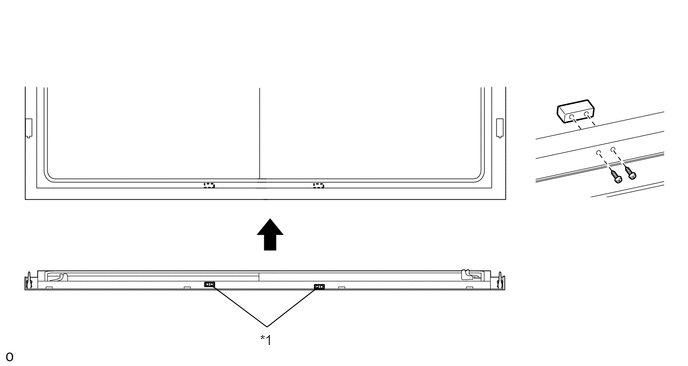
| *1 | No. 1 Side Window Stopper | - | - |
Before applying adhesive, clean off any old adhesive from the threaded portion of the screw.
Using non-residue solvent, clean and remove any oil, water or foreign matter from the threaded portion of the No. 1 side window stopper screw.
Apply adhesive to the threaded portion of the screw.
Install 2 new pieces of No. 1 side window stopper with the 4 screws.
62763R
10.INSTALL SIDE WINDOW FRAME RETAINER
Using non-residue solvent, clean the side window frame retainer installation surface of the rear side front window glass RH.
Install the primer to the side window frame retainer installation surface of the rear side front window glass RH.
- NOTICE:
- ·
Do not apply too much primer.
·Allow the primer to dry for 3 minutes or more.
for Slide Type:
Remove the peeling paper from a new side window frame retainer.
Install the 4 side window frame retainers to the rear side front window glass RH as shown in the illustration.
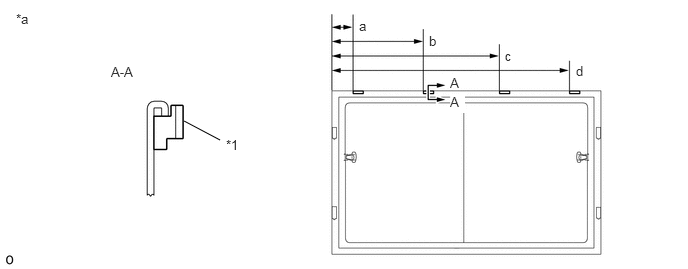
| *1 | Side Window Frame Retainer | - | - |
| *a | Back Side | - | - |
- Standard:
Area Specified Condition a 203.8 mm (8.02 in.) b 523.5 mm (20.6 in.) c 939.8 mm (37.0 in.) d 1323.5 mm (52.1 in.)
for Fixed Type:
Remove the peeling paper from a new side window frame retainer.
Install the 4 side window frame retainers to the rear side front window glass RH as shown in the illustration.
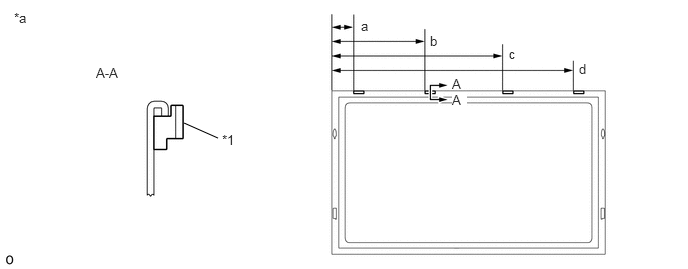
| *1 | Side Window Frame Retainer | - | - |
| *a | Back Side | - | - |
- Standard:
Area Specified Condition a 120.6 mm (4.75 in.) b 504.4 mm (19.9 in.) c 920.6 mm (36.2 in.) d 1304.4 mm (51.4 in.)
62785S
11.INSTALL SIDE WINDOW GLASS SPACER
Using non-residue solvent, clean the side window glass spacer installation surface of the rear side front window glass RH.
Install the primer to the side window glass spacer installation surface of the rear side front window glass RH.
- NOTICE:
- ·
Do not apply too much primer.
·Allow the primer to dry for 3 minutes or more.
for Slide Type:
Remove the peeling paper from a new side window glass spacer.
Install the 4 side window glass spacers to the rear side front window glass RH as shown in the illustration.
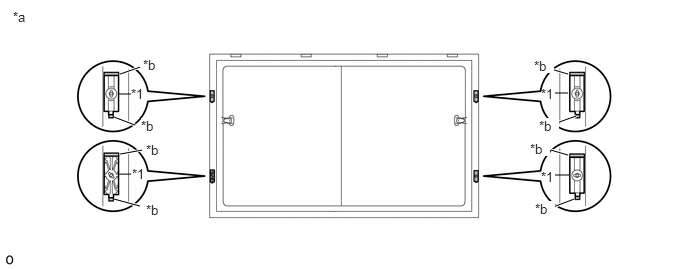
| *1 | Side Window Glass Spacer | - | - |
| *a | Back Side | *b | Ceramic Notch |
for Fixed Type:
Remove the peeling paper from a new side window glass spacer.
Install the 4 side window glass spacers to the rear side front window glass RH as shown in the illustration.
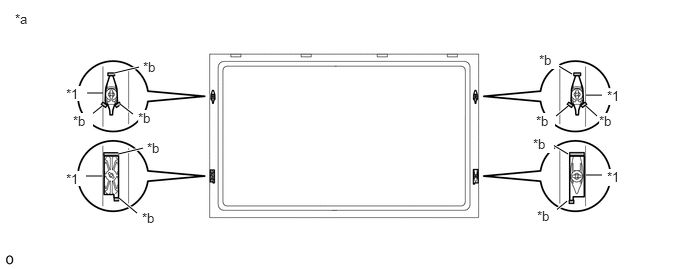
| *1 | Side Window Glass Spacer | - | - |
| *a | Back Side | *b | Ceramic Notch |