STEERING GEAR / LINKAGE STEERING GEAR DISASSEMBLY
CAUTION / NOTICE / HINT
- NOTICE:
-
When using a vise, do not overtighten it.
PROCEDURE

 1.REMOVE HOUSING BRACKET
Remove the 4 bolts and bracket.
45411
2.REMOVE PITMAN ARM
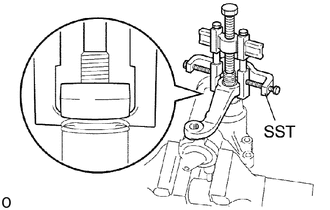
Remove the nut and spring washer.
Using SST, remove the pitman arm.
- SST
- 09950-40011 (09951-04020, 09952-04010, 09953-04020, 09954-04010, 09955-04031, 09958-04011)
- NOTICE:
-
Be careful not damage the sector shaft dust cover.
3.REMOVE SECTOR SHAFT DUST COVER
4. SECURE PS GEAR ASSEMBLY IN VISE
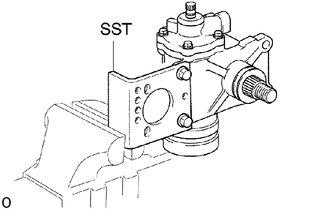
Mount the gear housing on SST and clamp SST in a vise.
- SST
- 09630-00015 (09631-00142)
5.REMOVE SECTOR SHAFT SIDE COVER
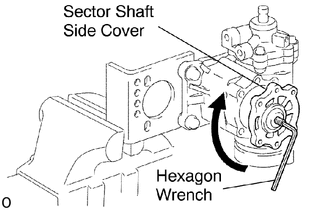
Remove the sector shaft adjusting screw lock nut.
Remove the 6 bolts.
Using a hexagon wrench, turn the sector shaft adjusting screw clockwise until the cover comes off.
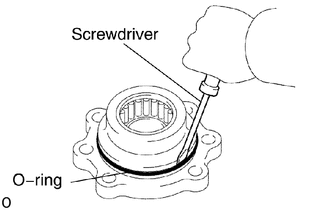
Using a screwdriver, remove the O-ring from the sector shaft side cover.
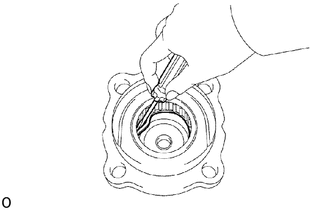
Using a screwdriver, remove the oil seal from the secote shaft side cover.
44015
6.REMOVE SECTOR SHAFT
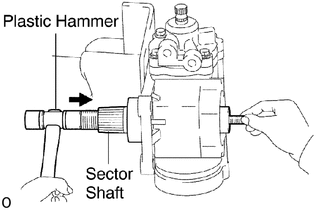
Using a plastic hammer tap on the sector shaft end, and pull out the sector shaft, as shown in the illustration.
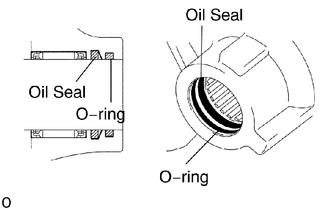
Using a screwdriver, remove the O-ring and oil seal from the gear housing.
44168
7.REMOVE WORM SHAFT DUST COVER
44011
8.REMOVE POWER PISTON SUB-ASSEMBLY
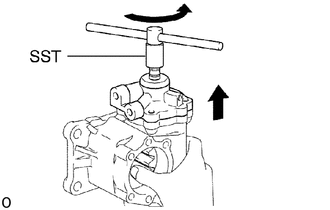
Remove the 4 bolts.
Using SST, turn the power piston shaft clockwise until the shaft is locked. Then turn the power piston shaft counterclockwise until the end cover of the power piston sub-assembly is separated from the gear housing by holding the power piston with your finger.
- SST
- 09616-00010
- NOTICE:
-
Do not separate the end cover from the housing cover more than 60 mm (2.36 in.).
With holding the power piston, pull out the power piston sub-assembly.
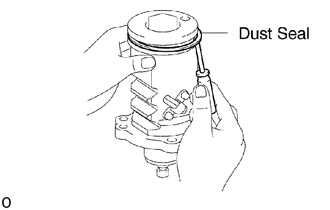
Using a screwdriver, remove the dust seal from the power piston sub-assembly.
- NOTICE:
-
Be careful not to damage the power piston sub-assembly.
9.REMOVE CONTROL VALVE SUB-ASSEMBLY
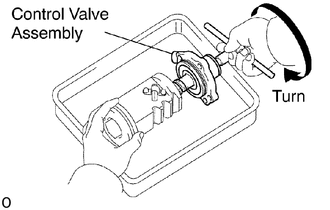
Pull out the control valve assembly from the power piston sub-assembly.
- NOTICE:
-
Do not lose the ball.
10.REMOVE BALL GUIDE CLAMP, BALL GUIDE AND BALLS
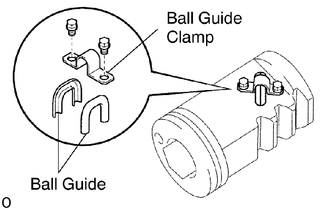
Remove the 2 bolts and ball guide clamp.
Remove the ball guide and 30 balls.
- NOTICE:
-
Be careful not to lose the balls.