1BZ-FPE FUEL LPG REGULATOR DISASSEMBLY
PROCEDURE

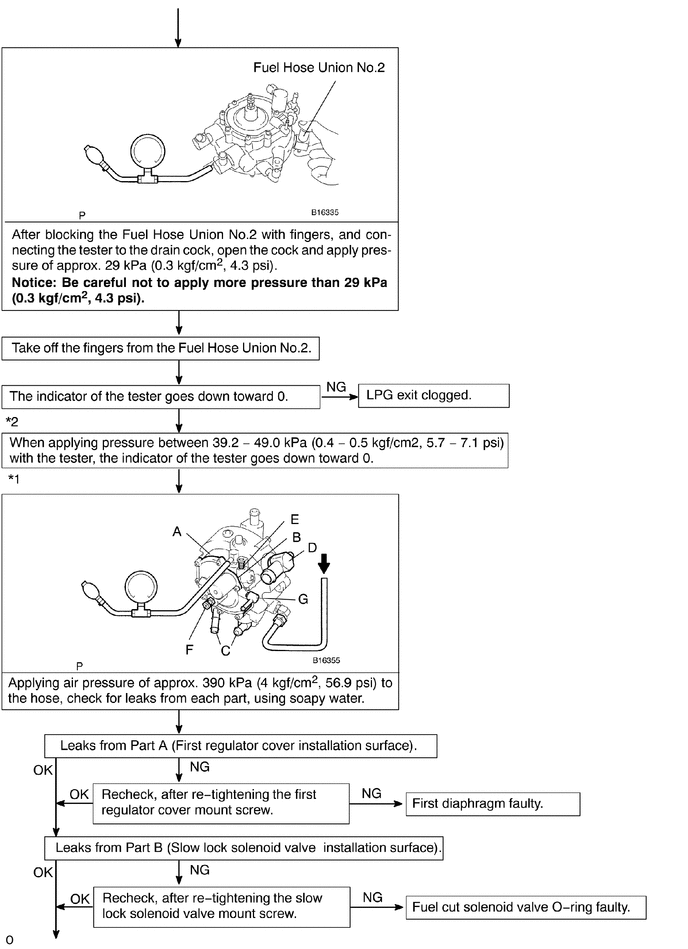
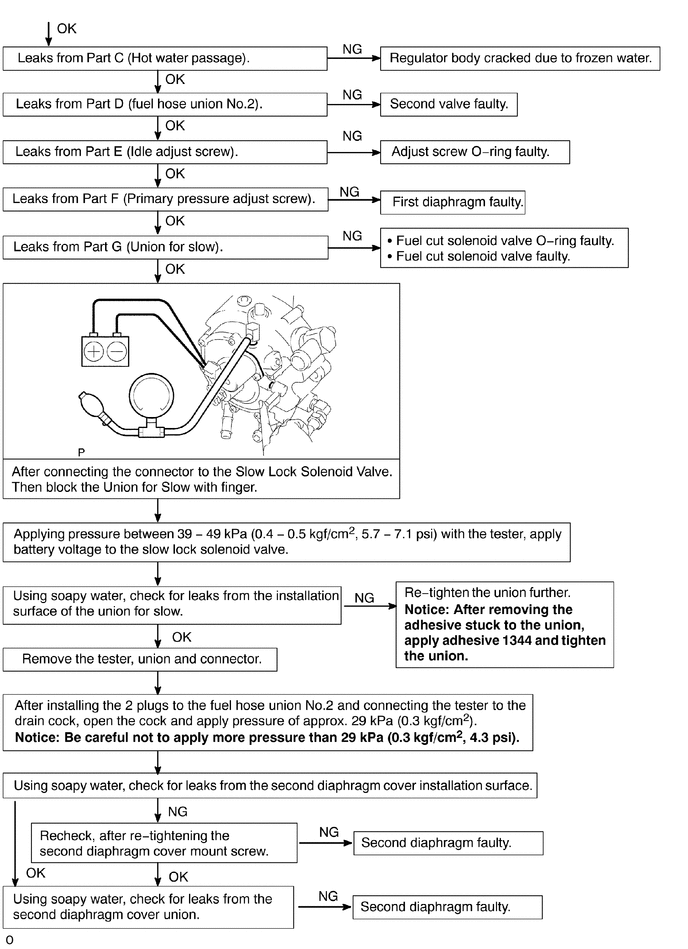
 1.INSPECT TESTER'S AIRTIGHTNESS
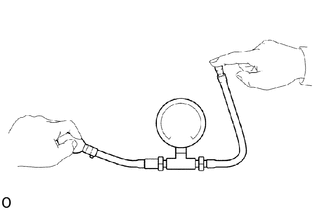
Plugging one end of the tester with fingers and applying pressure between 39 - 49 kPa (0.4 - 0.5 kgf/cm2, 5.7 - 7.1 psi), check that the indicator of the tester does not go down.
2.INSTALL SST
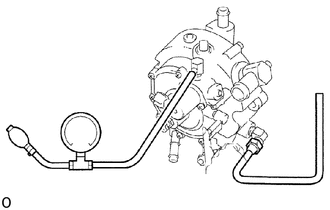
Remove the union nut at the tip of SST.
Install SST to the regulator body.
SST AISAN SST: 1000-3112 (5901-31110)
Remove the union nut from the tip of SST, install it on the LPG regulator pipe union, and connect the hose.
- NOTICE:
-
Clamp the connected part of the hose firmly since the air pressure of approx. 390 kPa (4 kgf/cm2, 57 psi) is applied for inspection.
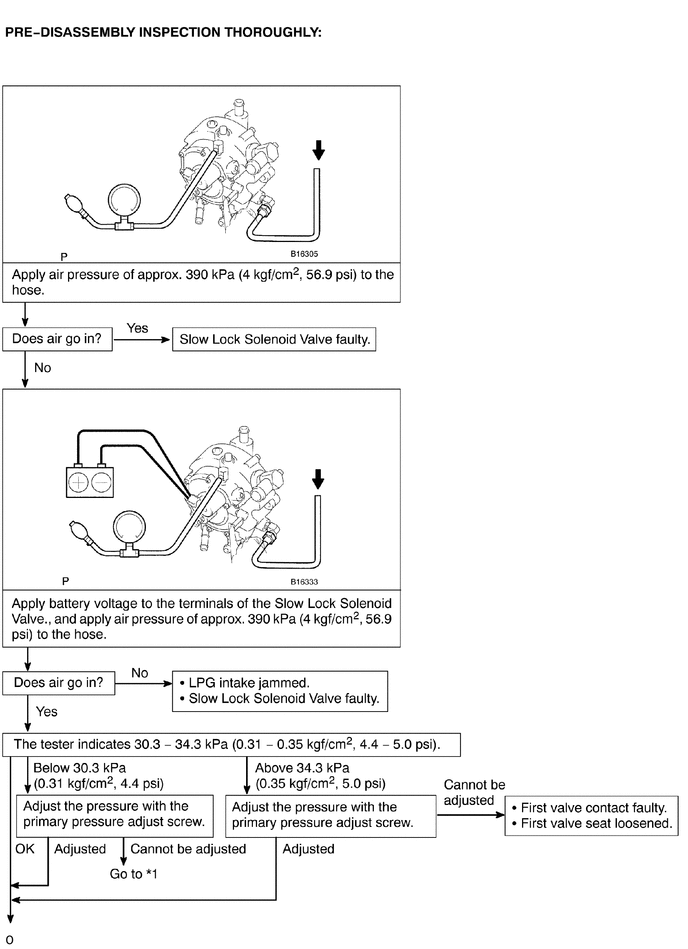
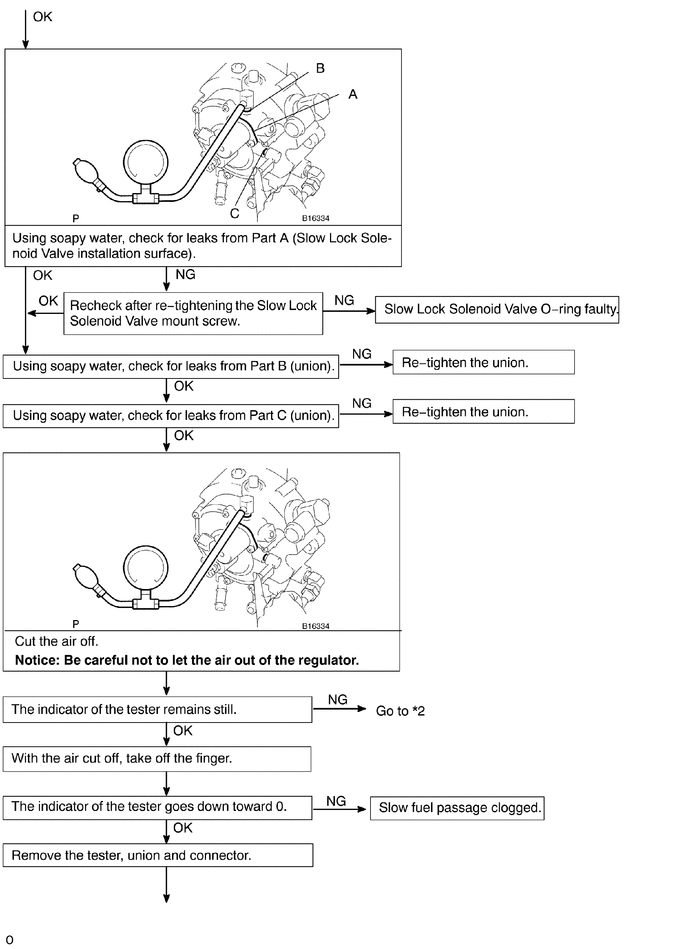
3.DISASSEMBLE PRIMARY DECOMPRESSING ROOM
- NOTICE:
- ·
Be sure to perform pre-disassembly inspection thoroughly before disassembling.
·Since the contact will become bad if the first valve is removed, disassembly should be carried out only when the valve is found faulty.
Slide the clips and remove the fuel hose.
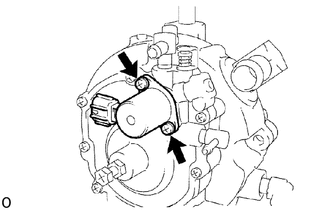
Remove the 2 screws, slow lock solenoid valve and 2 O-rings.
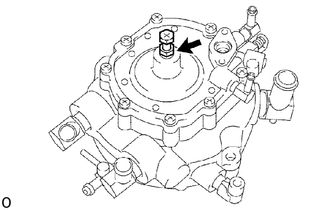
Loosen the nut, and remove the primary pressure adjust screw.
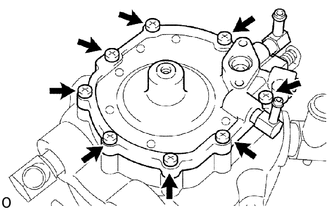
Remove the 8 screws, first regulator cover, spring guide and spring.
Remove the O-ring from the first regulator cover.
Remove the first diaphragm.
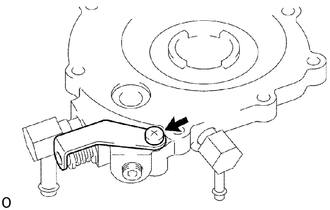
Remove the screw and stopper plate.
Remove the idle adjust screw, spring, washer and O-ring.
Remove the union No. 3 and union for slow.
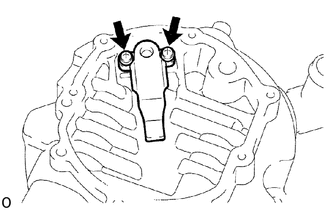
Remove the 2 screws, first valve assembly and O-ring.
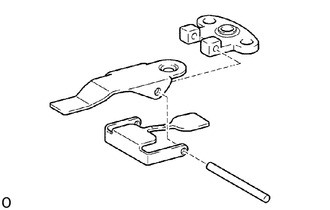
Disassemble the first valve assembly.
Remove the lever pin from the first valve assembly.
Remove the first lever and elastic face valve from the first valve seat.
Remove the drain cock.
Remove the union No.2.
4.DISASSEMBLE SECONDARY DECOMPRESSING ROOM
- NOTICE:
- ·
The primary decompressing room must be in the assembled condition when disassembling the secondary depressing room.
·Disassembly should be carried out only when the valve is found faulty since the contact will become bad if the valve is removed.
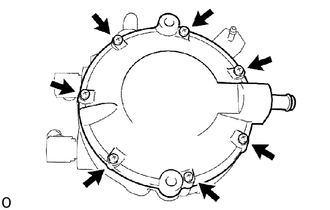
Remove the 7 screws and second regulator cover.
Remove the second diaphragm.
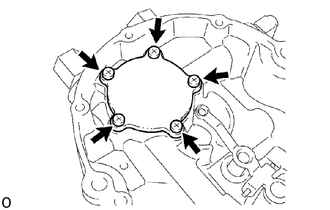
Remove the 5 screws, pre-heater cover and O-ring.
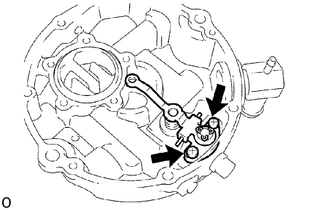
Remove the 2 screws, second valve assembly, O-ring and spring.
Disassemble the second valve assembly.
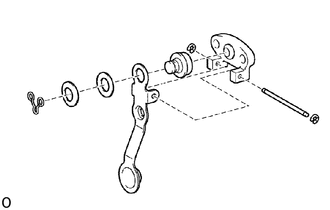
Remove the 2 E-rings, pin and second valve seat.
Remove the retainer, wave washer, washer and elastic face valve from the second lever.