AIR CONDITIONING REFRIGERANT REPLACEMENT
PROCEDURE

 1. RECOVER REFRIGERANT FROM REFRIGERATION SYSTEM
Start the engine.
Turn the A/C switch on.
Operate the cooler compressor while the engine speed is approximately 1000 rpm for 5 to 6 minutes to circulate the refrigerant and collect the compressor oil remaining in each component into the cooler compressor.
Stop the engine.
Recover the refrigerant from the A/C system using a refrigerant recovery unit.
2. CHARGE REFRIGERANT
- SST
- 09985-20010 (09985-02130, 09985-02150, 09985-02090, 09985-02110, 09985-02010, 09985-02050, 09985-02060, 09985-02070)
Perform vacuum purging using a vacuum pump.
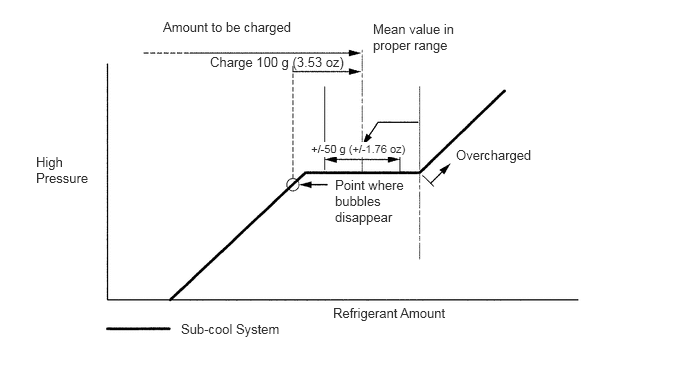
Charge refrigerant HFC-134a (R134a).
- Standard:
1800 +/-50 g (60.9 +/-1.8 oz)
- NOTICE:
-
Do not operate the cooler compressor before charging refrigerant as the cooler compressor will not work properly without any refrigerant, and will overheat.
3.WARM UP ENGINE
Warm up the engine at less than 2000 rpm for 1 minute or more after charging the refrigerant.
- NOTICE:
-
Be sure to warm up the compressor when turning the A/C switch on after removing and installing the cooler refrigerant lines (including the compressor) to prevent damage to the compressor.
4.INSPECT FOR REFRIGERANT GAS LEAK
After recharging the refrigerant gas, check for refrigerant gas leakage using a halogen leak detector.
Perform the operation observing the following instructions:
Stop the engine.
Secure good ventilation (the halogen leak detector may react to volatile gases other than refrigerant, such as evaporated gasoline or exhaust gas).
Repeat the test 2 or 3 times.
Make sure that some refrigerant remains in the refrigeration system.
- HINT:
-
When the compressor is off: approximately 392 to 588 kPa (4.0 to 6.0 kgf/cm2, 57 to 85 psi).
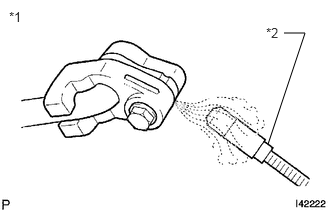
Using a halogen leak detector, check the refrigerant line for leakage.
If a gas leak is not detected from the drain hose, remove the blower motor control (blower resistor) from the cooling unit. Insert the halogen leak detector sensor into the unit and check for gas leakage.
Disconnect the pressure switch connector and wait for approximately 20 minutes. Bring the halogen leak detector close to the pressure switch and check for gas leakage.
| *1 | Check for Leakage |
| *2 | Halogen Leak Detector |