AIR CONDITIONING CONDENSER DISASSEMBLY
PROCEDURE

 88463A
1.REMOVE NO. 2 COOLER CONDENSER BRACKET
Remove the 3 No. 1 cooler condenser cushions, 3 No. 2 cooler condenser cushions and 3 No. 1 condenser bracket collars.
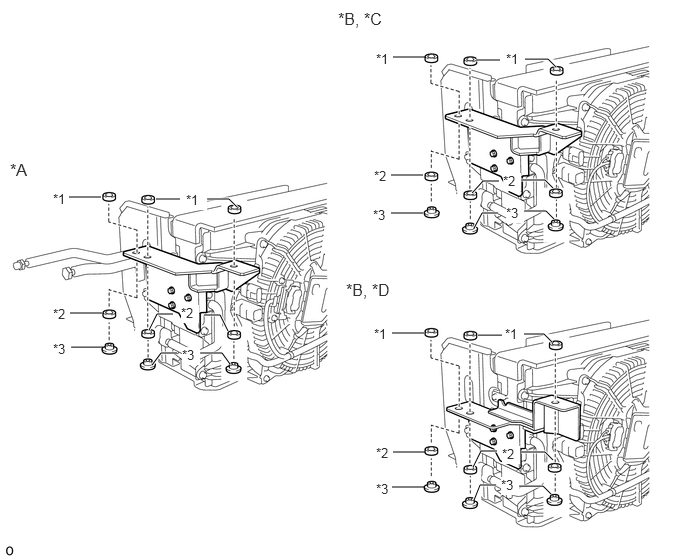
| *A | for RHD | *B | for LHD |
| *C | except Normal Body | *D | for Normal Body |
| *1 | No. 1 Cooler Condenser Cushion | *2 | No. 2 Cooler Condenser Cushion |
| *3 | No. 1 Condenser Bracket Collar | - | - |
Remove the 4 bolts and No. 2 cooler condenser bracket.
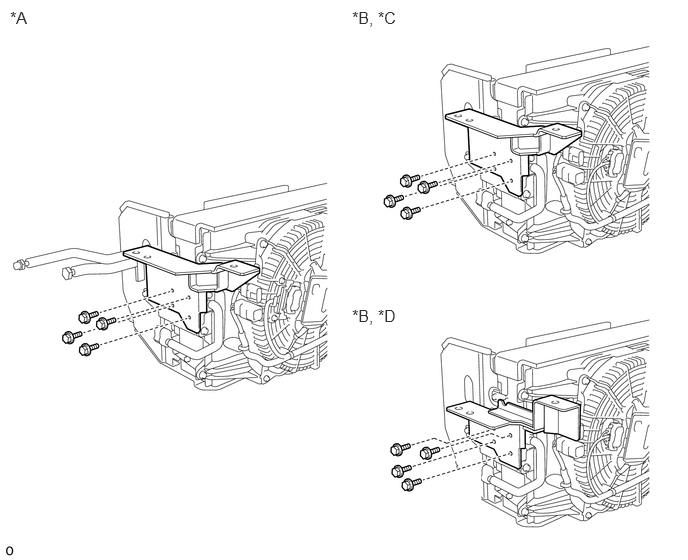
| *A | for RHD | *B | for LHD |
| *C | except Normal Body | *D | for Normal Body |
88463B
2.REMOVE NO. 3 COOLER CONDENSER BRACKET
Remove the 3 No. 1 cooler condenser cushions, 3 No. 2 cooler condenser cushions and 3 No. 1 condenser bracket collars.
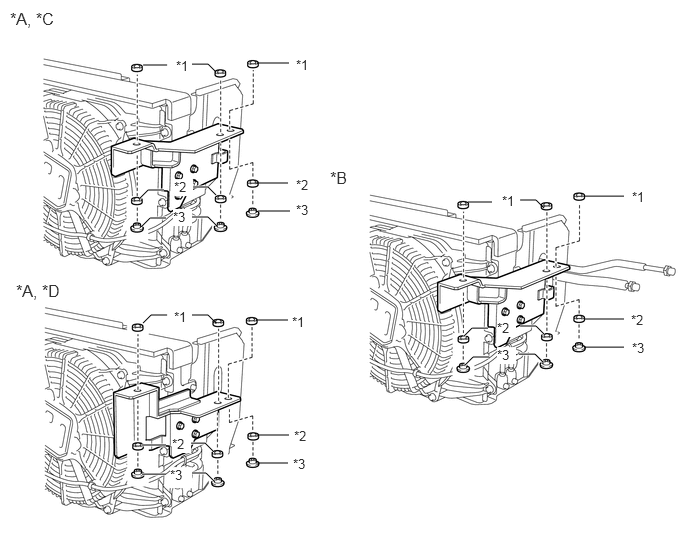
| *A | for RHD | *B | for LHD |
| *C | except Normal Body | *D | for Normal Body |
| *1 | No. 1 Cooler Condenser Cushion | *2 | No. 2 Cooler Condenser Cushion |
| *3 | No. 1 Condenser Bracket Collar | - | - |
for RHD:
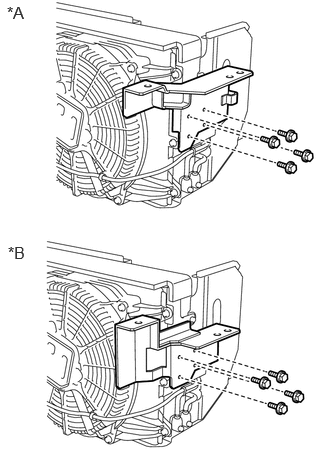
| *A | except Normal Body |
| *B | for Normal Body |
Remove the 4 bolts and No. 3 cooler condenser bracket.
for LHD:
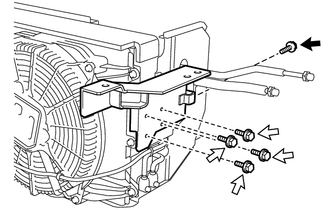

|
Bolt (A) |

|
Bolt (B) |
Remove the bolt (A).
Remove the 4 bolts (B) and No. 3 cooler condenser bracket.
88716P
3.REMOVE COOLER REFRIGERANT LIQUID PIPE P
for RHD:
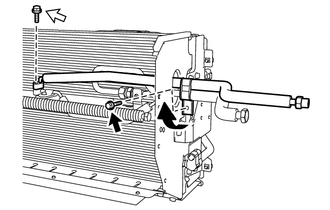
|
|
Bolt (A) |
|
|
Bolt (B) |
Remove the bolt (A) and move the No. 1 piping clamp as shown in the illustration and remove the No. 1 piping clamp.
Remove the bolt (B) and cooler refrigerant liquid pipe P.
- NOTICE:
-
Do not apply excessive force to the cooler refrigerant liquid pipe P.
Remove the O-ring.
- NOTICE:
-
Seal the openings of the disconnected parts using vinyl tape to prevent entry of moisture and foreign matter.
for LHD:
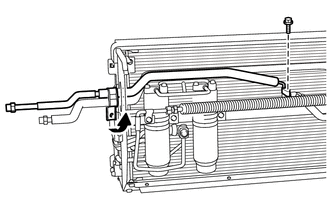
Move the No. 1 piping clamp as shown in the illustration and remove the No. 1 piping clamp.
Remove the bolt and cooler refrigerant liquid pipe P.
- NOTICE:
-
Do not apply excessive force to the cooler refrigerant liquid pipe P.
Remove the O-ring.
- NOTICE:
-
Seal the openings of the disconnected parts using vinyl tape to prevent entry of moisture and foreign matter.
88715K
4.REMOVE DISCHARGE TUBE K
Loosen the nut and remove the discharge tube K.
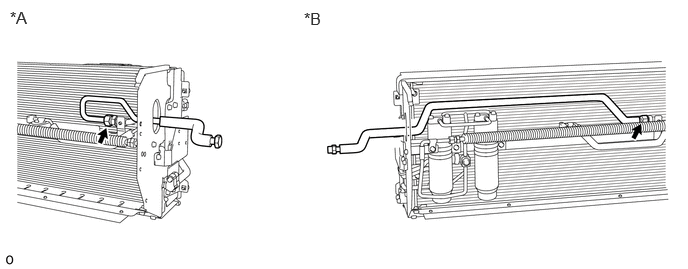
| *A | for RHD | *B | for LHD |
- NOTICE:
-
Do not apply excessive force to the discharge tube K.
Remove the O-ring.
- NOTICE:
-
Seal the openings of the disconnected parts using vinyl tape to prevent entry of moisture and foreign matter.
88716L
5.REMOVE COOLER REFRIGERANT LIQUID PIPE L
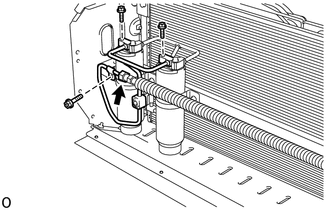
Loosen the nut and remove the 3 bolts and cooler refrigerant liquid pipe L.
- NOTICE:
-
Do not apply excessive force to the cooler refrigerant liquid pipe L.
Remove the 3 O-rings.
- NOTICE:
-
Seal the openings of the disconnected parts using vinyl tape to prevent entry of moisture and foreign matter.
88716B
6.REMOVE COOLER REFRIGERANT LIQUID PIPE B
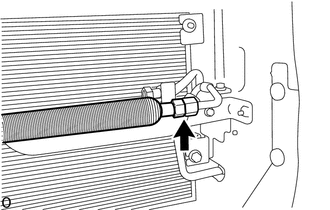
Loosen the nut and remove the cooler refrigerant liquid pipe B.
- NOTICE:
- ·
Do not apply excessive force to the cooler refrigerant liquid pipe B.
·Seal the openings of the disconnected parts using vinyl tape to prevent entry of moisture and foreign matter.
88716M
7.REMOVE COOLER REFRIGERANT LIQUID PIPE M
Remove the 2 bolts and cooler refrigerant liquid pipe M.
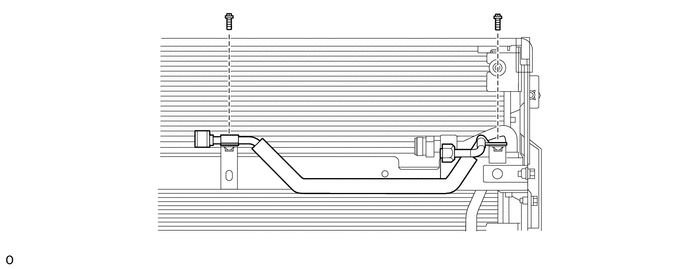
- NOTICE:
-
Do not apply excessive force to the cooler refrigerant liquid pipe M.
Remove the O-ring.
- NOTICE:
-
Seal the openings of the disconnected parts using vinyl tape to prevent entry of moisture and foreign matter.
88471
8.REMOVE RECEIVER AIR CONDITIONING TANK
88645H
9.REMOVE NO. 1 PRESSURE SWITCH
88716A
10.REMOVE COOLER REFRIGERANT LIQUID PIPE A
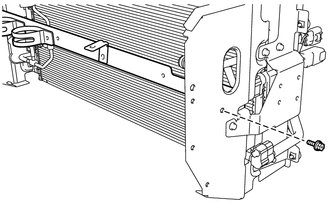
Remove the bolt.
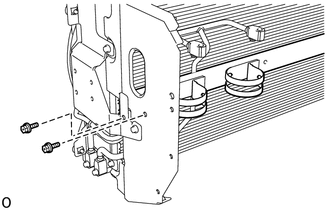
Remove the 2 bolts.
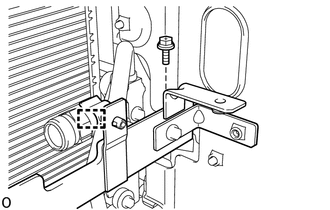
Remove the bolt.
Detach the clamp and remove the bracket sub-assembly.
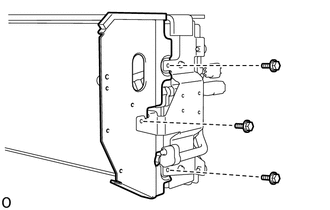
Remove the 3 bolts and dust cover.
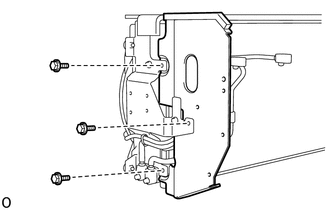
Remove the 3 bolts and dust cover.
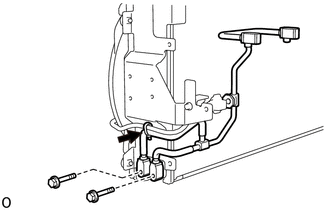
Cut and remove the strap.
Remove the 2 bolts and cooler refrigerant liquid pipe A.
- NOTICE:
-
Do not apply excessive force to the cooler refrigerant liquid pipe A.
Remove the 2 O-rings.
- NOTICE:
-
Seal the openings of the disconnected parts using vinyl tape to prevent entry of moisture and foreign matter.
11.REMOVE PIPING CLAMP
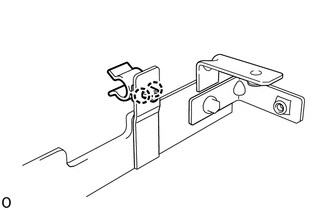
Detach the 2 claws and remove the piping clamp.
88715B
12.REMOVE COOLER REFRIGERANT DISCHARGE PIPE B
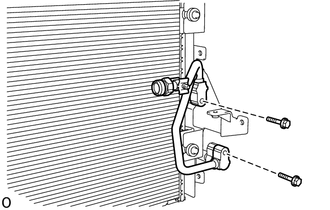
Remove the 2 bolts and cooler refrigerant discharge pipe B.
- NOTICE:
-
Do not apply excessive force to the cooler refrigerant discharge pipe B.
Remove the 2 O-rings.
- NOTICE:
-
Seal the openings of the disconnected parts using vinyl tape to prevent entry of moisture and foreign matter.
88715A
13.REMOVE COOLER REFRIGERANT DISCHARGE PIPE A
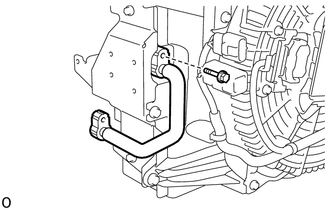
Remove the bolt and cooler refrigerant discharge pipe A.
- NOTICE:
-
Do not apply excessive force to the cooler refrigerant discharge pipe A.
Remove the O-ring.
- NOTICE:
-
Seal the openings of the disconnected parts using vinyl tape to prevent entry of moisture and foreign matter.
14.REMOVE NO. 2 COOLER PACKING
- HINT:
-
When removing the No. 2 cooler packing, heat the condenser assembly and No. 2 cooler packing using a heat light.
Heat the condenser assembly and No. 2 cooler packing using a heat light.
- CAUTION:
- ·
Do not touch the heat light and heated parts.
·Touching the heat light may result in burns.
·Touching heated parts for a long time may result in burns.
- Standard:
Item Temperature No. 2 Cooler Packing 40 to 60°C (104 to 140°F) Condenser Assembly
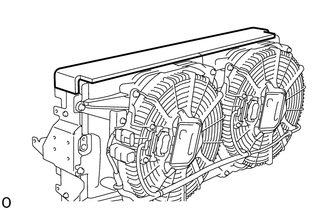
Remove the No. 2 cooler packing.
88461C
15.REMOVE NO. 2 COOLER CONDENSER CORE
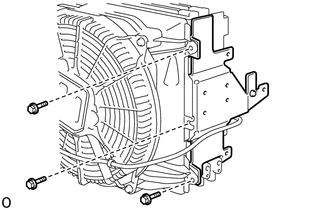
Remove the 3 bolts and bracket sub-assembly.
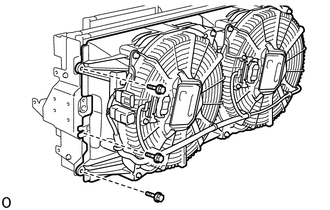
Remove the 3 bolts and fan shroud with blower assembly.
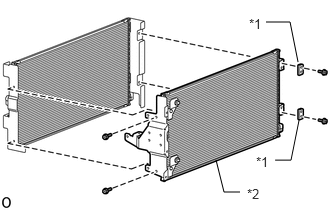
| *1 | No. 4 Cooler Condenser Bracket |
| *2 | No. 2 Cooler Condenser Core |
Remove the 4 bolts, 2 No. 4 cooler condenser brackets and No. 2 cooler condenser core.
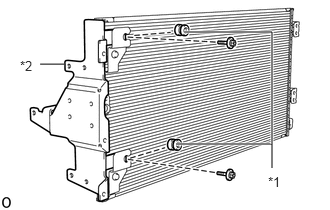
| *1 | Grommet |
| *2 | Bracket Sub-assembly |
Remove the 2 bolts, 2 grommets and bracket sub-assembly from the No. 2 cooler condenser core.
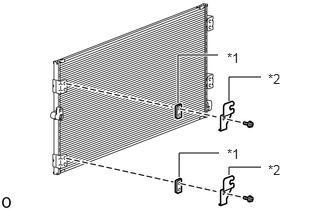
| *1 | No. 4 Cooler Condenser Bracket |
| *2 | Bracket |
Remove the 2 bolts, 2 No. 4 cooler condenser brackets and 2 brackets from the No. 2 cooler condenser core.
88461A
16.REMOVE COOLER CONDENSER CORE
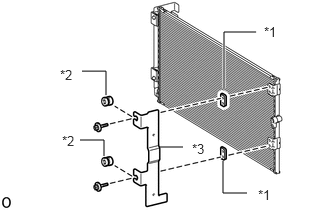
| *1 | No. 4 Cooler Condenser Bracket |
| *2 | Grommet |
| *3 | Bracket Sub-assembly |
Remove the 2 bolts, 2 grommets, bracket sub-assembly and 2 No. 4 cooler condenser brackets from the cooler condenser core.
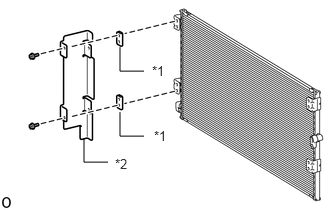
| *1 | No. 4 Cooler Condenser Bracket |
| *2 | Bracket Sub-assembly |
Remove the 2 bolts, bracket sub-assembly and 2 No. 4 cooler condenser brackets from the cooler condenser core.
88605J
17.REMOVE AIR CONDITIONING WIRING HARNESS SUB-ASSEMBLY
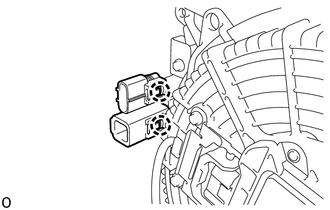
Detach the 2 claws.
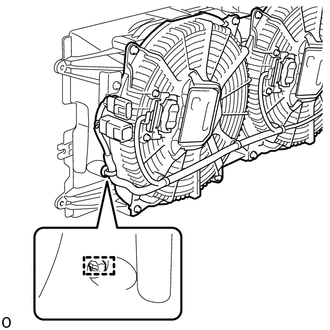
Detach the wire harness clamp.
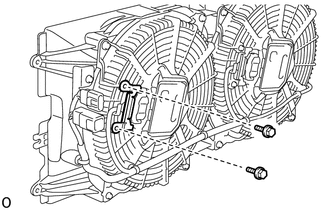
Remove the 2 bolts.
- HINT:
-
Use the same procedure for the other side.
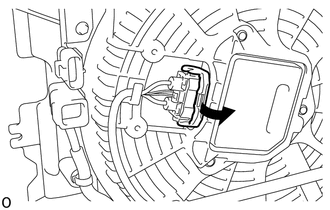
Move the connector cover in the direction shown in the illustration.
- HINT:
-
Use the same procedure for the other side.
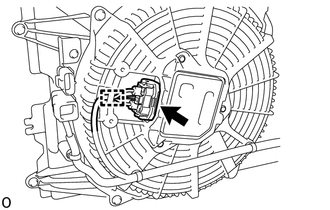
Disconnect the connector.
- HINT:
-
Use the same procedure for the other side.
Detach the wire harness clamp.
- HINT:
-
Use the same procedure for the other side.
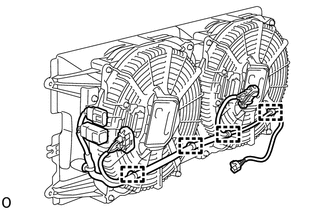
Detach the 4 wire harness clamps and remove the air conditioning wiring harness sub-assembly.
88590B
18.REMOVE BLOWER ASSEMBLY WITH SHROUD
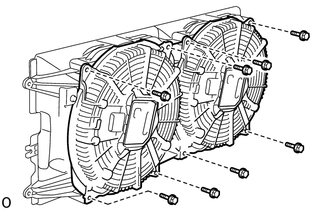
Remove the 8 bolts and 2 blower assembly with shrouds.
88454A
19.REMOVE FAN SHROUD
88453A
20.REMOVE COOLING FAN
88550D
21.REMOVE BLOWER MOTOR ASSEMBLY
88454B
22.REMOVE FAN SHROUD