AUDIO / VIDEO MICROPHONE AMPLIFIER REMOVAL
PROCEDURE

 1. PRECAUTION
- NOTICE:
-
After turning the ignition switch off, waiting time may be required before disconnecting the cable from the battery terminal. Therefore, make sure to read the disconnecting the cable from the battery terminal notice before proceeding with work.
-
Click hereGeneral>INTRODUCTION>REPAIR INSTRUCTION>PRECAUTION
2.DISCONNECT CABLE FROM NEGATIVE BATTERY TERMINAL
- NOTICE:
-
When disconnecting the cable, some systems need to be initialized after the cable is reconnected.
-
Click hereGeneral>INTRODUCTION>REPAIR INSTRUCTION>INITIALIZATION
33504F
3.REMOVE SHIFT LEVER KNOB SUB-ASSEMBLY (for Manual Transmission)
Remove the shift lever knob sub-assembly.
58534A
4.REMOVE TRANSMISSION COVER MAT (for Manual Transmission)
Remove the transmission cover mat from the shift and select lever support.
58286
5.REMOVE NO. 1 SHIFT AND SELECT LEVER BOOT (for Manual Transmission)
for RHD:
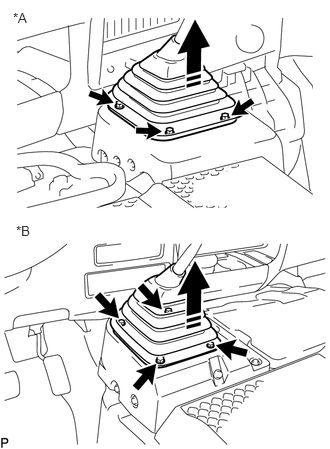
Remove the 3 bolts.
| *A | for RHD |
| *B | for LHD |

|
Removal Direction |
While sliding the shift lever, pull the shift lever boot diagonally to remove it.
for LHD:
Remove the 4 bolts.
While sliding the shift lever, pull the shift lever boot diagonally to remove it.
58123A
6.REMOVE SHIFT AND SELECT LEVER SUPPORT (for Manual Transmission)
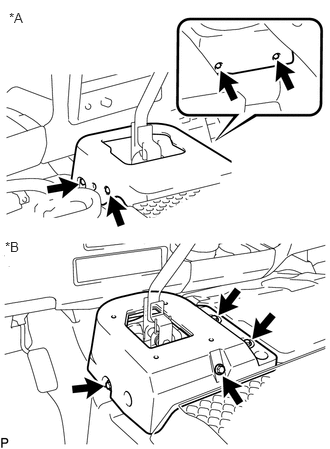
Remove the 4 bolts and shift lever hole cover.
| *A | for RHD |
| *B | for LHD |
58841A
7.REMOVE SHIFTING HOLE COVER (for Automatic Transmission)
55412D
8.REMOVE CENTER INSTRUMENT CLUSTER FINISH PANEL
86250
9.REMOVE AMPLIFIER MICROPHONE ASSEMBLY
86290A
10.REMOVE MICROPHONE AMPLIFIER ASSEMBLY
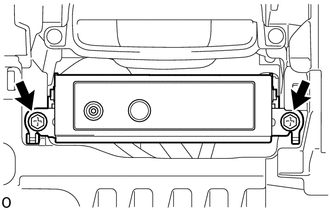
Remove the 2 screws.
Disconnect the connectors and remove the microphone amplifier assembly.
86285
11.REMOVE NO. 1 AMPLIFIER BRACKET
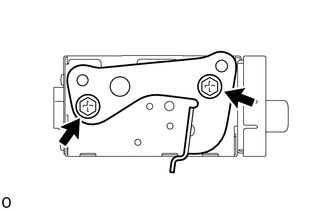
Remove the 2 screws and No. 1 amplifier bracket.
86286
12.REMOVE NO. 2 AMPLIFIER BRACKET
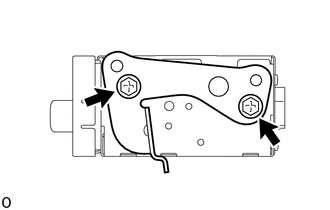
Remove the 2 screws and No. 2 amplifier bracket.
55301
13.REMOVE INSTRUMENT PANEL SUB-ASSEMBLY
86203
14.REMOVE RADIO WIRE
for RHD:
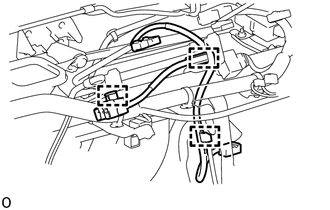
Disconnect the connector.
Detach the 3 clamps and remove the radio wire.
for LHD:
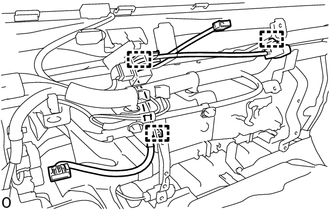
Disconnect the connector.
Detach the 3 clamps and remove the radio wire.