ADJUSTMENT
Removal / installation · Vehicles built from Nov 2010
Versions by build date: Jul 2007 – Oct 2010 from Nov 2010
- HINT:
-
Before adjusting the door position on vehicles equipped with side airbags and curtain shield airbags, be sure to disconnect the battery. After the adjustment, inspect the SRS warning light, the side airbag system and the curtain shield airbag system for normal operation. Then initialize both airbag systems.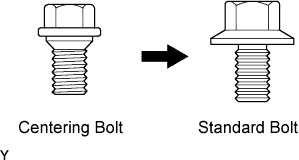

- Use the same procedure for the RH and LH sides.
- The procedures described below are for the RH side.
- Centering bolts are used to mount the door hinge onto the vehicle body and door. The door cannot be adjusted with the centering bolts on. Substitute standard bolts (with washers) for the centering bolts when making adjustments.
- For bolts without torque specifications, check the standard bolt chart (Click here).
-
| 1. INSPECT REAR DOOR |

Check that the clearance measurements are within the standard ranges.
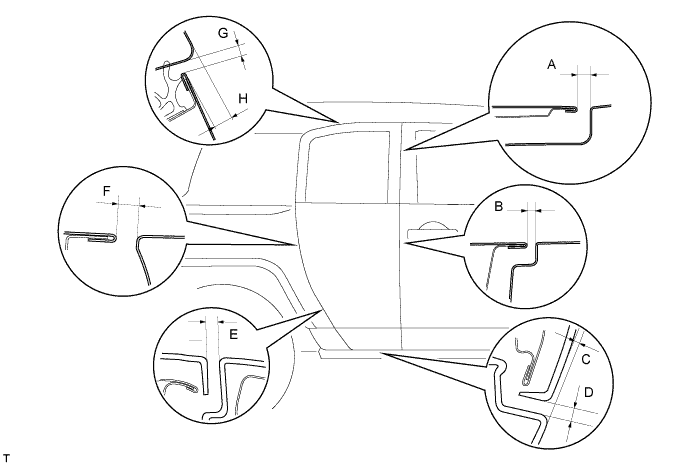
- Standard:
Area
Measurement
Area
Measurement
A
4.6 to 7.6 mm
(0.181 to 0.299 in.)
E
4.6 to 7.6 mm
(0.181 to 0.299 in.)
B
3.5 to 6.5 mm
(0.138 to 0.256 in.)
F
4.5 to 7.5 mm
(0.177 to 0.295 in.)
C
1.1 to 4.1 mm
(0.043 to 0.161 in.)
G
4.1 to 7.1 mm
(0.161 to 0.280 in.)
D
4.3 to 7.3 mm
(0.169 to 0.287 in.)
H
9 to 12 mm
(0.354 to 0.472 in.)
| 2. ADJUST REAR DOOR |
Disconnect the cable from the negative battery terminal.
- CAUTION:
- The work must be started at least 90 seconds after the ignition switch is turned to OFF and the cable is disconnected from the negative battery terminal. (The SRS is equipped with a back-up power source. If the work is started within 90 seconds of disconnecting the cable from the negative battery terminal and the ignition switch being turned to OFF, the SRS may deploy).
Loosen the body side hinge bolts and adjust the door position.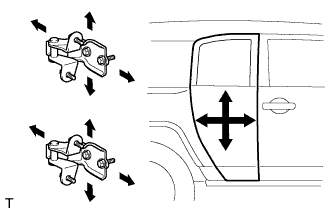
Tighten the body side hinge bolts after the adjustment.
- Torque:
- 26 N*m{ 265 kgf*cm , 19 ft.*lbf }
Loosen the door side hinge bolts and adjust the door position.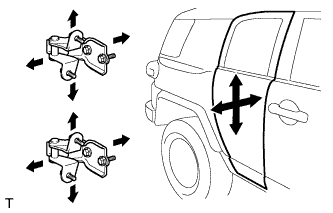
Tighten the door side hinge bolts after the adjustment.
- Torque:
- 26 N*m{ 265 kgf*cm , 19 ft.*lbf }
Using a screwdriver with its tip wrapped in protective tape, disengage the 2 claws and remove the 2 roof side inner garnish covers.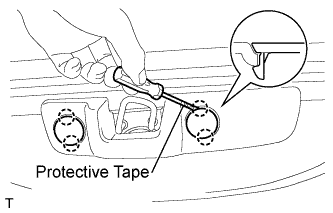
Remove the 2 bolts.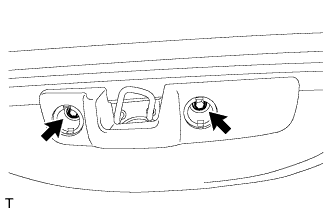
Disengage the 2 claws and remove the No. 1 roof side rail garnish.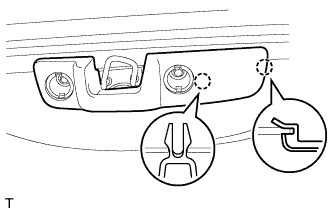
Adjust the striker position by slightly loosening the striker mounting screws with "Torx" socket wrench T40 and hitting the striker with a plastic hammer (upper side).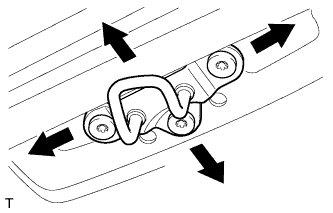
Using "Torx" socket wrench T40, tighten the striker mounting screws after the adjustment.
- Torque:
- 23 N*m{ 235 kgf*cm , 17 ft.*lbf }
Adjust the striker position by slightly loosening the striker mounting screws with "Torx" socket wrench T40 and hitting the striker with a plastic hammer (lower side).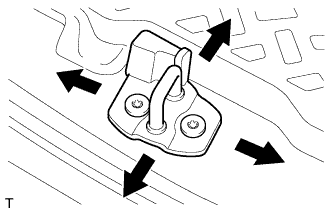
Using "Torx" socket wrench T40, tighten the striker mounting screws after the adjustment.
- Torque:
- 23 N*m{ 235 kgf*cm , 17 ft.*lbf }
Engage the 2 claws and install the No. 1 roof side rail garnish.
Install the 2 bolts.
Engage the 2 claws and install the roof side inner garnish cover.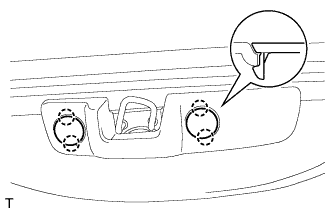
Connect the cable to the negative battery terminal.
- Torque:
- 3.9 N*m{ 40 kgf*cm , 35 in.*lbf }
Inspect the SRS warning light (Click here).