REMOVAL
Removal / installation · Vehicles built Jul 2007 – Oct 2010
Versions by build date: Jul 2007 – Oct 2010 from Nov 2010
| 1. REMOVE INSTRUMENT PANEL GARNISH LH |

Remove screw <H>.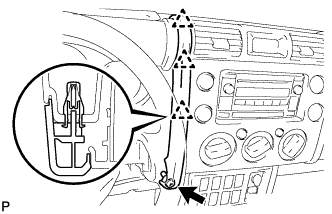

Disengage the 3 clips and remove the instrument panel garnish.
- NOTICE:
- Pull the instrument panel garnish up at an angle of 45° to remove it.
- Do not damage the surface of the instrument panel when removing it.
- Pull the instrument panel garnish up at an angle of 45° to remove it.
| 2. REMOVE INSTRUMENT PANEL GARNISH RH |
Remove screw <H>.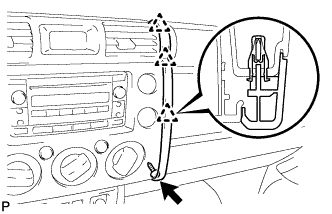
Disengage the 3 clips and remove the instrument panel garnish.
- NOTICE:
- Pull the instrument panel garnish up at an angle of 45° to remove it.
- Do not damage the surface of the instrument panel when removing it.
- Pull the instrument panel garnish up at an angle of 45° to remove it.
| 3. REMOVE INTEGRATION CONTROL AND PANEL ASSEMBLY |
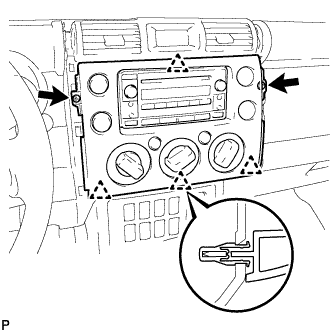 |
Remove the 2 screws.
Disengage the 4 clips and remove the integration control assembly.
Disconnect the 3 connectors.