INSTALLATION
Removal / installation · Vehicles built from Jul 2007
| 1.
INSTALL REAR WIPER MOTOR |
 |
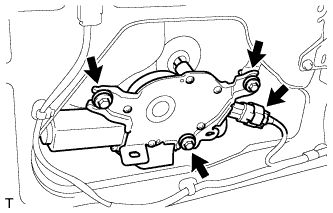
- Install the rear wiper motor with the 3 bolts.
-
Torque:
- 5.5 N*m{
56 kgf*cm
, 49 in.*lbf
}
Connect the connector.
| 2.
INSTALL REAR WIPER ARM AND BLADE ASSEMBLY |
|
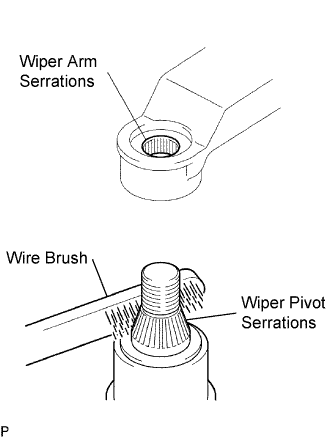
- Scrape any metal powder off the serrated part of the wiper arm with a round file or the equivalent (when reinstalling).
Clean the wiper pivot serrations with a wire brush.
Operate the wiper, then stop the windshield wiper motor in the automatic stop position.
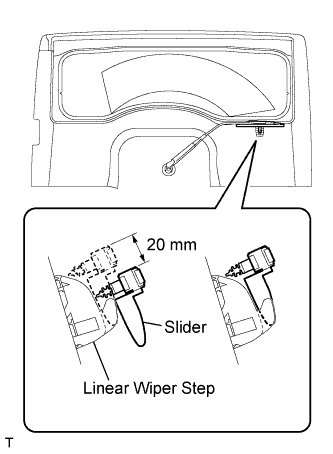
- Install the rear wiper arm in the position shown in the illustration with the nut.
-
Torque:
- 12 N*m{
117 kgf*cm
, 8 ft.*lbf
}
- HINT:
- Using the nut, Tighten the rear wiper arm with the slider on the linear wiper step, 20 mm below the rise-up position in the rotational direction.
Return the slider to the rise-up position.
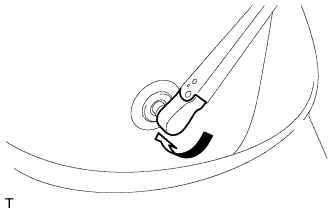
- Close the rear wiper arm head cap.
| 3.
INSTALL BACK DOOR SERVICE HOLE COVER
|
|
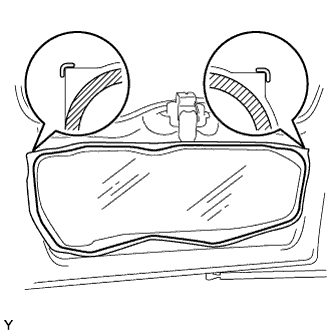
- Apply butyl tape to the door panel, then install the new back door service hole cover as shown in the illustration.
- HINT:
- When installing the service hole cover, pull the links and connectors out through the service hole.
- There should be no wrinkles or folds after attaching the service hole cover.
- After attaching the service hole cover, check the quality of the seal.
| 4.
INSTALL BACK DOOR TRIM BOARD
|
|
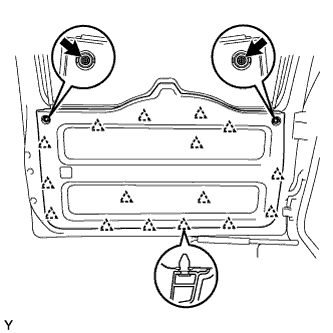
- Engage the 16 clips and install the back door trim board.
Install the 2 screws.
| 5.
INSTALL DOOR TRIM RETAINER CAP
|
|
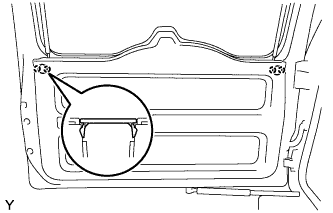
- Engage the 2 claws and install the door trim retainer cap.
| 6.
INSTALL BACK DOOR TRIM COVER LH
|
|
- HINT:
- Use the same procedure as described for the RH side.
| 7.
INSTALL BACK DOOR TRIM COVER RH
|
|
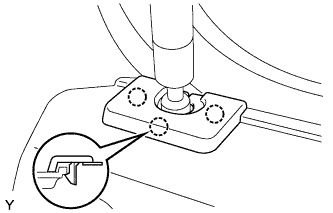
Engage the 3 claws and back door trim cover.