The procedure described below is for the LH side. Use the same procedure for both the RH and LH sides, unless otherwise specified.
1.
DISCONNECT CABLE FROM NEGATIVE BATTERY TERMINAL (w/ Back Sonar)
2.
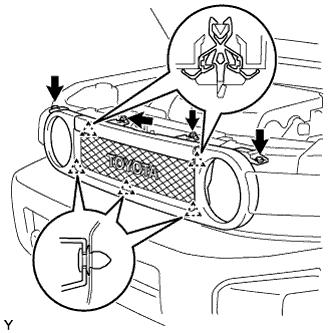
REMOVE RADIATOR GRILLE
Using a clip remover, remove the 2 clips.
Remove the 2 screws.
Disengage the 5 clips and remove the radiator grille.
3.
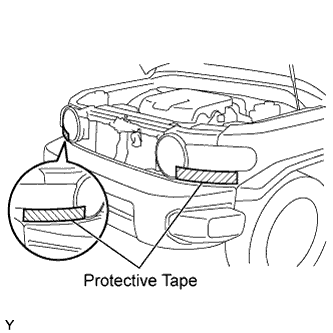
REMOVE FRONT BUMPER COVER
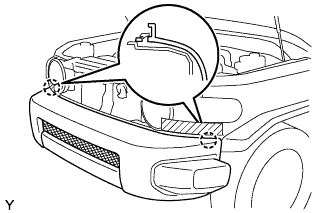
Apply protective tape as shown in the illustration.
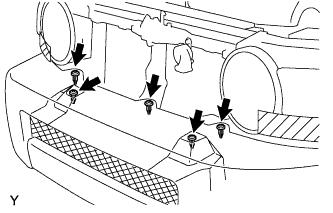
Using a clip remover, remove the 5 clips.
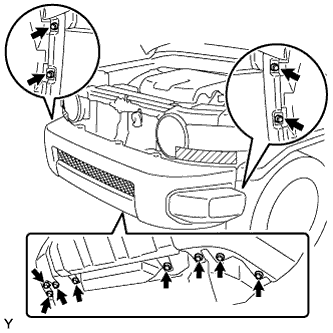
Remove the 8 screws and the 4 bolts.
Disengage the 2 claws and remove the front bumper cover.
4.
REMOVE REAR BUMPER COVER
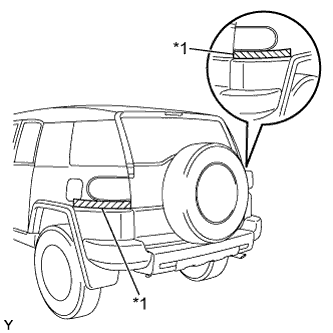
Apply protective tape as shown in the illustration.
Text in Illustration
*1
Protective Tape
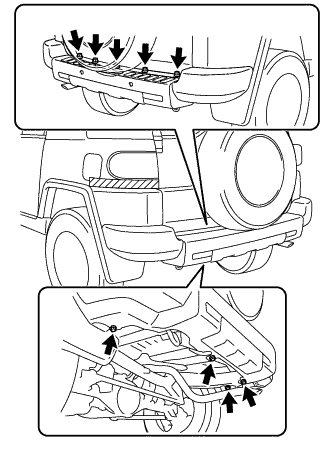
Remove the 7 bolts and the 2 screws.
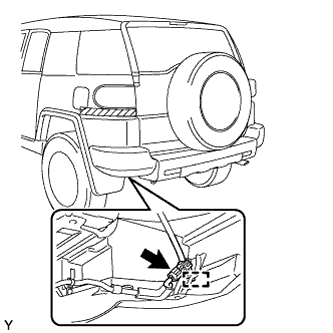
Disengage the clamp and separate the floor wire.
Disconnect the connector.
HINT:
If the vehicle is equipped with back sonar, disconnect the connector and floor wire.
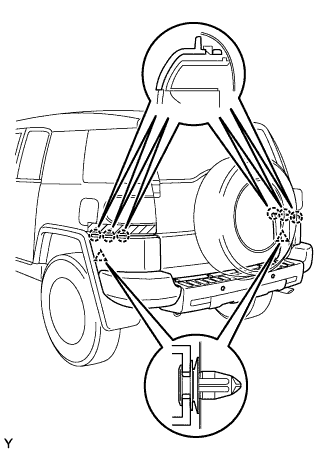
Disengage the 6 claws and the 2 clips and remove the rear bumper cover.
5.
REMOVE FRONT FENDER MUDGUARD
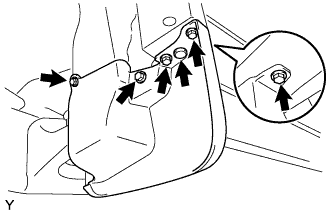
Using a clip remover, remove the clip.
Remove the 5 screws and the front fender mudguard.
6.
REMOVE QUARTER PANEL MUDGUARD
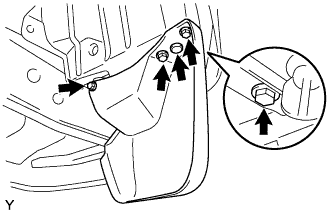
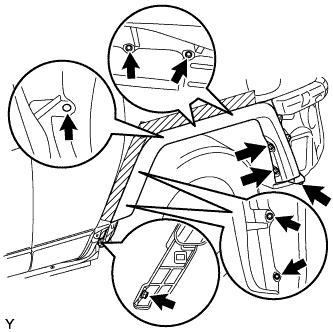
Using a clip remover, remove the clip.
Remove the 4 screws and the quarter panel mudguard.
7.
REMOVE FRONT BUMPER SIDE SUPPORT
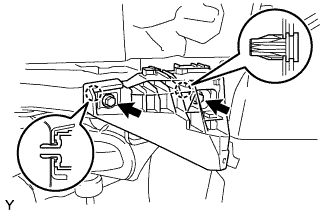
Remove the 2 screws.
Disengage the 2 claws to remove the front bumper side support LH.
8.
REMOVE SIDE STEP SUB-ASSEMBLY (w/ Side Step)
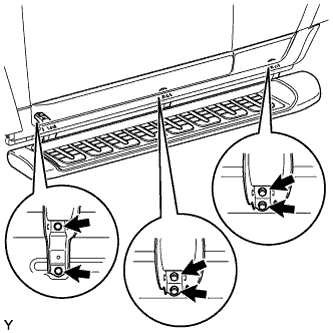
Remove the 6 bolts and the side step.
9.
REMOVE ROCKER PANEL MOULDING
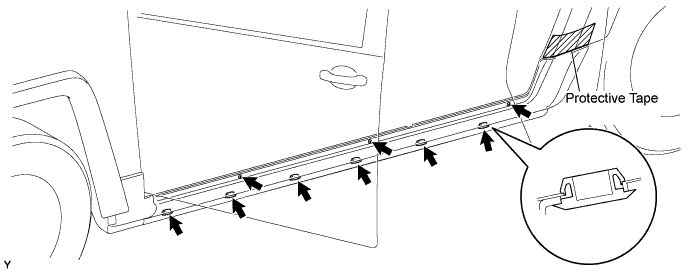
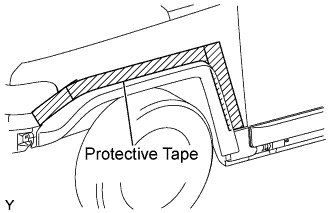
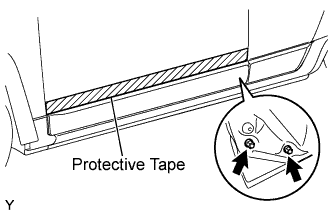
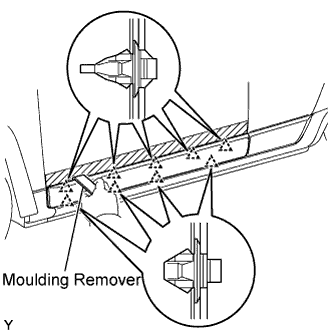
Apply protective tape to the quarter panel in the area around the rocker panel moulding.
Using a clip remover, remove the 6 retainers.
Remove the 3 screws.
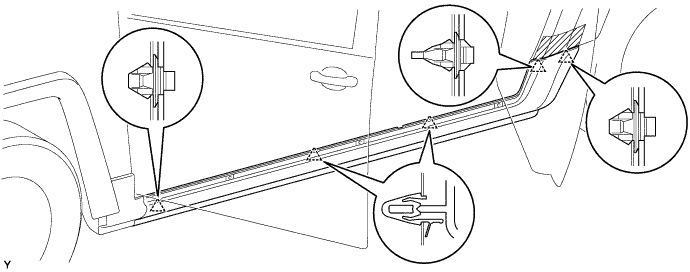
Disengage the 5 clips and remove the rocker panel moulding.
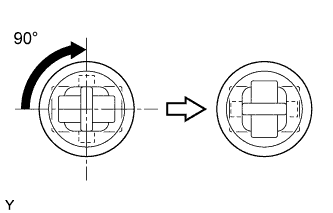
Turn the clips 90° clockwise and remove them.
10.
REMOVE FRONT FENDER MOULDING SUB-ASSEMBLY
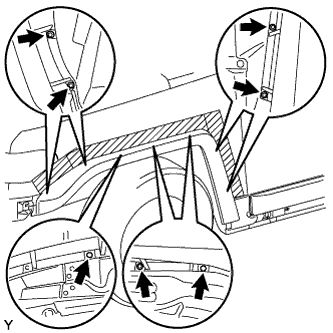
Apply protective tape to the fender panel in the area around the front fender moulding.
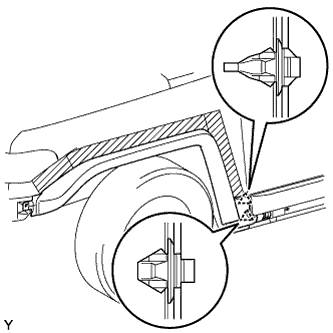
Using a clip remover, remove the 2 clips.
Remove the 5 screws.
Disengage the 2 clips and remove the front fender moulding.
Turn the clips 90° clockwise and remove them.
11.
REMOVE QUARTER OUTSIDE MOULDING SUB-ASSEMBLY
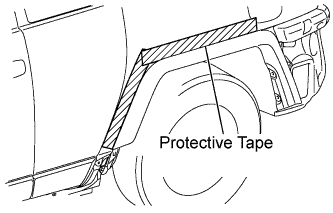
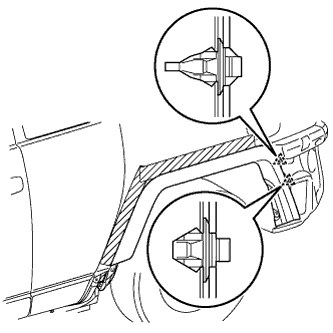
Apply protective tape to the quarter panel in the area around the quarter outside moulding.
Using a clip remover, remove the clip.
Remove the 8 screws.
Disengage the 2 clips and remove the quarter outside moulding.
Turn the clips 90° clockwise and remove them.
12.
REMOVE FRONT DOOR OUTSIDE MOULDING SUB-ASSEMBLY
Apply protective tape to the front door panel in the area around the front door outside moulding.
Remove the 2 nuts.
Using a moulding remover, disengage the 9 clips and remove the front door outside moulding.
Turn the clips 90° clockwise and remove them.
13.
REMOVE REAR DOOR OUTSIDE MOULDING SUB-ASSEMBLY
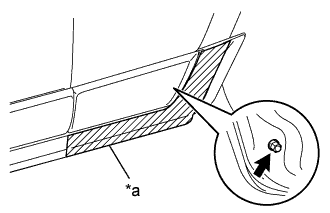
Apply protective tape to the rear door panel in the area around the rear door outside moulding sub-assembly.
Text in Illustration
*a
Protective Tape
Remove the nut.
Using an infrared light, heat the vehicle body.
Heating Temperature
Item
Temperature
Vehicle Body
40 to 60°C (104 to 140°F)
CAUTION:
Do not burn yourself on the hot vehicle body or with the infrared light.
NOTICE:
Do not heat the vehicle body excessively.
Remove any tape remaining on the vehicle body.
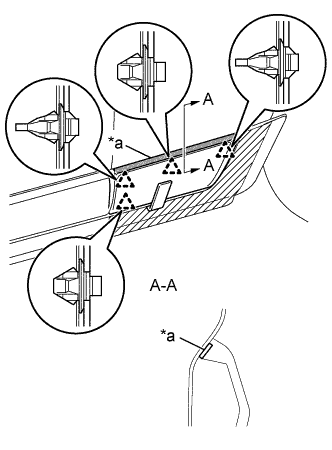
Using a moulding remover, while pulling the rear door outside moulding sub-assembly from the side of the vehicle, disengage the 4 clips while peeling off the double-sided tape. Then remove the rear door outside moulding sub-assembly.
Text in Illustration
*a
Double-sided Tape
14.
REMOVE SPARE TIRE
15.
REMOVE BACK DOOR OUTSIDE MOULDING LH
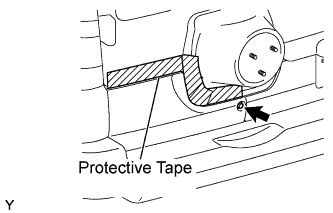
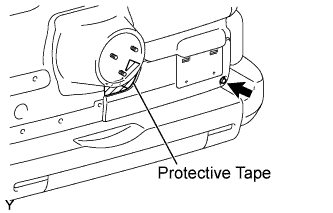
Apply protective tape to the back door panel in the area around the back door outside moulding.
Remove the screw.
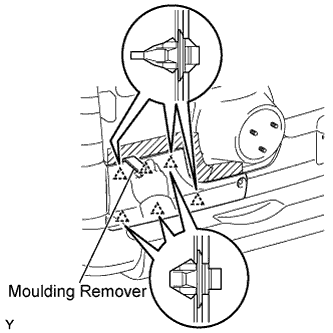
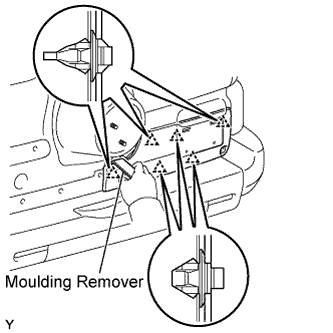
Using a moulding remover, disengage the 6 clips and remove the back door outside moulding.
Turn the clips 90° clockwise and remove them.
16.
REMOVE BACK DOOR OUTSIDE MOULDING RH
Apply protective tape to the back door panel in the area around the back door outside moulding.
Remove the screw.
Using a moulding remover, disengage the 6 clips and remove the back door outside moulding.