INSTALLATION
Removal / installation · Vehicles built from Jul 2007
| 1. INSTALL FRONT DOOR LOCK |

- NOTICE:
- If reusing a door lock that has been removed, replace the packing in the connecting part with new.
- Make sure that no grease or dirt adheres to the packing surface in the connecting part.
- If reusing a door lock that has been removed, replace the packing in the connecting part with new.
Apply MP grease to the sliding and rotating areas of the front door lock.
Connect the front door lock remote control cable and the front door inside locking cable.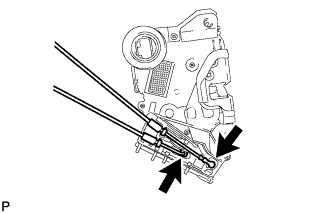

Engage the 5 claws and close the cover.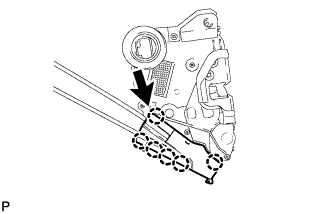
Insert the door lock open rod into the front door lock, then set it to the door panel.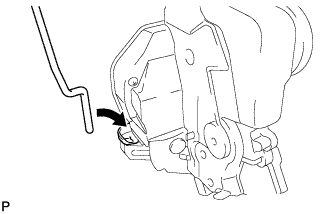
- NOTICE:
- Make sure that the outside handle link is securely engaged with the door lock.
Apply adhesive to the threads of the screws.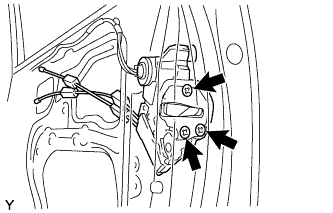
- Adhesive:
- Toyota Genuine Adhesive 1324, Three Bond 1324 or the equivalent
Using "Torx" socket wrench T30, install the front door lock with the 3 screws.
- Torque:
- 5.0 N*m{ 51 kgf*cm , 44 in.*lbf }
| 2. REMOVE FRONT DOOR LOCK CYLINDER ASSEMBLY |
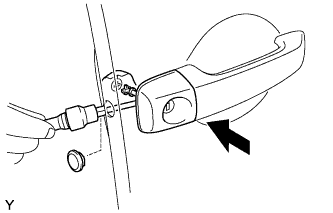 |
Using a "Torx" socket wrench T30, install the front door lock cylinder.
- Torque:
- 5.5 N*m{ 56 kgf*cm , 49 in.*lbf }
- HINT:
- Make sure that the door lock key cylinder rod is inserted.
Install the hole plug.
| 3. INSTALL FRONT DOOR GLASS SUB-ASSEMBLY |
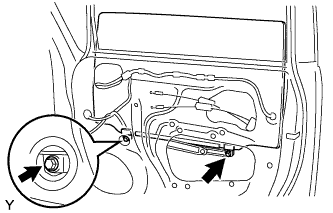 |
Install the front door glass onto the front door window regulator with the 2 bolts.
- Torque:
- 8.0 N*m{ 82 kgf*cm , 71 in.*lbf }
- NOTICE:
- Do not damage the glass.
Install the hole plug.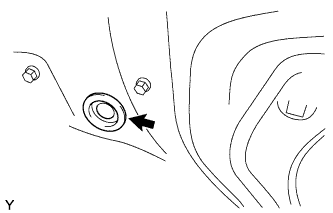
| 4. INSTALL FRONT DOOR WINDOW FRAME REAR LOWER |
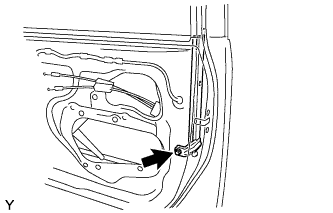 |
Install the front door window frame rear lower, and temporarily tighten the bolt.
| 5. INSTALL FRONT DOOR LOWER FRAME BRACKET GARNISH |
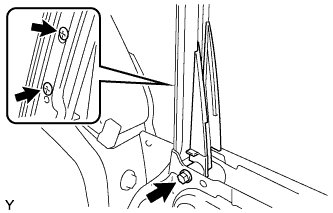 |
Install the front door lower frame bracket garnish with the bolt and 2 screws.
- Torque:
- 5.5 N*m{ 56 kgf*cm , 49 in.*lbf }
| 6. INSTALL FRONT DOOR FRAME SUB-ASSEMBLY FRONT LOWER |
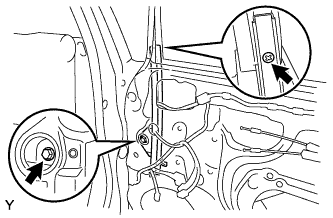 |
Install the front door frame sub-assembly front lower with the screw.
Temporarily tighten the bolt.
| 7. INSTALL FRONT DOOR GLASS RUN |
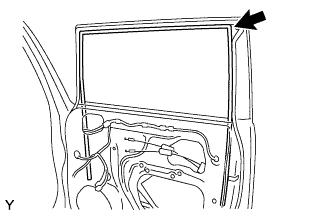 |
Install the front door glass run.
Tighten the front door window frame rear lower to the specified torque with the bolt.
- Torque:
- 5.5 N*m{ 56 kgf*cm , 49 in.*lbf }
Tighten the front door frame sub-assembly front lower to the specified torque with the bolt.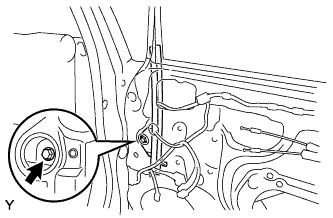
- Torque:
- 5.5 N*m{ 56 kgf*cm , 49 in.*lbf }
Install the hole plug.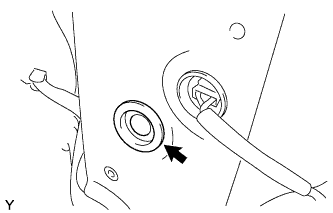
| 8. INSTALL FRONT DOOR WEATHERSTRIP |
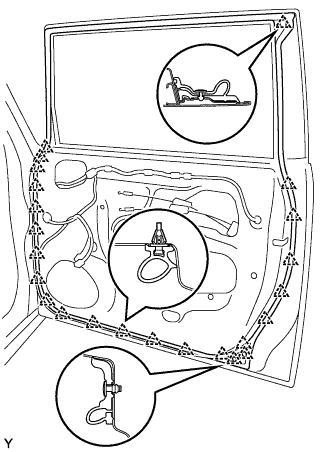 |
Install the front door weatherstrip.
| 9. INSTALL FRONT DOOR CHECK ASSEMBLY |
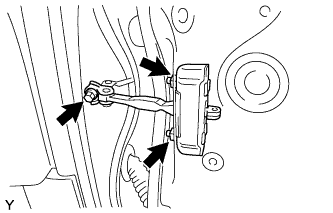 |
Apply MP grease to the sliding areas of the door check.
Install the front door check onto the door panel with the 2 nuts.
- Torque:
- 5.5 N*m{ 56 kgf*cm , 49 in.*lbf }
Apply adhesive to the threads of the bolt.
- Adhesive:
- Toyota Genuine Adhesive 1324, Three Bond 1324 or the equivalent.
Install the front door check onto the body panel with the bolt.
- Torque:
- 30 N*m{ 306 kgf*cm , 22 ft.*lbf }
| 10. INSTALL FRONT DOOR INSIDE PANEL PLATE |
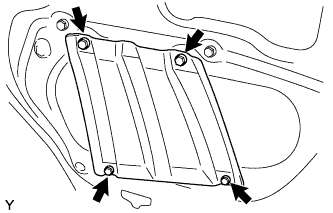 |
Install the front door inside panel plate with the 4 screws.
| 11. INSTALL FRONT DOOR SERVICE HOLE COVER |
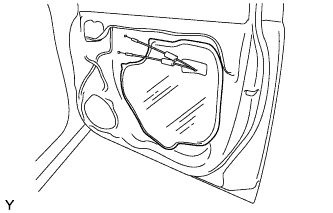 |
Remove the front door service hole cover.
- NOTICE:
- Remove any tape remaining on the door side.
| 12. INSTALL FRONT NO. 1 SPEAKER |
- Torque:
- 3.9 N*m{ 40 kgf*cm , 35 in.*lbf }
| 13. INSTALL FRONT DOOR GLASS OUTER WEATHERSTRIP ASSEMBLY |
Engage the 8 claws and install a new front door glass outer weatherstrip.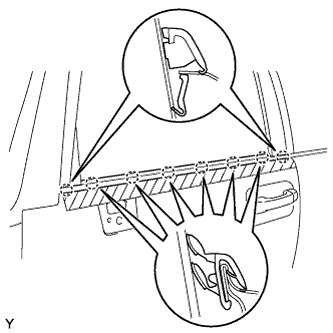
Remove the protective tape.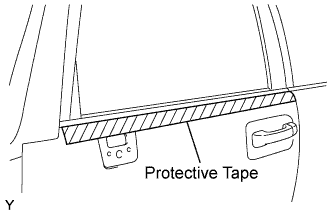
| 14. INSTALL OUTER REAR VIEW MIRROR |
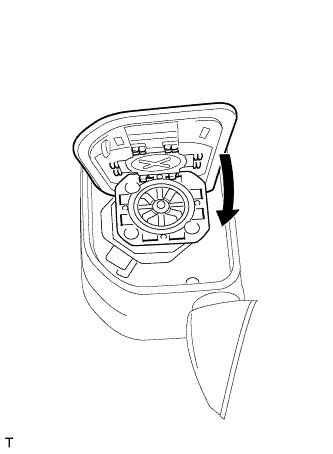 |
Engage the 2 claws on the upper side of the mirror and the 6 clips and install the mirror.
- HINT:
- Heating the mirror holder with a domestic dryer before this procedure makes the work easier.
Install the outer rear view mirror with the 3 bolts.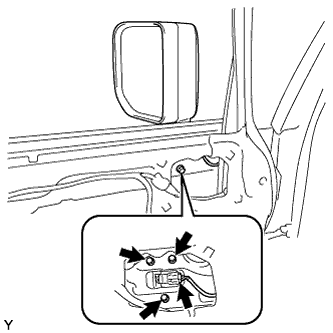
- Torque:
- 8.0 N*m{ 82 kgf*cm , 71 in.*lbf }
Connect the connector.
| 15. INSTALL FRONT NO. 2 DOOR SERVICE HOLE COVER |
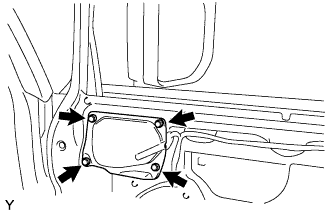 |
Install the front No. 2 door service hole cover with the 4 screws.
| 16. INSTALL FRONT DOOR TRIM BOARD SUB-ASSEMBLY |
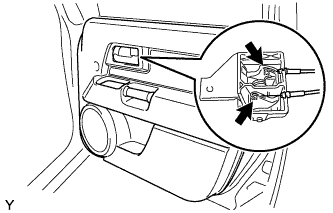 |
Connect the front door lock remote control cable and front door inside locking cable.
Engage the 10 clips and install the front door trim board.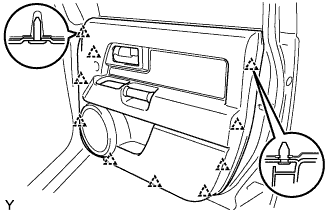
Tighten the 2 screws.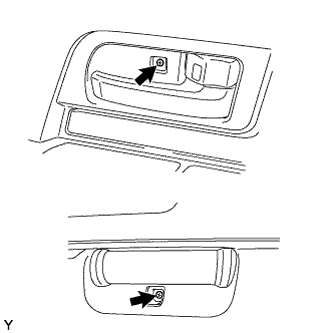
for LH side: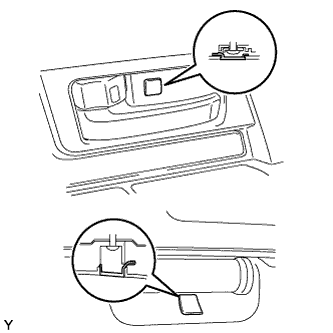
Close the 2 covers.
for RH side: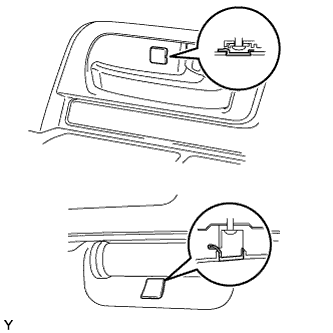
Close the 2 covers.
| 17. INSTALL FRONT ARMREST BASE UPPER PANEL |
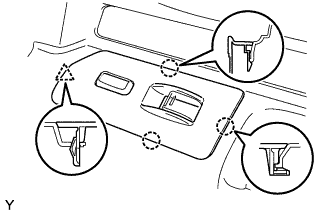 |
Connect the connector.
Engage the 3 claws and clip and install the front armrest base upper panel.
| 18. CONNECT CABLE TO NEGATIVE BATTERY TERMINAL |
- Torque:
- 3.9 N*m{ 40 kgf*cm , 35 in.*lbf }