REMOVAL
Removal / installation · Vehicles built Aug 2013 – Jul 2014
Versions by build date: Jul 2007 – Jul 2009 Aug 2009 – Oct 2010 Nov 2010 – Jul 2013 Aug 2013 – Jul 2014 from Aug 2014
| 1. REMOVE NO. 1 ENGINE UNDER COVER SUB-ASSEMBLY |

Remove the 4 bolts.
Unhook the engine under cover from the frame as shown in the illustration.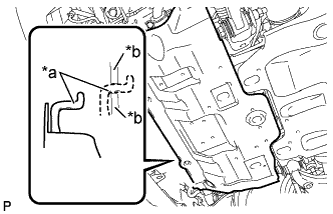

Text in Illustration *a
Hook
*b
Frame
| 2. DRAIN ENGINE COOLANT |
- CAUTION:
- Do not remove the radiator cap sub-assembly while the engine and radiator assembly are still hot. Pressurized, hot engine coolant and steam may be released and cause serious burns.
Remove the service hole cover from the engine under cover.
Install a vinyl hose to the radiator drain cock on the radiator assembly side.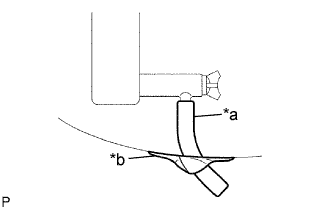
Text in Illustration *a
Vinyl Hose
*b
Tape
Fix the vinyl hose with tape.
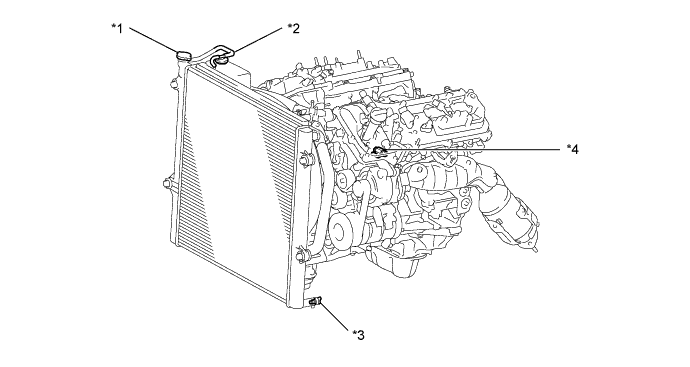
Text in Illustration *1
Radiator Cap Sub-assembly
*2
Radiator Reserve Tank Cap Sub-assembly
*3
Radiator Drain Cock Plug
*4
Cylinder Block Drain Cock Plug
Loosen the radiator drain cock plug.
Remove the radiator cap sub-assembly and drain the engine coolant.
- HINT:
- Collect the engine coolant in a container and dispose of it according to the regulations in your area.
Loosen the cylinder block drain cock plug and drain the engine coolant from the engine.
- NOTICE:
- If engine coolant is not drained from the radiator drain cock plug, cylinder block drain cock plug and radiator reservoir, clogging in the radiator assembly or engine coolant leakage from the seal of water pump may result.
| 3. REMOVE V-BANK COVER |
Raise the front of the V-bank cover to disengage the 2 pins.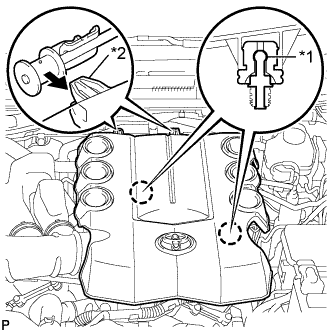
Remove the 2 V-bank cover hooks from the bracket.
Remove the V-bank cover.
Text in Illustration *1
Pin
*2
Hook
| 4. DISCONNECT NO. 2 RADIATOR HOSE |
Disconnect the radiator hose.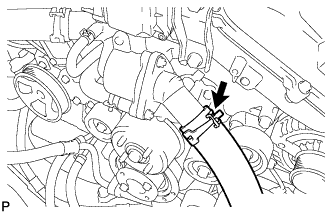
| 5. REMOVE WATER INLET WITH THERMOSTAT |
- HINT:
- If the thermostat was not installed, cooling efficiency would decrease. Even if the engine tends to overheat, do not remove the thermostat.
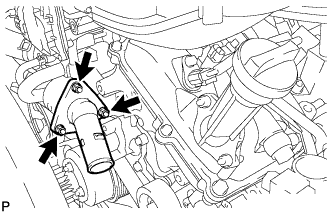
Remove the 3 nuts, water inlet with thermostat and gasket.