 |
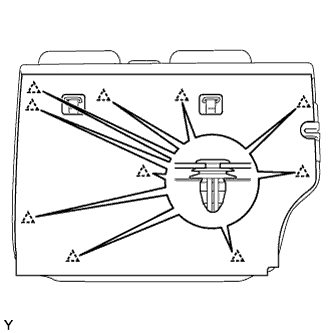
Pull the rear seatback lock release button and tilt the rear seatback forward.
QUARTER WINDOW GLASS > REMOVAL |
| 1. DISCONNECT CABLE FROM NEGATIVE BATTERY TERMINAL |
| 2. REMOVE REAR SEATBACK BOARD CARPET ASSEMBLY RH |
|
Pull the rear seatback lock release button and tilt the rear seatback forward.
Disengage the 10 clips and remove the rear seatback board carpet.
| 3. REMOVE REAR SEATBACK ASSEMBLY RH |
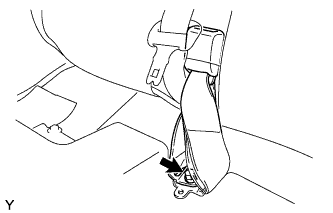 |
Pull up the rear seatback.
Remove the bolt and the anchor plate of the rear center seat outer belt.
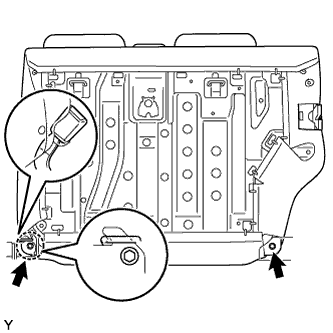 |
Remove the rear seat inner belt from the rear seatback holder.
Pull the rear seatback lock release button and tilt the rear seatback forward.
Remove the 2 bolts.
Disengage the hook and remove the rear seatback.
| 4. REMOVE REAR SEATBACK BOARD CARPET ASSEMBLY LH |
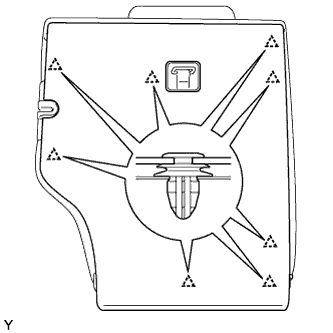 |
Pull the rear seatback lock release button and tilt the rear seatback forward.
Disengage the 8 clips and remove the rear seatback board carpet.
| 5. REMOVE REAR SEATBACK ASSEMBLY LH |
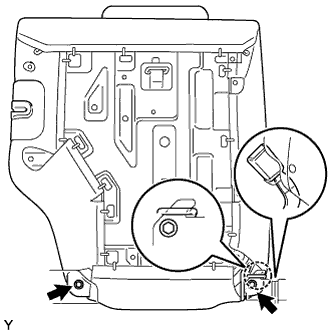 |
Remove the rear center seat inner belt from the rear seatback holder.
Remove the 2 bolts.
Disengage the hook and remove the rear seatback.
| 6. REMOVE REAR FLOOR BOARD |
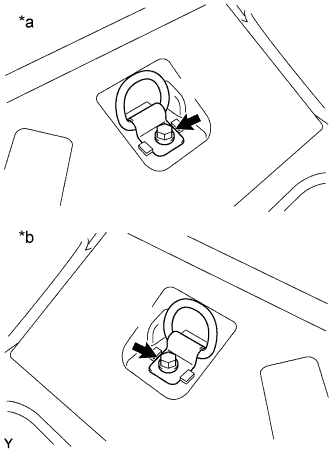 |
Remove the bolt and the luggage hold belt striker.
| *a | for RH Side |
| *b | for LH Side |
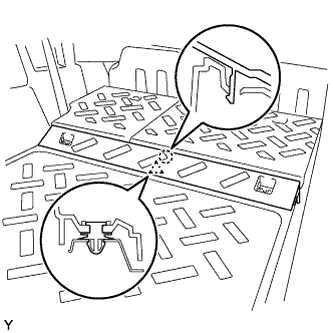 |
Disengage the clip and the claw and remove the rear floor board.
| 7. REMOVE REAR FLOOR MAT SUPPORT PLATE |
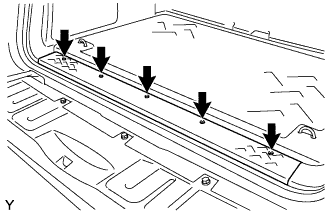 |
Remove the 5 screws.
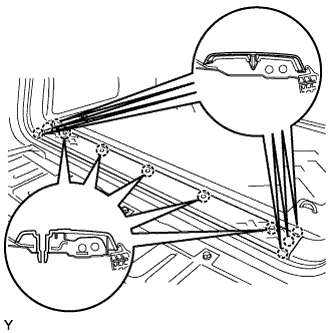 |
Disengage the 11 claws and remove the rear floor mat support plate.
| 8. REMOVE REAR FLOOR MAT ASSEMBLY |
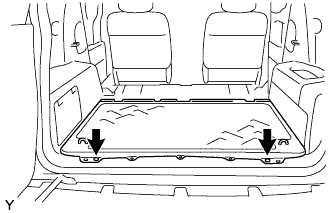 |
Using a clip remover, remove the 2 clips and the rear floor mat.
| 9. REMOVE LUGGAGE HOLD BELT STRIKER ASSEMBLY |
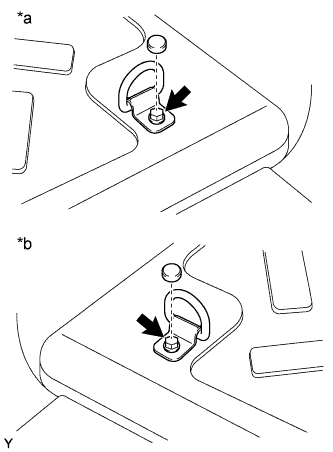 |
| *a | for RH Side |
| *b | for LH Side |
Remove the cap.
Remove the bolt and the luggage hold belt striker.
| 10. REMOVE FRONT DOOR SCUFF PLATE RH |
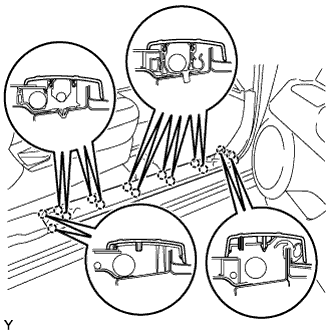 |
Disengage the 14 claws and remove the front door scuff plate.
| 11. REMOVE FRONT DOOR SCUFF PLATE LH |
| 12. REMOVE REAR DOOR SCUFF PLATE RH |
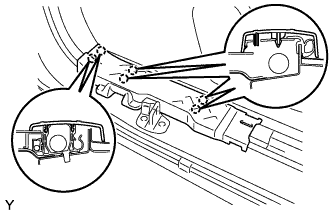 |
Disengage the 6 claws and remove the access door scuff plate.
| 13. REMOVE REAR DOOR SCUFF PLATE LH |
| 14. REMOVE FRONT DOOR OPENING TRIM WEATHERSTRIP RH |
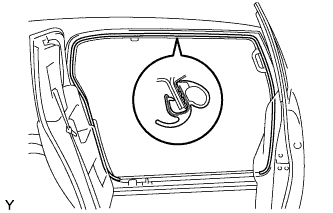 |
Remove the front door opening trim weatherstrip.
| 15. REMOVE FRONT DOOR OPENING TRIM WEATHERSTRIP LH |
| 16. REMOVE DECK SIDE GARNISH (w/ Woofer) |
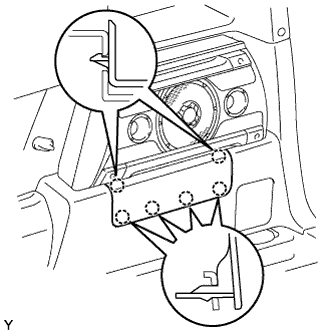 |
Disengage the 6 claws and remove the rear deck side garnish.
| 17. REMOVE SPEAKER MOUNTING COVER (w/ Woofer) |
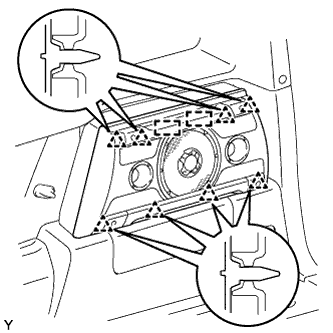 |
Disengage the 8 clips and 2 guides and remove the speaker mounting cover.
| 18. REMOVE AMPLIFIER BOX SPEAKER ASSEMBLY (w/ Woofer) |
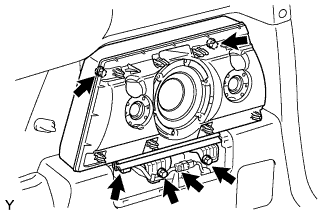 |
Disconnect the connectors.
Remove the 4 bolts and the amplifier box speaker.
| 19. REMOVE PACKAGE HOLDER NET HOOK |
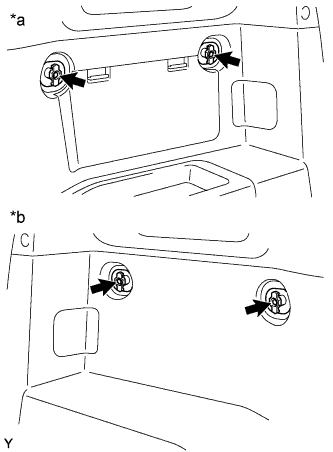 |
| *a | for RH Side without Woofer |
| *b | for LH Side |
Remove the screw and the package holder net hook.
| 20. REMOVE QUARTER TRIM POCKET TRAY (w/o Woofer) |
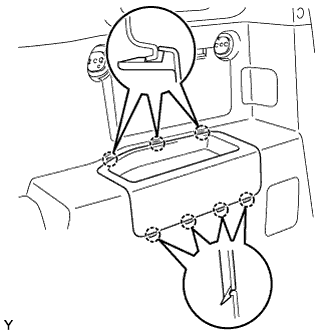 |
Disengage the 7 claws and remove the quarter trim pocket tray.
| 21. REMOVE SIDE TRIM COVER (w/o Woofer) |
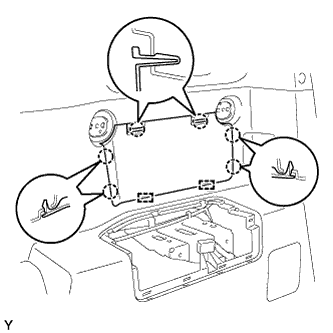 |
Disengage the 6 claws and the 2 guides remove the side trim cover.
| 22. REMOVE QUARTER TRIM POCKET (w/o Woofer) |
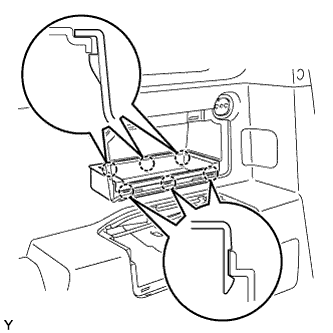 |
Disengage the 6 claws and remove the quarter trim pocket.
| 23. REMOVE LAP BELT OUTER ANCHOR COVER |
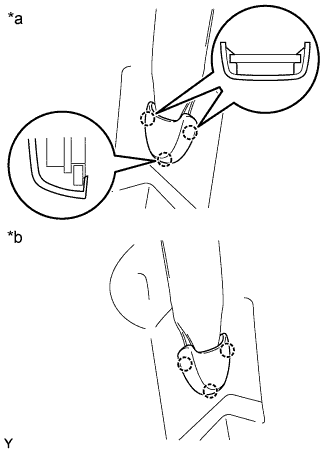 |
| *a | for RH Side |
| *b | for LH Side |
Disengage the 3 claws and remove the lap belt outer anchor cover.
| 24. REMOVE REAR SEAT OUTER BELT ASSEMBLY RH |
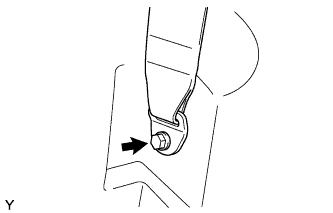 |
Remove the bolt and the anchor plate.
| 25. REMOVE REAR SEAT OUTER BELT ASSEMBLY LH |
| 26. REMOVE REAR DECK TRIM COVER (w/ Power Outlet Socket) |
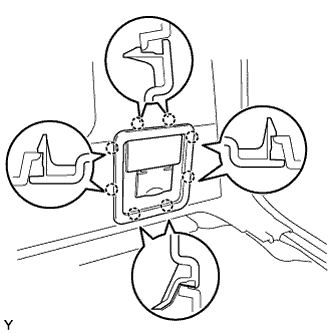 |
Disengage the 8 claws and remove the rear deck trim cover.
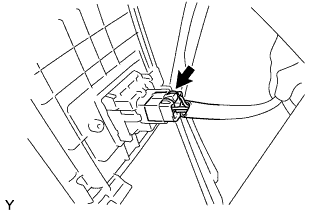 |
Disconnect the power outlet connector.
| 27. REMOVE DECK TRIM SIDE PANEL ASSEMBLY RH |
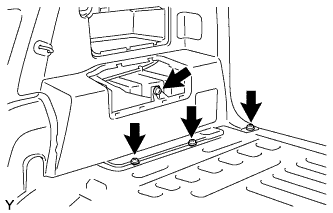 |
Remove the 3 screws and bolt.
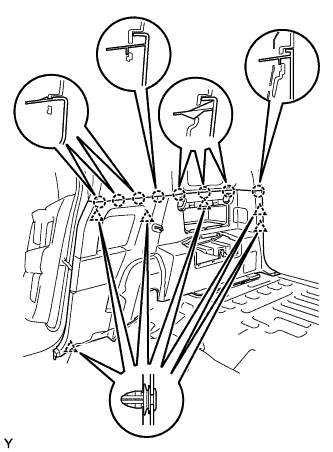 |
Disengage the 6 clips and the 8 claws and remove the deck trim side panel.
| 28. REMOVE DECK TRIM SIDE PANEL ASSEMBLY LH |
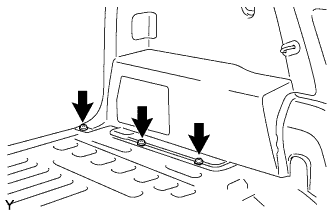 |
Remove the 3 screws.
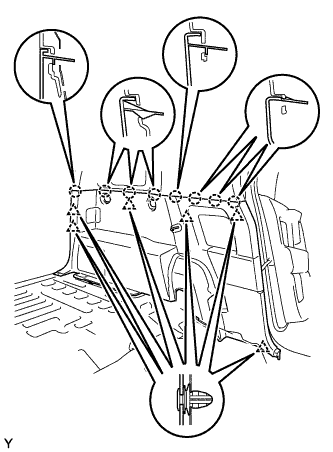 |
Disengage the 6 clips and the 8 claws and remove the deck trim side panel.
| 29. REMOVE ROOF SIDE INNER GARNISH RH |
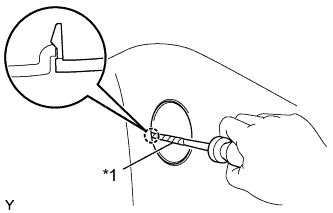 |
Using a screwdriver with its tip wrapped in protective tape, disengage the claw and open the cover.
| *1 | Protective Tape |
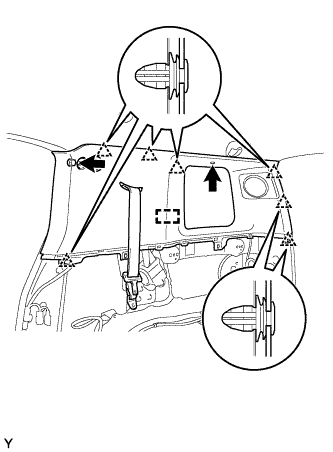 |
Remove the bolt and the clip.
Disengage the 7 clips and the guide and remove the roof side inner garnish.
Pass the rear seat outer belt through the slit in the roof side inner garnish.
| 30. REMOVE ROOF SIDE INNER GARNISH LH |
| 31. REMOVE QUARTER WINDOW GLASS |
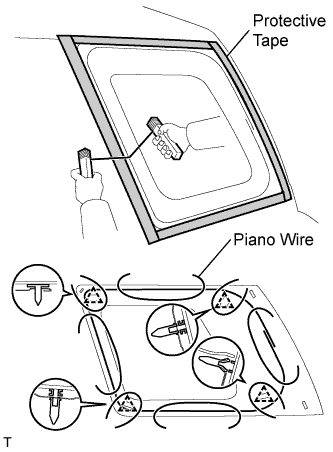 |
Apply protective tape to the outer circumference of the quarter window, as shown in the illustration.
From the interior, insert piano wires between the vehicle body and quarter window, as shown in the illustration.
Tie objects that can serve as handles (for example, wooden blocks) to all wire ends.
Cut through the adhesive by pulling the piano wire around the quarter window.