REAR DOOR > REASSEMBLY |
| 1. INSTALL REAR DOOR GLASS |
| 2. INSTALL ACCESS DOOR GLASS OUTER WEATHERSTRIP |
| 3. INSTALL ACCESS DOOR OUTSIDE MOULDING SUB-ASSEMBLY |
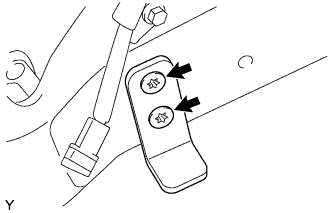
| 4. INSTALL ACCESS PANEL LOWER LOCK STOP |
|
Using a T40 "TORX" socket wrench, install the access panel lower lock stop with the 2 screws.
| 5. INSTALL ACCESS PANEL WEATHERSTRIP |
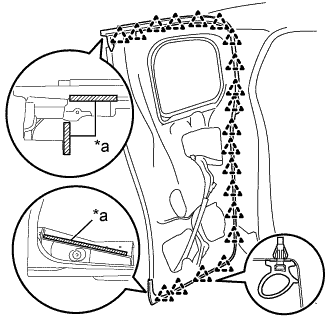 |
Engage the 20 clips and install a new access panel weatherstrip.
| *a | Double-sided Tape |
Apply though pressure to the sections with double-sided tape.
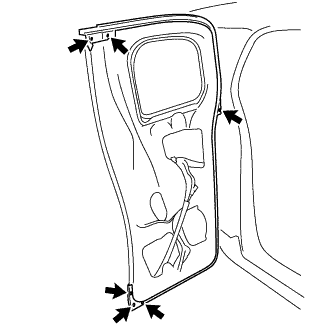 |
Install the 6 clips.
| 6. INSTALL ACCESS PANEL CHECK ASSEMBLY |
Apply MP grease to the sliding areas of the access panel check assembly.
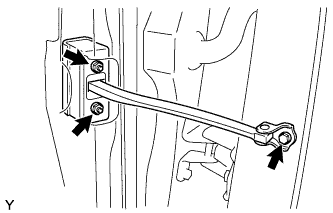 |
Install the access panel check assembly onto the door panel with the 2 nuts.
Apply adhesive to the threads of the bolt.
Install the access panel check assembly onto the body panel with the bolt.
| 7. INSTALL REAR DOOR OPENING TRIM |
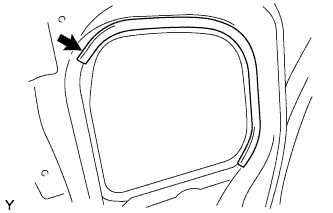 |
Install the rear door opening trim.
| 8. INSTALL REAR DOOR PANEL PROTECTOR |
Using a piece of cloth, clean the attachment surface.
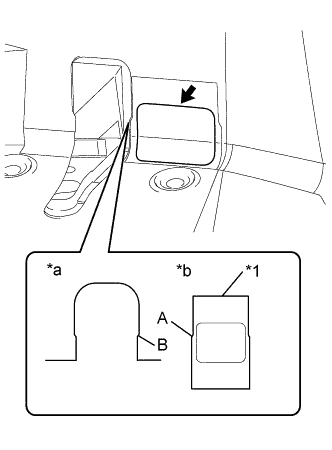 |
Align the edge A of the application tape with the edge B of the rear door panel, and install a new rear door panel protector.
| *1 | Application Tape |
| *a | Rear Door Panel |
| *b | Rear Door Panel Protector |
Remove the application tape from the rear door panel protector.
| 9. INSTALL ACCESS PANEL LOCK STRIKER PLATE ASSEMBLY |
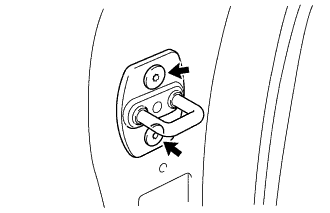 |
Using a T40 "TORX" socket wrench, install the access panel lock striker plate assembly with the 2 screws.
| 10. INSTALL FRONT DOOR COURTESY SWITCH |
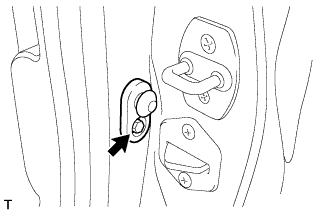 |
Connect the connector.
Install the front door courtesy switch with the bolt.
| 11. INSTALL ACCESS PANEL LOCK CANCEL LEVER ASSEMBLY |
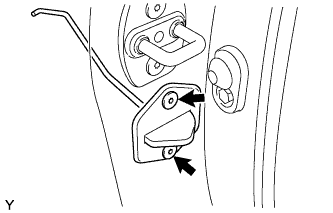 |
Using a T30 "TORX" socket wrench, install the access panel lock cancel lever assembly with the 2 screws.
| 12. INSTALL ACCESS PANEL LOCK REMOTE CONTROL ASSEMBLY |
Apply MP grease to the sliding and rotating areas of the access panel lock remote control assembly.
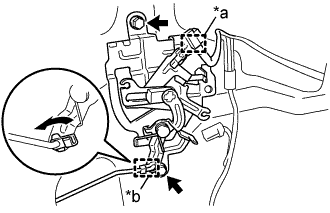 |
Install the access panel lock remote control assembly with the 2 bolts.
| *a | Clamp |
| *b | Snap |
Connect the rod and engage the snap.
Engage the clamp.
| 13. INSTALL ACCESS PANEL LOWER LOCK ASSEMBLY |
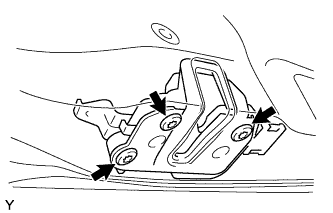 |
Install the access panel lower lock onto the rear door.
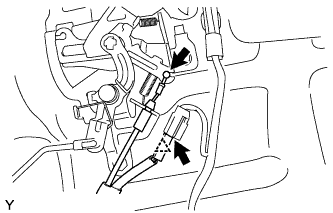 |
Connect the connector, connector clamp and access panel lock control cable.
| 14. INSTALL ACCESS PANEL UPPER LOCK ASSEMBLY |
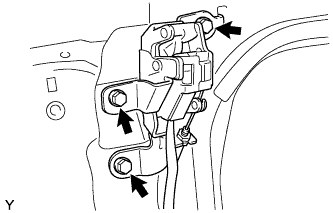 |
Install the access panel upper lock with the 3 bolts.
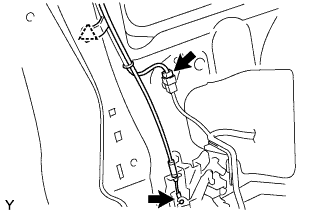 |
Connect the connector, harness clamp and access panel lock control cable.
| 15. INSTALL ACCESS PANEL INSIDE HANDLE SUB-ASSEMBLY |
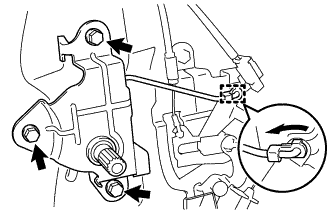 |
Install the access panel inside handle sub-assembly with the 3 bolts.
Connect the rod and engage the snap.
| 16. INSTALL FRONT SHOULDER BELT ANCHOR ADJUSTER ASSEMBLY |
Insert the hook into the body hole and provisionally install the shoulder belt anchor adjuster with the 2 bolts.
Tighten the upper bolt and then the lower bolt.
| 17. INSTALL FRONT SEAT OUTER BELT ASSEMBLY |
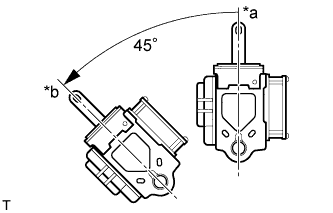 |
Check the angle of inclination required to lock the retractor.
| *a | Unlock |
| *b | Lock |
Gently incline the retractor from its initial position. Check that the belt does not lock when the retractor is inclined 15° or less in any direction. Also, check that the belt locks when the inclination of the retractor is 45° or more.
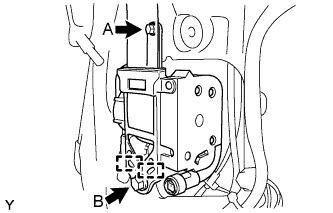 |
Hook the lower stay of the retractor onto the 2 body hooks and provisionally install the retractor with the 2 bolts.
Tighten bolt A and then bolt B.
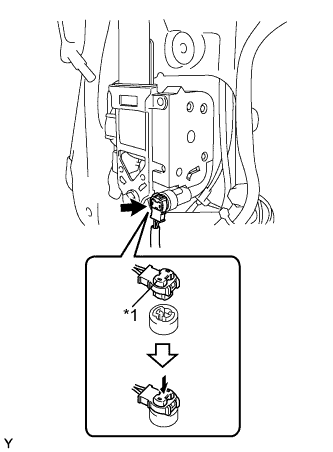 |
Connect the pretensioner connector.
| *1 | Locking Button |
Lock the locking button of the pretensioner connector.
Install the through anchor with the nut.
Make sure that the shoulder anchor rotates smoothly.
Check that the ELR locks.
With the belt installed, check that the belt locks when it is pulled out quickly.
If the operation is not as specified, replace the front seat outer belt.
| 18. INSTALL CENTER PILLAR UPPER GARNISH |
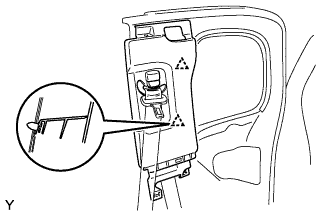 |
Engage the 2 clips and install the center pillar upper garnish.
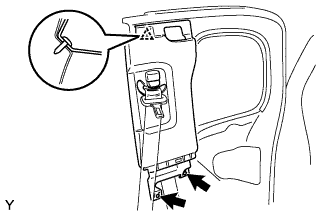 |
Install the 2 screws.
Install the clip.
| 19. INSTALL REAR DOOR TRIM BRACKET |
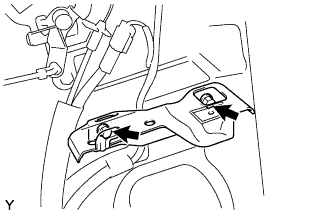 |
Install the rear door trim bracket with the 2 screws.
| 20. INSTALL REAR DOOR TRIM BOARD SUB-ASSEMBLY |
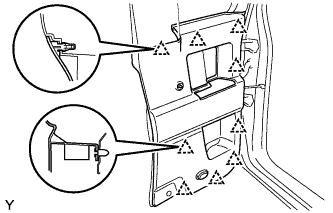 |
Engage the 9 clips and install the rear door trim board.
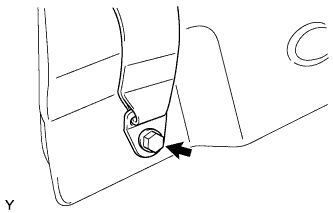 |
Install the front seat belt outer (floor side) with the bolt.
| 21. CONNECT FRONT SEAT OUTER BELT ASSEMBLY |
|
Connect the front seat outer belt assembly with the bolt.
| 22. INSTALL NO. 1 CUP HOLDER |
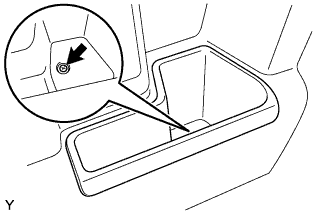 |
Install the No. 1 cup holder with the screw.
| 23. INSTALL REAR DOOR INSIDE HANDLE SUB-ASSEMBLY |
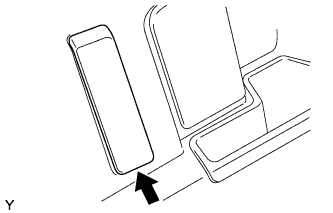 |
Install the rear door inside handle with the snap ring onto the access panel inside handle.
| 24. INSTALL LAP BELT OUTER ANCHOR COVER |
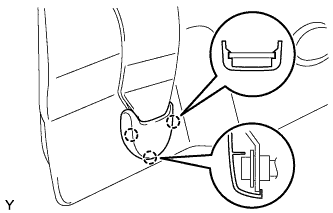 |
Engage the 3 claws and install the lap belt outer anchor cover.
| 25. INSTALL ACCESS PANEL REAR WEATHERSTRIP |
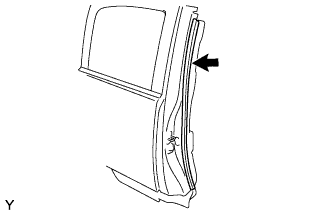 |
Install the access panel rear weatherstrip.