INPUT SHAFT > REASSEMBLY |
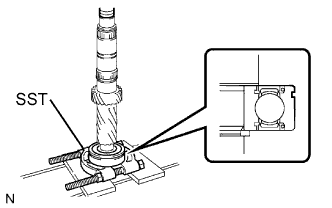
| 1. INSTALL INPUT SHAFT FRONT BEARING |
|
Using SST and a press, install the input shaft front bearing onto the input shaft.
| 2. INSTALL INPUT SHAFT FRONT BEARING SNAP RING |
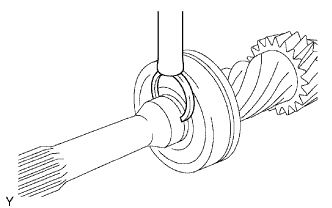 |
Select a snap ring that will allow minimum axial play.
| Part No. | Thickness: mm (in.) | Mark |
| 90520-31026 | 2.65 to 2.70 (0.1043 to 0.1063) | A |
| 90520-31027 | 2.70 to 2.75 (0.1063 to 0.1083) | B |
| 90520-31028 | 2.75 to 2.80 (0.1083 to 0.1102) | C |
| 90520-31029 | 2.80 to 2.85 (0.1102 to 0.1122) | D |
| 90520-31030 | 2.85 to 2.90 (0.1122 to 0.1142) | E |
| 90520-31031 | 2.90 to 2.95 (0.1142 to 0.1161) | F |
Using a brass bar and hammer, install the snap ring onto the input shaft.
| 3. INSTALL NO. 2 TRANSMISSION CLUTCH HUB |
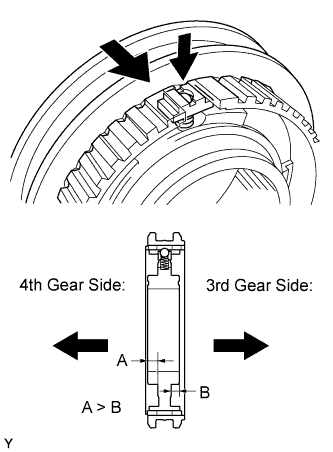 |
Apply a light coat of gear oil to the sleeve and hub.
Install the clutch hub sleeve onto the No. 2 clutch hub.
Put the ball into the keyhole from the bottom.(*1)
Put the spring under the ball.(*2)
Insert the ball and spring into the No. 2 clutch hub while attached onto the key.(*3)
| 4. INSTALL NO. 3 TRANSMISSION CLUTCH HUB |
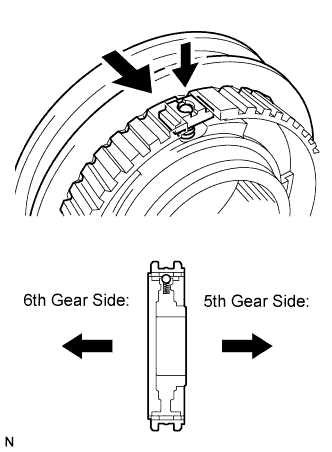 |
Apply a light coat of gear oil to the sleeve and hub.
Install the clutch hub sleeve onto the No. 3 clutch hub.
Put the ball into the keyhole from the bottom.(*1)
Put the spring under the ball.(*2)
Insert the ball and spring into the No. 3 clutch hub while attached onto the key.(*3)
| 5. INSTALL 4TH GEAR NEEDLE ROLLER BEARING |
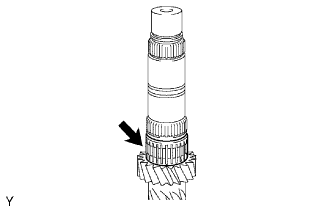 |
Coat the 4th gear needle roller bearing with gear oil, then install it onto the input shaft.
| 6. INSTALL 4TH GEAR |
Coat the 4th gear and No. 3 synchronizer ring with gear oil, then install them onto the input shaft.
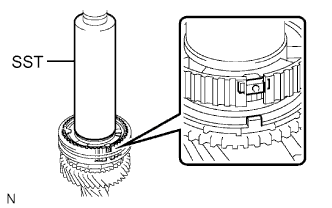 |
Using SST and a press, install the No. 2 clutch hub onto the input shaft.
Install the clutch hub and confirm that the gear and synchronizer ring move smoothly.
| 7. INSTALL CLUTCH HUB NO.2 SETTING SHAFT SNAP RING |
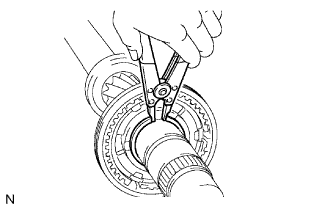 |
Select a snap ring that will allow minimum axial play.
| Part No. | Thickness: mm (in.) | Mark |
| 90520-42012 | 1.77 to 1.82 (0.0697 to 0.0717) | A |
| 90520-42013 | 1.82 to 1.87 (0.0717 to 0.0736) | B |
| 90520-42014 | 1.87 to 1.92 (0.0736 to 0.0756) | C |
| 90520-42015 | 1.92 to 1.97 (0.0756 to 0.0776) | D |
| 90520-42016 | 1.97 to 2.02 (0.0776 to 0.0795) | E |
| 90520-42017 | 2.02 to 2.07 (0.0795 to 0.0815) | F |
| 90520-42018 | 2.07 to 2.12 (0.0815 to 0.0835) | G |
Using a snap ring expander, install the snap ring onto the input shaft.
| 8. INSTALL NO. 2 SYNCHRONIZER RING SET |
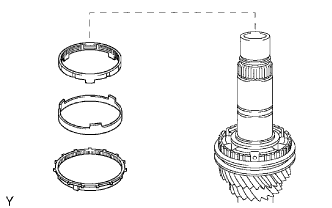 |
Coat the No. 2 synchronizer ring set with gear oil, then install it onto the input shaft.
| 9. INSTALL SPACER |
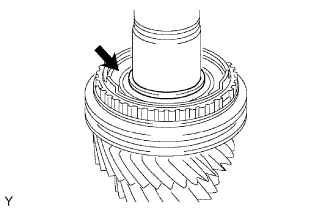 |
Coat the spacer with gear oil, and install it onto the input shaft.
| 10. INSTALL 3RD GEAR NEEDLE ROLLER BEARING |
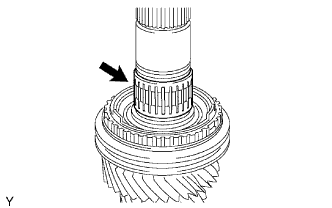 |
Coat the 3rd gear needle roller bearing with gear oil, and install it onto the input shaft.
| 11. INSTALL STRAIGHT PIN |
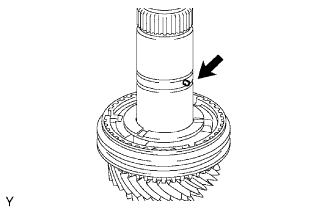 |
Install the straight pin into the input shaft.
| 12. INSTALL 3RD GEAR |
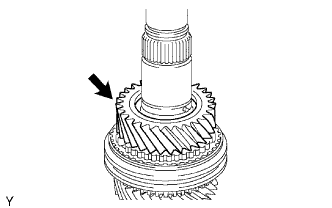 |
Coat the 3rd gear with gear oil, and install it onto the input shaft.
| 13. INSTALL 3RD GEAR THRUST WASHER |
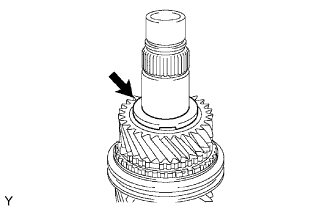 |
Coat the 3rd gear thrust washer with gear oil, and install it onto the input shaft.
| 14. INSTALL GEAR THRUST WASHER SHAFT SNAP RING |
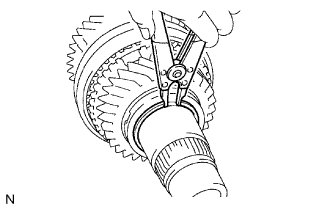 |
Select a snap ring that will allow minimum axial play.
| Part No. | Thickness: mm (in.) | Mark |
| 90520-39026 | 2.07 to 2.12 (0.0815 to 0.0835) | A |
| 90520-39027 | 2.12 to 2.17 (0.0835 to 0.0854) | B |
| 90520-39028 | 2.17 to 2.22 (0.0854 to 0.0874) | C |
| 90520-39029 | 2.22 to 2.27 (0.0874 to 0.0894) | D |
| 90520-39030 | 2.27 to 2.32 (0.0894 to 0.0913) | E |
| 90520-39031 | 2.32 to 2.37 (0.0913 to 0.0933) | F |
Using a snap ring expander, install the snap ring onto the input shaft.
| 15. INSTALL SHAFT SNAP RING |
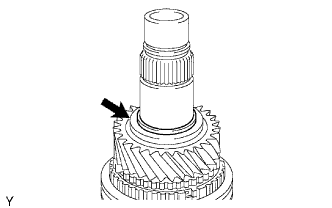 |
Coat the shaft snap ring with gear oil, and install it onto the input shaft.
| 16. INSTALL 6TH GEAR NEEDLE ROLLER BEARING |
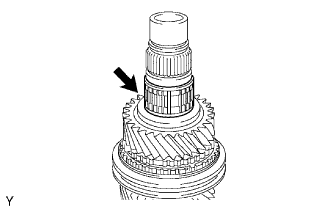 |
Coat the 6th gear needle roller bearing with gear oil, and install it onto the input shaft.
| 17. INSTALL 6TH GEAR |
 |
Install the 6th gear onto the input shaft.
Install the synchronizer ring onto the input shaft.
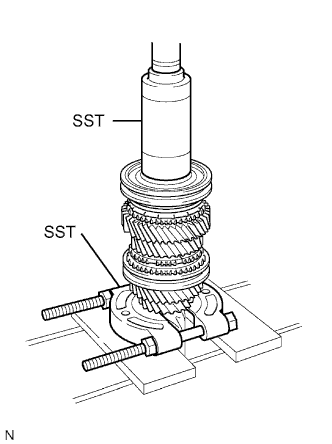
Using SST and a press, install the clutch hub onto the input shaft.
Install the clutch hub and confirm that the gear and synchronizer ring move smoothly.
| 18. INSTALL TRANSMISSION CLUTCH HUB NO.3 SHAFT SNAP RING |
 |
Select a snap ring that will allow minimum axial play.
| Part No. | Thickness: mm (in.) | Mark |
| 90520-33022 | 2.10 to 2.15 (0.0827 to 0.0847) | A |
| 90520-33023 | 2.15 to 2.20 (0.0847 to 0.0866) | B |
| 90520-33024 | 2.20 to 2.25 (0.0866 to 0.0886) | C |
| 90520-33025 | 2.25 to 2.30 (0.0886 to 0.0906) | D |
| 90520-33026 | 2.30 to 2.35 (0.0906 to 0.0925) | E |
| 90520-33027 | 2.35 to 2.40 (0.0925 to 0.0945) | F |
| 90520-33028 | 2.40 to 2.45 (0.0945 to 0.0965) | G |
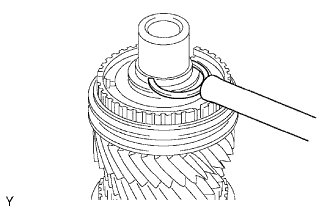
Using a brass bar and a hammer, install the snap ring onto the input shaft.
| 19. INSPECT 6TH GEAR THRUST CLEARANCE |
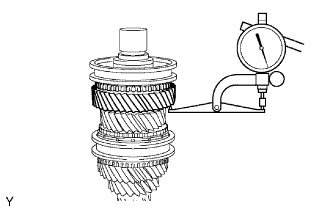 |
Using a dial indicator, measure the 6th gear thrust clearance.
| 20. INSPECT 3RD GEAR THRUST CLEARANCE |
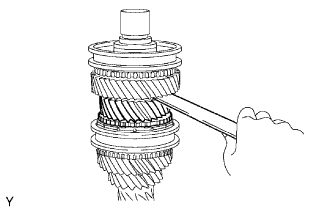 |
Using a feeler gauge, measure the 3rd gear thrust clearance.
| 21. INSPECT 4TH GEAR THRUST CLEARANCE |
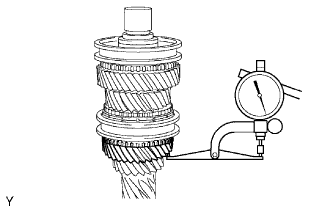 |
Using a dial indicator, measure the 4th gear thrust clearance.
| 22. INSPECT 6TH GEAR RADIAL CLEARANCE |
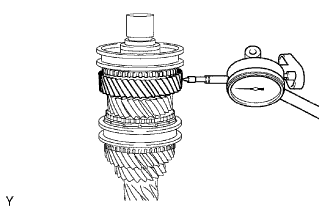 |
Using a dial indicator, measure the 6th gear radial clearance.
| 23. INSPECT 3RD GEAR RADIAL CLEARANCE |
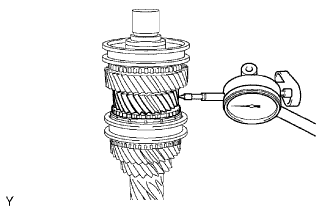 |
Using a dial indicator, measure the 3rd gear radial clearance.
| 24. INSPECT 4TH GEAR RADIAL CLEARANCE |
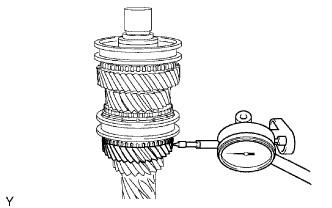 |
Using a dial indicator, measure the 4th gear radial clearance.