CLUTCH SWITCH > REMOVAL |
| 1. DISCONNECT CABLE FROM NEGATIVE BATTERY TERMINAL |
| 2. REMOVE FRONT DOOR SCUFF PLATE LH |
|
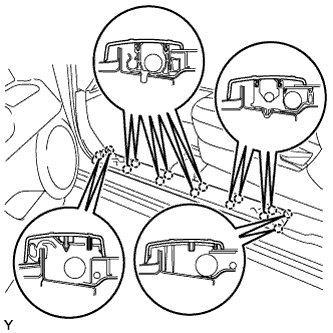
Disengage the 14 claws and remove the front door scuff plate.
| 3. REMOVE FRONT FLOOR FOOTREST |
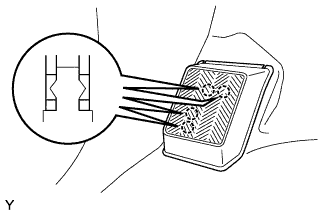 |
Disengage the 4 claws and remove the front floor footrest.
| 4. REMOVE FOOTREST CLIP |
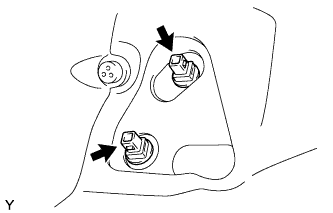 |
Remove the 2 footrest clips.
| 5. REMOVE COWL SIDE TRIM BOARD LH |
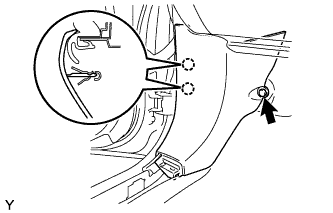 |
Remove the clip.
Disengage the 2 claws and remove the cowl side trim board.
| 6. REMOVE NO. 1 INSTRUMENT PANEL REGISTER ASSEMBLY |
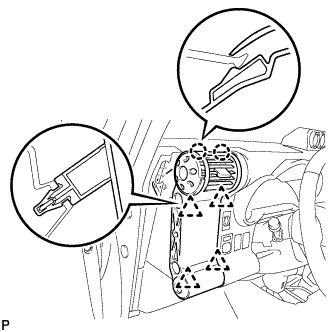 |
Disengage the 4 clips and 2 claws and remove the instrument panel register.
| 7. SEPARATE HOOD LOCK CONTROL LEVER SUB-ASSEMBLY |
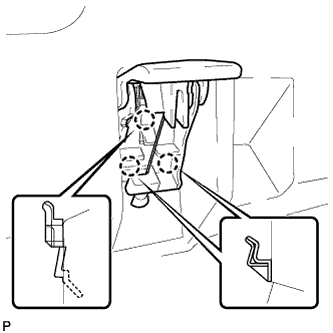 |
Disengage the 3 claws and separate the hood lock control lever.
| 8. REMOVE INSTRUMENT PANEL FINISH PLATE |
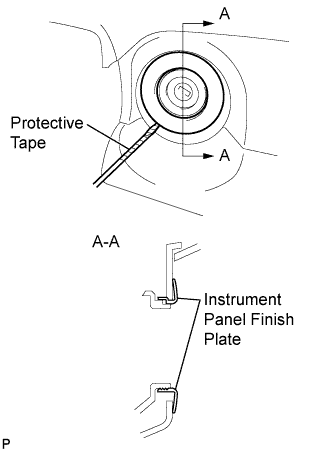 |
Using a screwdriver with its tip wrapped in protective tape, remove the instrument panel finish plate.
| 9. REMOVE LOWER INSTRUMENT PANEL FINISH PANEL SUB-ASSEMBLY LH |
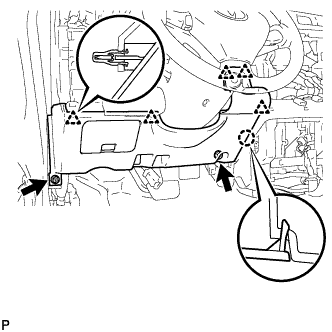 |
Remove the 2 <F> bolts.
Disengage the 5 clips and claw and remove the lower instrument panel finish panel.
Disconnect the connector.
| 10. REMOVE LOWER INSTRUMENT PANEL LH |
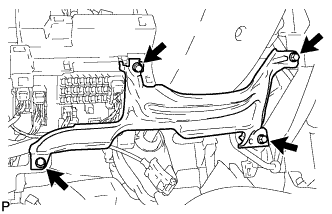 |
Remove the 4 <F> bolts and remove the lower instrument panel.
| 11. REMOVE INSTRUMENT PANEL SIDE BRACKET |
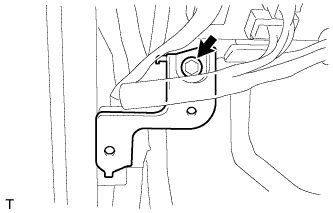 |
Remove the bolt and remove the instrument panel side bracket.
| 12. SEPARATE MAIN BODY ECU (DRIVER SIDE J/B) |
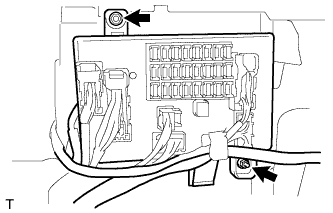 |
Remove the 2 nuts and separate the main body ECU.
| 13. REMOVE CLUTCH SWITCH ASSEMBLY |
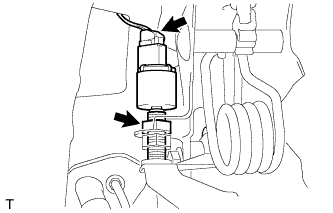 |
Disconnect the connector.
Loosen the nut and remove the clutch switch assembly.