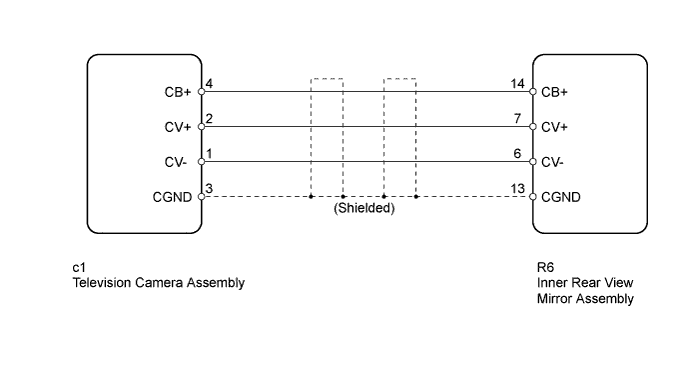
REAR VIEW MONITOR SYSTEM > Display Signal Circuit between Inner Rear View Mirror Assembly and Television Camera Assembly |
| 1.CHECK HARNESS AND CONNECTOR (INNER MIRROR - TELEVISION CAMERA) |
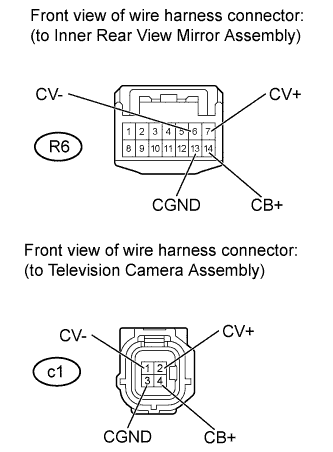 |
Disconnect the R6 inner rear view mirror assembly connector.
Disconnect the c1 television camera assembly connector.
Measure the resistance according to the value(s) in the table below.
| Tester Connection | Condition | Specified Condition |
| R6-7 (CV+) - c1-2 (CV+) | Always | Below 1 Ω |
| R6-13 (CGND) - c1-3 (CGND) | ||
| R6-14 (CB+) - c1-4 (CB+) | ||
| R6-6 (CV-) - c1-1 (CV-) | ||
| R6-7 (CV+) - Body ground | Always | 10 kΩ or higher |
| R6-13 (CGND) - Body ground | ||
| R6-14 (CB+) - Body ground | ||
| R6-6 (CV-) - Body ground |
Reconnect the inner rear view mirror assembly connector.
Reconnect the television camera assembly connector.
|
| ||||
| OK | |
 |
| 2.INSPECT INNER REAR VIEW MIRROR ASSEMBLY |
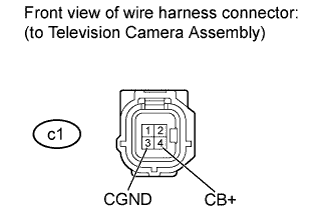 |
Disconnect the c1 television camera assembly connector.
Measure the voltage according to the value(s) in the table below.
| Tester Connection | Switch Condition | Specified Condition |
| c1-4 (CB+) - c1-3 (CGND) | Ignition switch ON, shift lever in R | 5.5 to 7.05 V |
Reconnect the television camera assembly connector.
|
| ||||
| OK | |
|
| 3.INSPECT TELEVISION CAMERA ASSEMBLY |
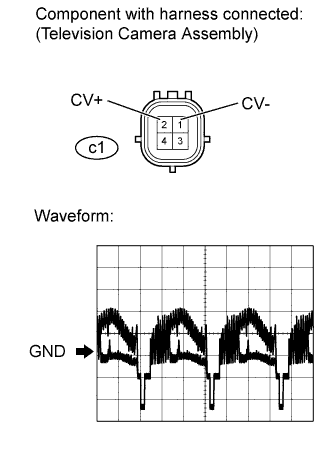 |
Using an oscilloscope, check the waveform.
| Tester Connection | c1-1 (CV-) - c1-2 (CV+) |
| Tester Range | 0.2 V/DIV., 50 μs/DIV. |
| Vehicle Condition | Ignition switch ON, shift lever in R |
|
| ||||
| OK | ||
 | ||
| ||
