 |
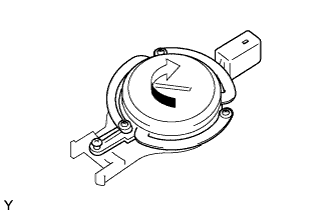
Install the roof speaker by turning it in the direction of the arrow shown in the illustration.
ROOF SPEAKER > INSTALLATION |
| 1. INSTALL ROOF SPEAKER ASSEMBLY |
|
Install the roof speaker by turning it in the direction of the arrow shown in the illustration.
Tighten the screw.
Connect the speaker connector.
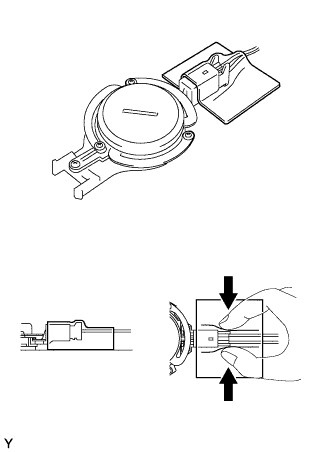 |
Cover the engaged portion of the connector and the lead line with a new hole cover, and attach them to the roof headlining securely.
| 2. INSTALL ROOF HEADLINING |
Install the roof headlining with the 4 clips.
Engage the 4 clamps.
w/ Satellite Radio:
Connect the antenna cord connector.
Engage the clamp and connect the antenna cord connector.
| 3. INSTALL PERSONAL LIGHT ASSEMBLY (w/ CRAWL) |
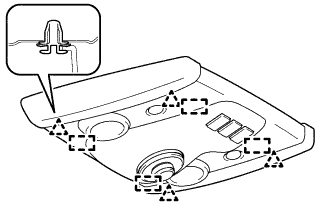 |
Install the 4 new clips to the personal light assembly.
Connect the connector.
Engage the 4 clips and 4 guides to install the personal light assembly.
| 4. INSTALL ROOM LIGHT ASSEMBLY |
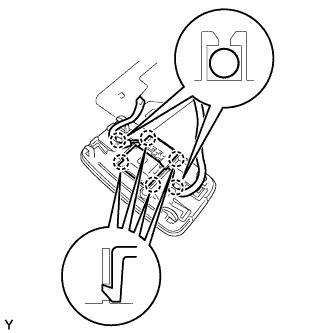 |
for Front Side:
Engage the 4 claws and install the room light switch base.
Insert the 2 wire harnesses into the 2 claws of the room light.
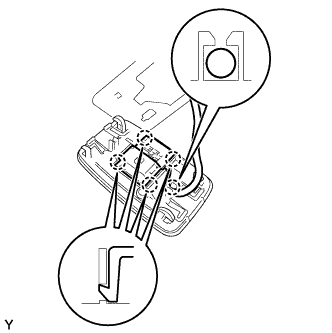 |
for Rear Side:
Engage the 4 claws and install the room light switch base.
Insert the wire harness into the claw of the room light.
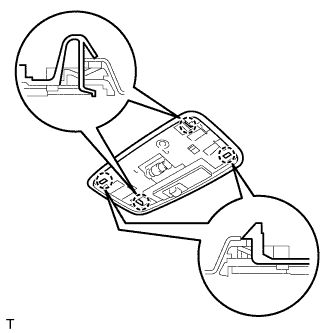 |
Engage the 4 claws and install the room light.
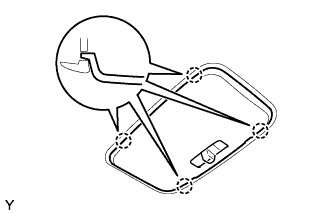 |
Engage the 4 claws and install the room light lens.
| 5. INSTALL INNER REAR VIEW MIRROR ASSEMBLY |
| 6. INSTALL VISOR HOLDER |
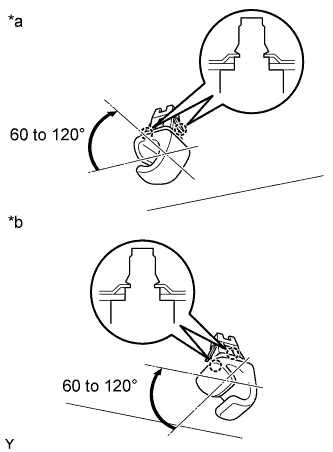 |
| *a | for RH Side |
| *b | for LH Side |
Engage the 2 claws by turning the visor holder clockwise between 60 to 120° and install the visor holder.
| 7. INSTALL VISOR ASSEMBLY RH |
Install the visor with the 2 screws.
Install the visor support shaft into the visor holder.
| 8. INSTALL VISOR ASSEMBLY LH |
| 9. INSTALL COAT HOOK |
Install the coat hook with the bolt.
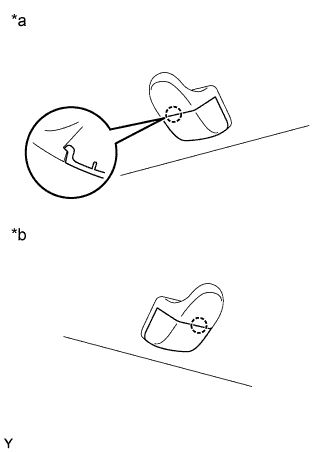 |
Engage the claw and close the cover.
| *a | for RH Side |
| *b | for LH Side |
| 10. INSTALL ROOF HEADLINING HOLE PLUG |
Engage the claw and install the roof headlining hole plug.
Install the bolt.
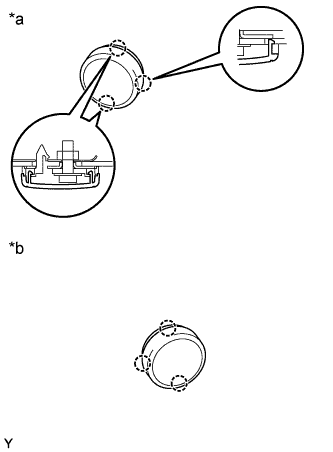 |
Engage the 3 claws and close the cover.
| *a | for RH Side |
| *b | for LH Side |
| 11. INSTALL ROOF SIDE INNER GARNISH RH |
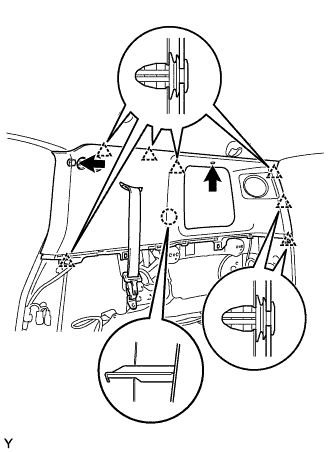 |
Pass the rear seat outer belt through the slit in the roof side inner garnish.
Engage the 7 clips and the claw and install the roof side inner garnish.
Tighten the bolt.
Install the clip.
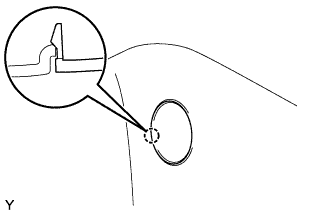 |
Engage the claw and close the cover.
| 12. INSTALL ROOF SIDE INNER GARNISH LH |
| 13. INSTALL DECK TRIM SIDE PANEL ASSEMBLY RH |
Engage the 6 clips and the 8 claws and install the deck trim side panel.
Install the 3 screws.
Install the bolt.
| 14. INSTALL DECK TRIM SIDE PANEL ASSEMBLY LH |
Engage the 6 clips and the 8 claws and install the deck trim side panel.
Install the 3 screws.
| 15. INSTALL REAR DECK TRIM COVER (w/ Power Outlet Socket) |
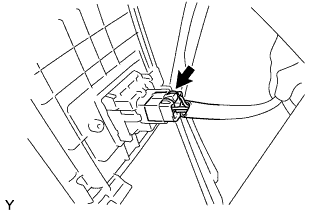 |
Connect the power outlet connector.
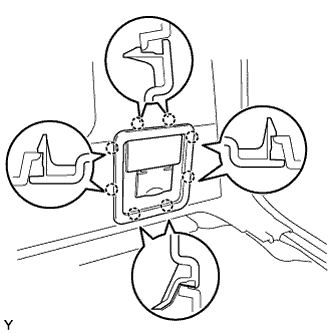 |
Engage the 8 claws and install the rear deck trim cover.
| 16. INSTALL REAR SEAT OUTER BELT ASSEMBLY RH |
Install the anchor plate with the bolt.
Make sure that the anchor plate rotates smoothly.
| 17. INSTALL REAR SEAT OUTER BELT ASSEMBLY LH |
| 18. INSTALL LAP BELT OUTER ANCHOR COVER |
Engage the 3 claws and install the lap belt outer anchor cover.
| 19. INSTALL QUARTER TRIM POCKET |
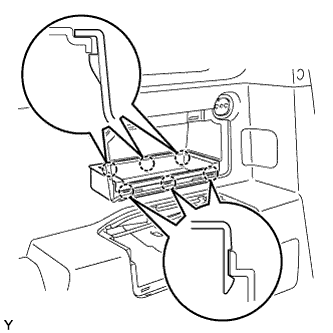 |
Engage the 6 claws and install the quarter trim pocket.
| 20. INSTALL SIDE TRIM COVER |
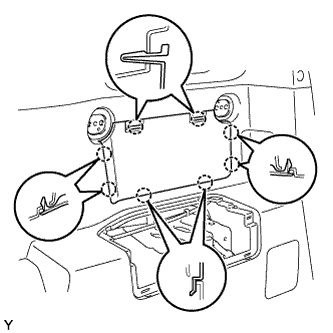 |
Engage the 8 claws and install the side trim cover.
| 21. INSTALL QUARTER TRIM POCKET TRAY |
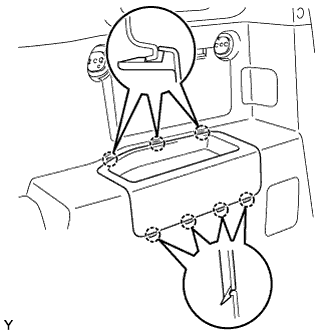 |
Engage the 7 claws and install the quarter trim pocket tray.
| 22. INSTALL PACKAGE HOLDER NET HOOK |
Install the package holder net hook with the bolt.
| 23. INSTALL FRONT PILLAR GARNISH RH |
Engage the guide and the 2 clips and install the front pillar garnish.
| 24. INSTALL FRONT PILLAR GARNISH LH |
| 25. INSTALL VISOR SUB-ASSEMBLY RH |
Engage the 2 claws and install the visor sub-assembly.
| 26. INSTALL VISOR SUB-ASSEMBLY LH |
| 27. INSTALL ASSIST GRIP ASSEMBLY |
Install the assist grip with the 2 bolts.
| 28. INSTALL ASSIST GRIP PLUG |
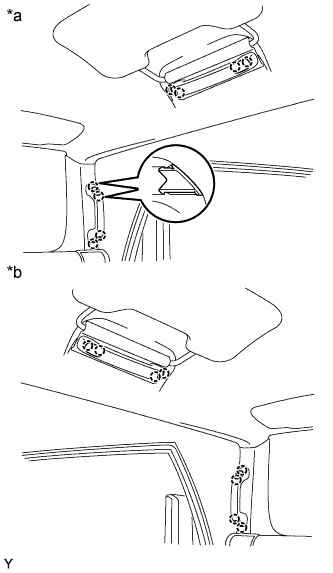 |
| *a | for RH Side |
| *b | for LH Side |
Engage the 2 claws and install the assist grip plug.
| 29. INSTALL FRONT DOOR OPENING TRIM WEATHERSTRIP RH |
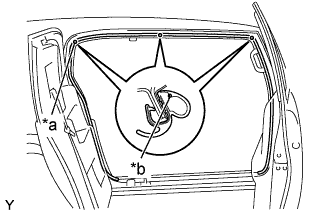 |
Align the locating marks with the paint marks first, and install the front door opening trim weatherstrip, as shown in the illustration.
| *a | Locating Mark |
| *b | Paint Mark |
| Area | Color |
| RH side | White |
| LH side | Red |
| 30. INSTALL FRONT DOOR OPENING TRIM WEATHERSTRIP LH |
| 31. INSTALL ROOF SIDE RAIL GARNISH RH |
Engage the claw and the guide install the roof side rail garnish.
Install the 2 bolts.
| 32. INSTALL ROOF SIDE RAIL GARNISH LH |
| 33. INSTALL ROOF SIDE INNER GARNISH COVER RH |
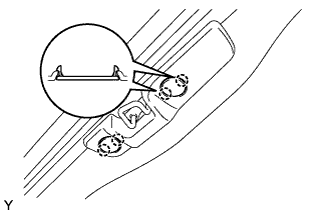 |
Engage the 2 claws and install the roof side inner garnish cover.
| 34. INSTALL ROOF SIDE INNER GARNISH COVER LH |
| 35. INSTALL COWL SIDE TRIM BOARD RH |
Engage the 2 claws and install the cowl side trim board.
Install the clip.
| 36. INSTALL COWL SIDE TRIM BOARD LH |
| 37. INSTALL FOOTREST CLIP |
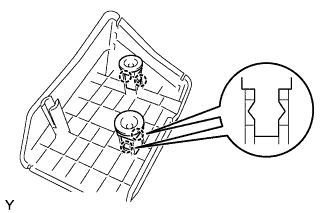 |
Engage the 2 claws and install the footrest clip.
| 38. INSTALL FRONT FLOOR FOOTREST |
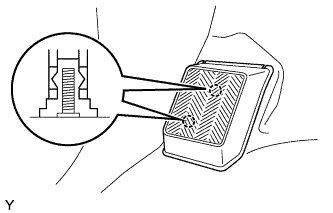 |
Engage the 2 studs and install the front floor footrest.
| 39. INSTALL ACCESS DOOR SCUFF PLATE RH |
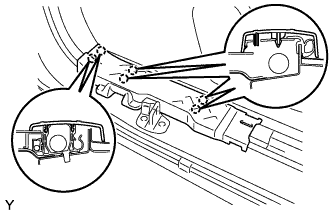 |
Engage the 6 claws and install the access door scuff plate.
| 40. INSTALL ACCESS DOOR SCUFF PLATE LH |
| 41. INSTALL FRONT DOOR SCUFF PLATE RH |
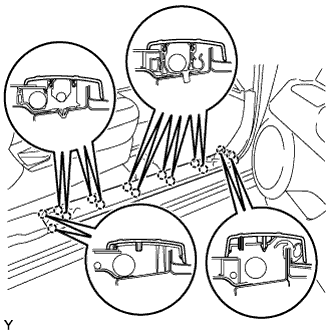 |
Engage the 14 claws and install the door scuff plate.
| 42. INSTALL FRONT DOOR SCUFF PLATE LH |
| 43. INSTALL REAR FLOOR MAT ASSEMBLY |
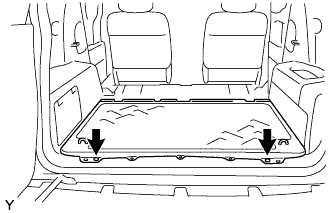 |
Install the rear floor mat with the 2 clips.
| 44. INSTALL LUGGAGE HOLD BELT STRIKER ASSEMBLY |
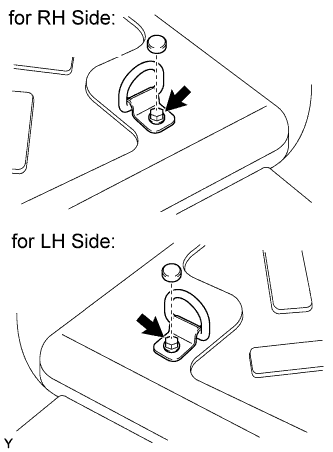 |
Install the luggage hold belt striker with the bolt.
Install the cap.
| 45. INSTALL REAR FLOOR MAT SUPPORT PLATE |
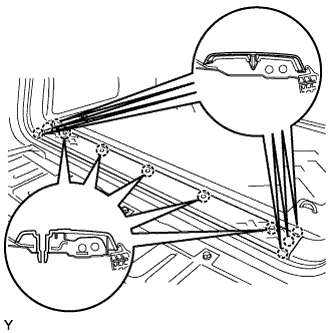 |
Engage the 11 claws and install the rear floor mat support plate.
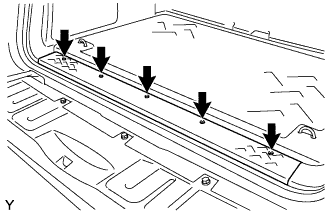 |
Tighten the 5 screws.
| 46. INSTALL REAR FLOOR BOARD |
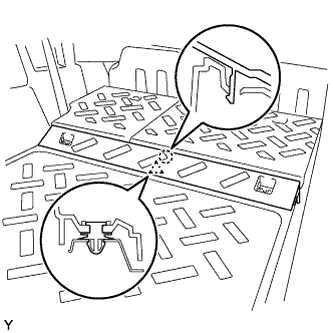 |
Engage the clip and claw and install the rear floor board.
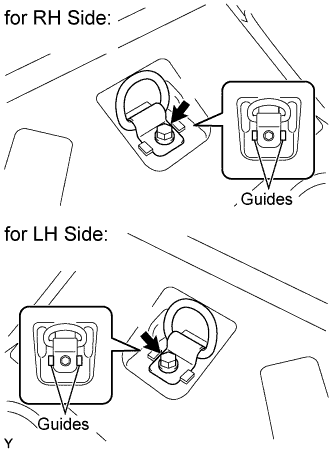 |
Install the luggage hold belt striker with the bolt.
| 47. INSTALL REAR SEATBACK ASSEMBLY RH |
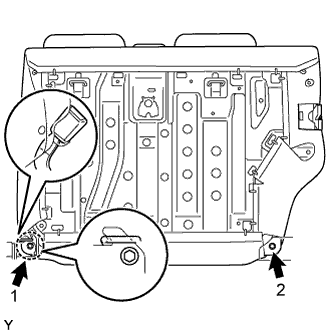 |
Engage the hook and temporarily install the rear seatback with the 2 bolts.
Tighten the 2 bolts in the sequence shown in the illustration.
Pull up the rear seatback.
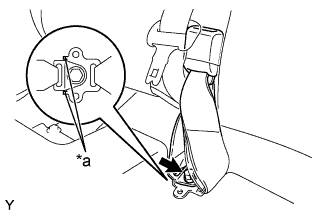 |
Install the rear seat inner belt into the rear seatback holder.
| *a | Convex |
Install the anchor plate of the rear center seat outer belt with the bolt.
| 48. INSTALL REAR SEATBACK BOARD CARPET ASSEMBLY RH |
Pull the rear seatback lock release button and tilt the rear seatback forward.
Engage the 10 clips and install the rear seatback board carpet.
Pull up the rear seatback.
| 49. INSTALL REAR SEATBACK ASSEMBLY LH |
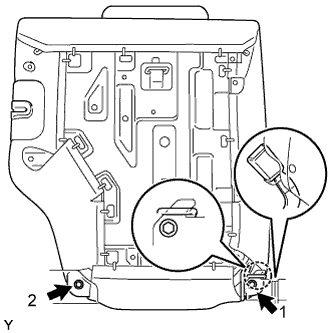 |
Engage the hook and temporarily install the rear seatback with the 2 bolts.
Tighten the 2 bolts in the sequence shown in the illustration.
Install the rear center seat inner belt into the rear seatback holder.
| 50. INSTALL REAR SEATBACK BOARD CARPET ASSEMBLY LH |
Engage the 8 clips and install the rear seatback board carpet.
Pull up the rear seatback.