Home › BODY › INTERIOR › ROOF HEADLINING

ROOF HEADLINING > REASSEMBLY

for Preparation Click here


1. INSTALL ROOF WIRE (w/ CRAWL)


  1. Apply new double-sided tape to the roof headlining along the markings of the roof headlining.
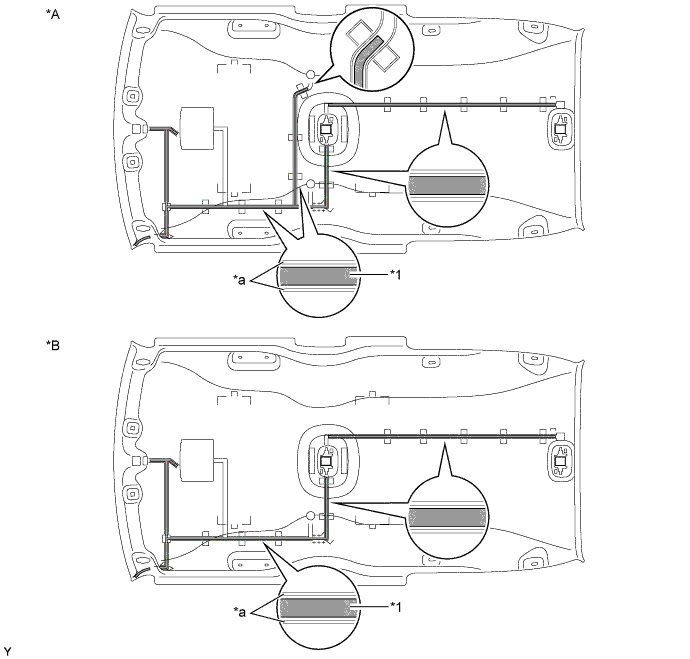

    B327681E01


    Text in Illustration 
    *A
    w/ Roof Speaker
    *B
    w/o Roof Speaker
    *1
    Double-sided Tape
    -
    -
    *a
    Marking
    -
    -

    NOTICE:
    1. Apply the tape securely in place.
    2. Do not touch the adhesive surface when applying the tape to prevent adhesion failure.
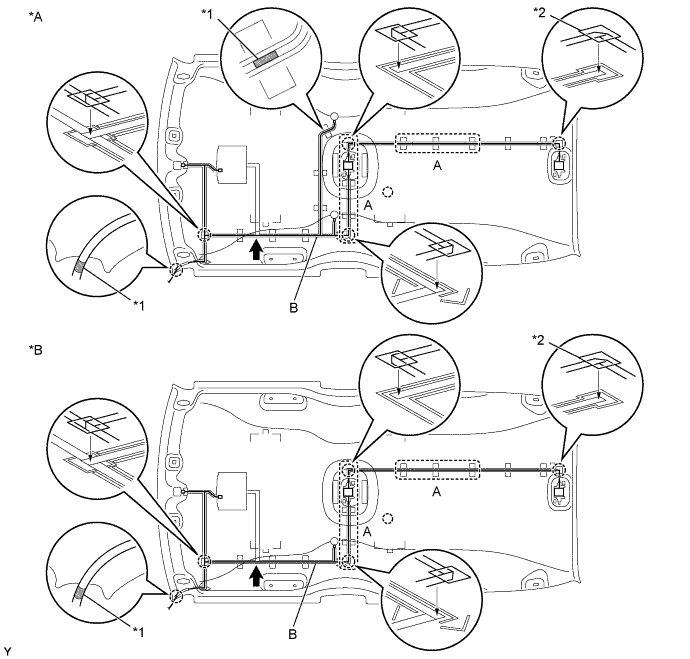


  1. Install the roof wire as shown in the illustration.


    B327682E01


    Text in Illustration 
    *A
    w/ Roof Speaker
    *B
    w/o Roof Speaker
    *1
    Marking Tape
    *2
    Fixed Tape

    NOTICE:
    1. Do not twist the flat wire harness when installing it.
    2. Securely fix the wire harness by pressing it.
    3. Securely fix the wire harness to secure a gap between the wire harness and the roof panel in part A.
    4. Securely fix the wire harness to avoid looseness in the wire harness between portion B and the marking tape.


2. INSTALL ROOF WIRE (w/o CRAWL)


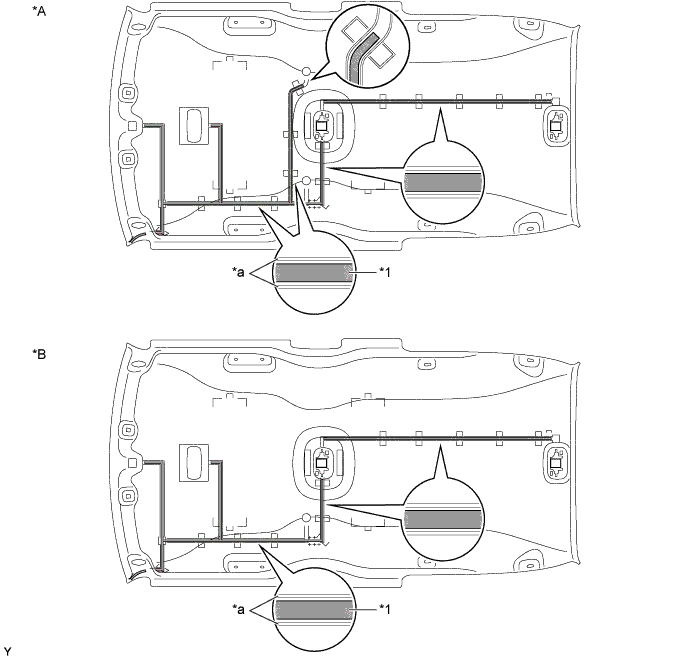
  1. Apply new double-sided tape to the roof headlining along the markings of the roof headlining.


    B328475E01


    Text in Illustration 
    *A
    w/ Roof Speaker
    *B
    w/o Roof Speaker
    *1
    Double-sided Tape
    -
    -
    *a
    Marking
    -
    -

    NOTICE:
    1. Apply the tape securely in place.
    2. Do not touch the adhesive surface when applying the tape to prevent adhesion failure.


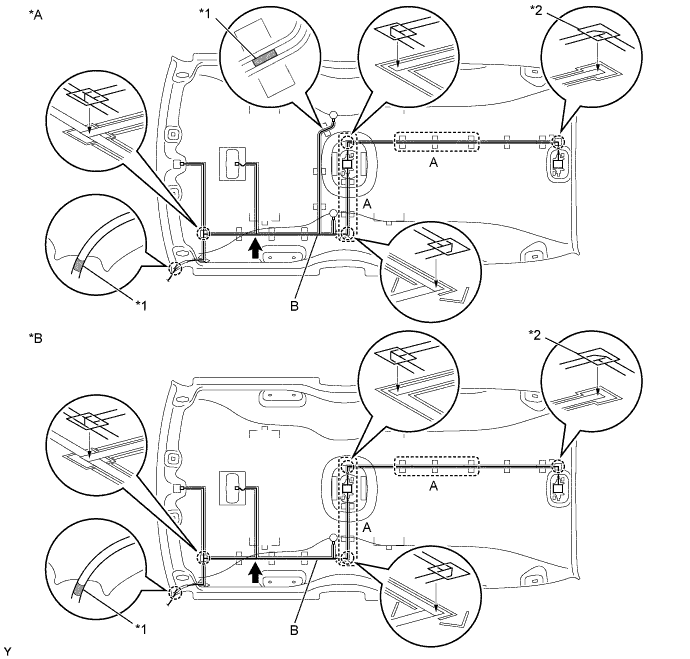
  1. Install the roof wire as shown in the illustration.


    B328476E01


    Text in Illustration 
    *A
    w/ Roof Speaker
    *B
    w/o Roof Speaker
    *1
    Marking Tape
    *2
    Fixed Tape

    NOTICE:
    1. Do not twist the flat wire harness when installing it.
    2. Securely fix the wire harness by pressing it.
    3. Securely fix the wire harness to secure a gap between the wire harness and the roof panel in part A.
    4. Securely fix the wire harness to avoid looseness in the wire harness between portion B and the marking tape.


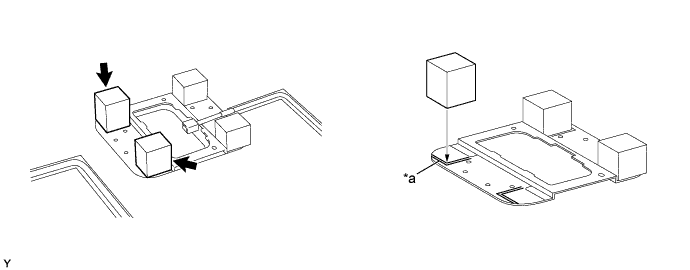
3. INSTALL ROOF HEADLINING PAD (w/o CRAWL)


  1. Align 2 new roof headlining pads with the markings of the roof headlining and install them onto the roof headlining.


    B327683E01


    Text in Illustration 
    *a
    Marking
    -
    -


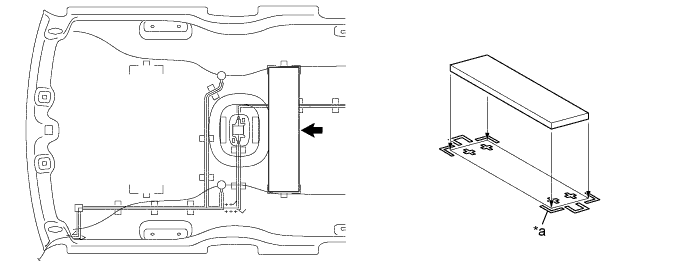
4. INSTALL NO. 2 ROOF SILENCER PAD
  1. Apply double-sided tape to the roof silencer pad.


  1. Align the roof silencer pad with the markings of the roof headlining and install them onto the roof headlining.


    B327686E01


    Text in Illustration 
    *a
    Marking
    -
    -


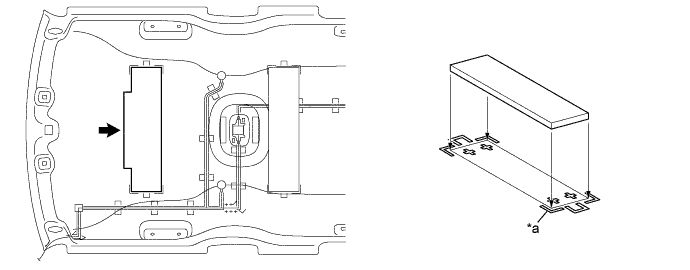
5. INSTALL ROOF SILENCER PAD
  1. Apply double-sided tape to the roof silencer pad.


  1. Align the roof silencer pad with the markings of the roof headlining and install them onto the roof headlining.


    B327687E01


    Text in Illustration 
    *a
    Marking
    -
    -


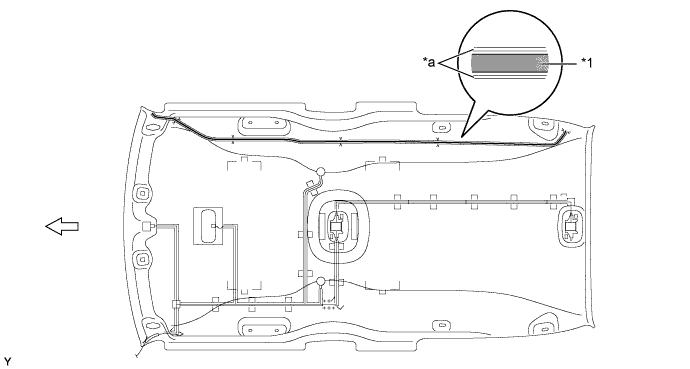
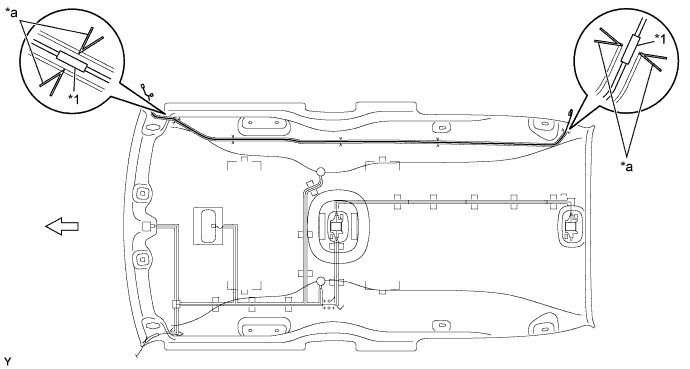
6. INSTALL NO. 1 ANTENNA CORD SUB-ASSEMBLY (w/ Satellite Radio)


  1. Apply new double-sided tape to the roof headlining along the markings of the roof headlining.


    E221539E01


    Text in Illustration 
    *1
    Double-sided Tape
    -
    -
    *a
    Marking
    -
    -
    V100136
    Front Side
    -
    -

    NOTICE:
    1. Apply the tape securely in place.
    2. Do not touch the adhesive surface when applying the tape to prevent adhesion failure.


  1. Install the antenna cord as shown in the illustration.


    E221540E01


    Text in Illustration 
    *1
    Marking Tape
    -
    -
    *a
    Marking
    -
    -
    V100136
    Front Side
    -
    -

    NOTICE:
    1. Do not twist the flat antenna cord when installing it.
    2. Securely fix the antenna cord by pressing it.


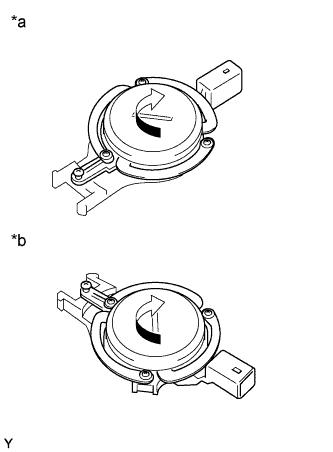
7. INSTALL ROOF SPEAKER ASSEMBLY (for 6 Speakers)


B138635E04

HINT:
Use the same procedure for both sides.

Text in Illustration 
*a
for RH Side
*b
for LH Side
  1. Install the roof speaker by turning it in the direction of the arrow shown in the illustration.


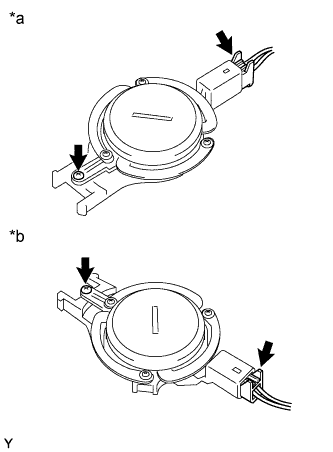
    B135049E04
  1. Tighten the screw.
    Text in Illustration 
    *a
    for RH Side
    *b
    for LH Side

  1. Connect the speaker connector.


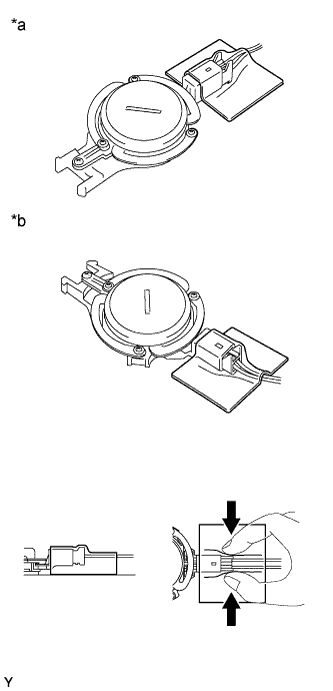
    B151255E04
  1. Cover the engaged portion of the connector and the lead line with a new hole cover, and attach them to the roof headlining securely.
    Text in Illustration 
    *a
    for RH Side
    *b
    for LH Side

    NOTICE:
    Securely attach the hole cover to the roof headlining to avoid looseness in the connector and the lead line.