 |
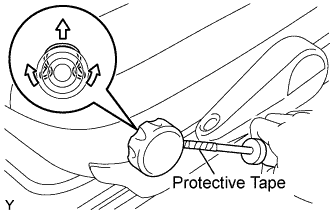
Using a screwdriver with its tip wrapped in protective tape, disengage the snap ring and remove the vertical seat adjuster knob.
FRONT SEAT ASSEMBLY > DISASSEMBLY |
| 1. REMOVE VERTICAL SEAT ADJUSTER KNOB (for Driver Side) |
|
Using a screwdriver with its tip wrapped in protective tape, disengage the snap ring and remove the vertical seat adjuster knob.
| 2. REMOVE VERTICAL SEAT ADJUSTER HANDLE COVER (for Driver Side) |
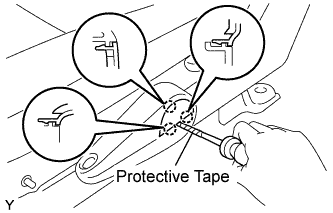 |
Using a screwdriver with its tip wrapped in protective tape, disengage the 3 claws and remove the vertical seat adjuster handle cover.
| 3. REMOVE VERTICAL SEAT ADJUSTER HANDLE (for Driver Side) |
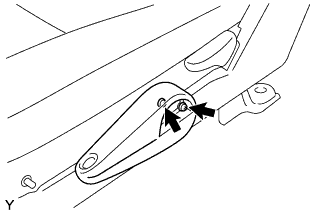 |
Remove the 2 screws and the vertical seat adjuster handle.
| 4. REMOVE RECLINING ADJUSTER RELEASE HANDLE |
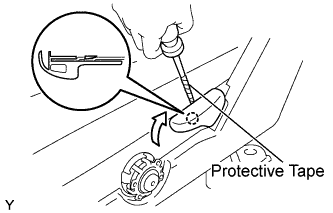 |
Using a screwdriver with its tip wrapped in protective tape, disengage the claw and remove the reclining adjuster release handle.
| 5. REMOVE FRONT SEAT CUSHION OUTER SHIELD |
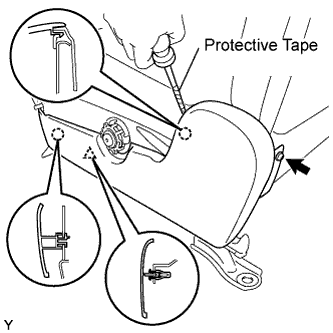 |
Remove the screw.
Using a screwdriver with its tip wrapped in protective tape, disengage the 2 claws and the clip and remove the front seat cushion outer shield.
| 6. REMOVE FRONT SEAT INNER BELT ASSEMBLY |
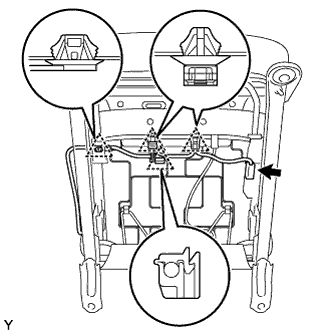 |
for Driver Side:
Disconnect the seat position sensor connector.
Using a clip remover, remove the 2 connectors and the clamp.
Remove the clamp.
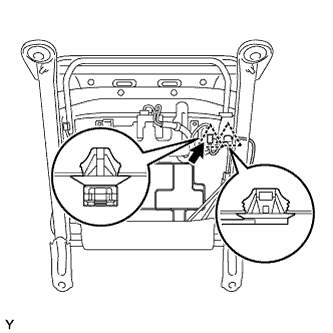 |
for Front Passenger Side:
Disconnect the buckle switch connector.
Using a clip remover, remove the connector and the clamp.
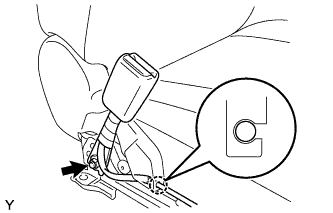 |
Remove the wire harness from the claw of the front seat cushion inner shield.
Remove the nut and the front seat inner belt.
| 7. REMOVE FRONT SEAT CUSHION INNER SHIELD |
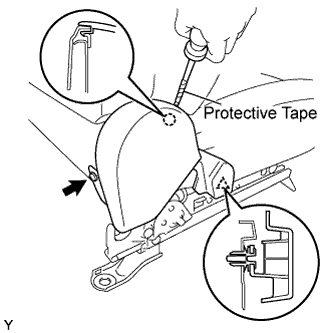 |
Remove the screw.
Using a screwdriver with its tip wrapped in protective tape, disengage the claw and the clip and remove the front seat cushion inner shield.
| 8. REMOVE FRONT SEAT CUSHION ASSEMBLY |
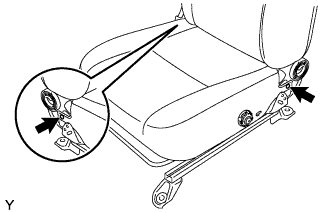 |
Using a clip remover, remove the 2 clips.
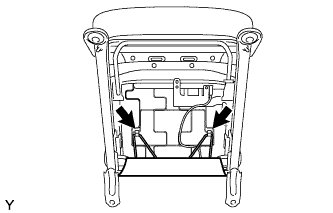 |
Remove the 2 front seatback cover bands.
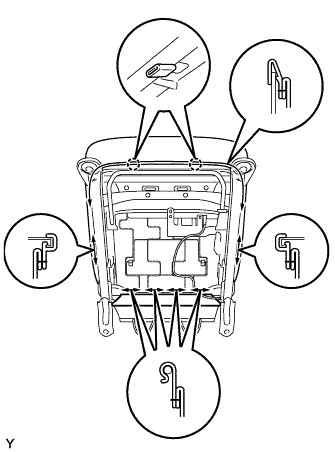 |
Disengage the 2 claws and the 7 hooks and remove the front seat cushion.
| 9. REMOVE FRONT SEAT CUSHION COVER |
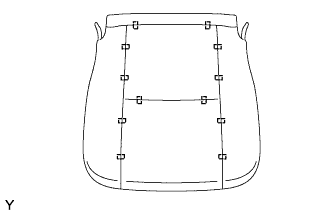 |
Remove the 12 hog rings and the front seat cushion cover.
| 10. REMOVE FRONT SEAT HEADREST ASSEMBLY |
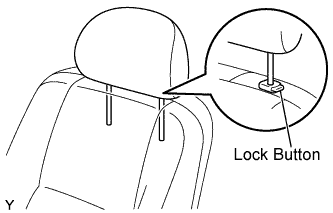 |
Push in the lock button of the front seat headrest support and remove the front seat headrest.
| 11. REMOVE FRONT SEAT ARMREST CAP (for Driver Side) |
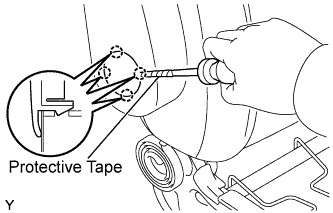 |
Using a screwdriver with its tip wrapped in protective tape, disengage the 4 claws and remove the front seat armrest cap.
| 12. REMOVE FRONT SEAT ARMREST COVER (for Front Passenger Side) |
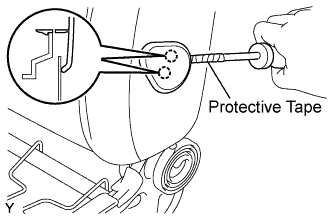 |
Using a screwdriver with its tip wrapped in protective tape, disengage the 2 claws and remove the front seat armrest cover.
| 13. REMOVE FRONT SEAT ARMREST ASSEMBLY (for Driver Side) |
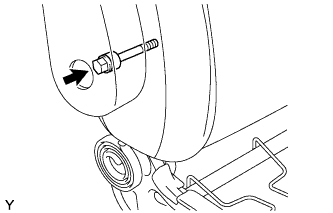 |
Remove the bolt, the bush and the front seat armrest.
| 14. REMOVE FRONT SEAT HEADREST SUPPORT |
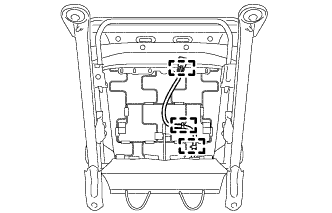 |
Disengage the 3 clamps to separate the front seat side airbag wire harness.
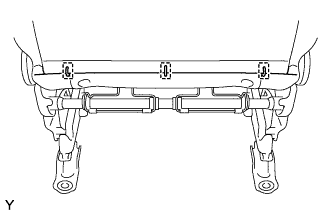 |
Remove the 3 hog rings.
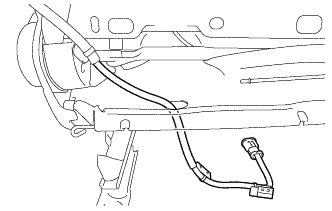 |
Pull out the front seat side airbag wire harness from the front seatback cover.
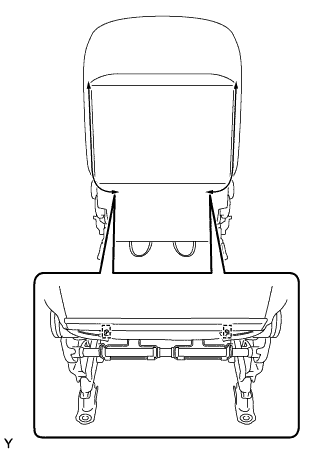 |
Remove the 2 hog rings.
Unfasten the 2 zippers.
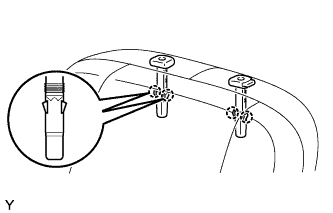 |
Disengage the 2 claws and remove the front seat headrest support.
| 15. REMOVE FRONT SEATBACK ASSEMBLY |
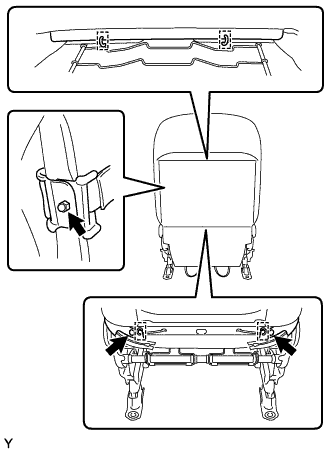 |
Using a clip remover, remove the 2 clips.
Remove the 4 hog rings.
Remove the nut.
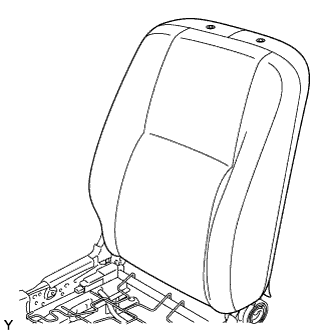 |
Remove the front seatback.
| 16. REMOVE FRONT SEATBACK COVER |
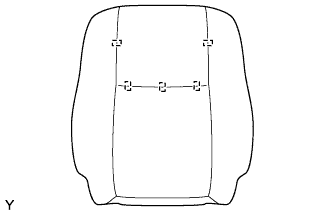 |
Remove the 5 hog rings and the front seatback cover.
| 17. REMOVE UPPER ACTIVE HEADREST UNIT |
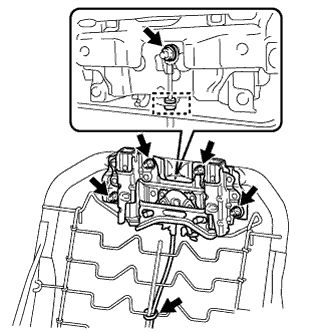 |
Remove the 5 nuts.
Remove the wire harness clamp.
Disengage the lower active headrest unit cable and remove the upper active headrest unit.
| 18. REMOVE LOWER ACTIVE HEADREST UNIT |
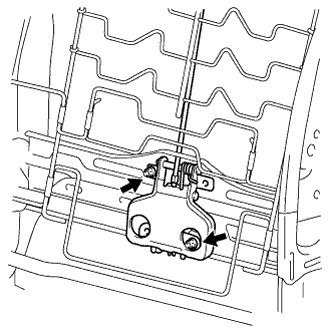 |
Remove the 2 nuts and remove the lower active headrest unit.
| 19. REMOVE VERTICAL SEAT ADJUSTER BUSH (for Driver Side) |
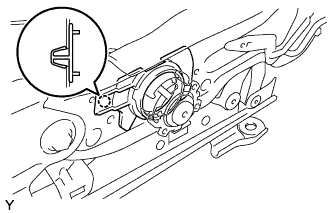 |
Disengage the claw and remove the vertical seat adjuster bush.
| 20. REMOVE RECLINING ADJUSTER INSIDE COVER RH |
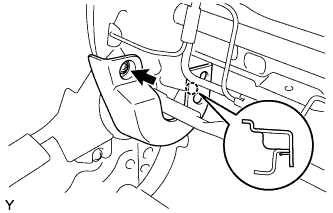 |
Remove the screw.
Disengage the claw and remove the reclining adjuster inside cover.
| 21. REMOVE RECLINING ADJUSTER INSIDE COVER LH |
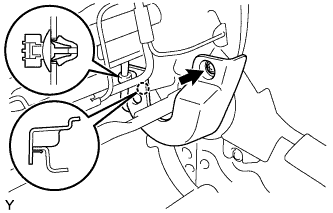 |
Remove the screw.
Using a clip remover, remove the clamp.
Disengage the claw and remove the reclining adjuster inside cover.
| 22. REMOVE RECLINING ADJUSTER OUTSIDE COVER RH |
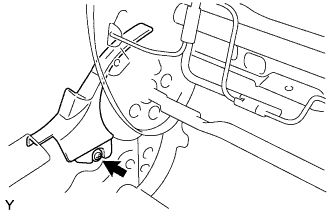 |
Remove the screw and the reclining adjuster outside cover.
| 23. REMOVE RECLINING ADJUSTER OUTSIDE COVER LH |
| 24. REMOVE FRONT SEAT CUSHION LOWER SHIELD RH |
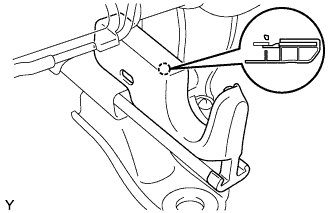 |
Disengage the claw and remove the front seat cushion lower shield.
| 25. REMOVE FRONT SEAT CUSHION LOWER SHIELD LH |
| 26. REMOVE FRONT SEAT CUSHION EDGE PROTECTOR |
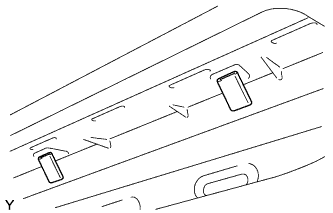 |
Remove the 2 front seat cushion edge protectors.
| 27. REMOVE SEAT POSITION SENSOR (for Driver Side) |
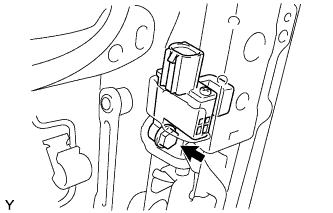 |
Remove the bolt and the seat position sensor.
| 28. REMOVE OCCUPANT CLASSIFICATION ECU (for Front Passenger Side) |
Disconnect the 2 connectors.
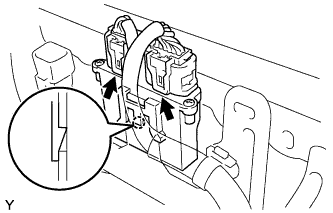 |
Using a screwdriver, disengage the claw and remove the occupant classification ECU.
| 29. REMOVE FRONT SEAT WIRE (for Front Passenger Side) |
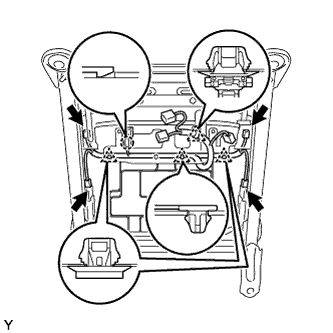 |
Disconnect the 4 connectors.
Disengage the claw and remove the connector.
Using a clip remover, remove the 4 clamps and the front seat wire.
| 30. REMOVE FRONT SEAT SIDE AIRBAG ASSEMBLY |
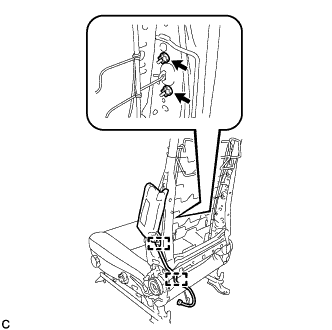 |
Disengage the 2 clamps.
Remove the 2 nuts and front seat side airbag assembly.