Home › RESTRAINTS › SEAT BELT › REAR SEAT OUTER BELT ASSEMBLY

REAR SEAT OUTER BELT ASSEMBLY > INSTALLATION

for Preparation Click here


HINT:
The procedure described below is for the RH side. Use the same procedure for both the RH and LH sides, unless otherwise specified.


1. INSTALL REAR SEAT OUTER BELT ASSEMBLY


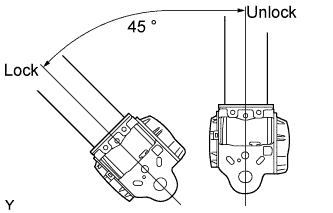
    B130782E01
  1. Check the angle of inclination required to lock the retractor.

    1. Gently incline the retractor from its initial position. Check that the belt does not lock when the retractor is inclined 15° or less in any direction. Also, check that the belt locks when the inclination of the retractor is 45° or more.

      NOTICE:
      Do not disassemble the retractor.
      If the operation is not as specified, replace the rear seat outer belt.


    B130780E01
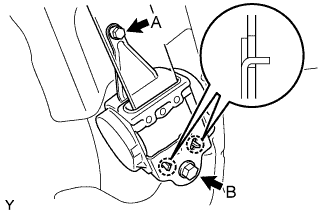
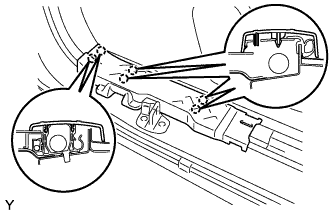
  1. Hook the lower stay of the retractor onto the 2 body hooks and provisionally install the retractor with the 2 bolts.

  1. Tighten bolt A and then bolt B.

    Torque:
    8.5 N*m{ 85 kgf*cm , 75 in.*lbf } for bolt A
    42 N*m{ 428 kgf*cm , 31 ft.*lbf } for bolt B


    B130781
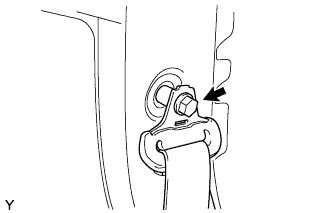
  1. Install the through anchor with the bolt.

    Torque:
    42 N*m{ 428 kgf*cm , 31 ft.*lbf }

  1. Make sure that the shoulder anchor rotates smoothly.

  1. Check that the ELR locks.

    NOTICE:
    Perform the check with the front seat outer belt installed.


    1. With the belt installed, check that the belt locks when it is pulled out quickly.
      If the operation is not as specified, replace the rear seat outer belt.


2. INSTALL ROOF SIDE INNER GARNISH


    B130622
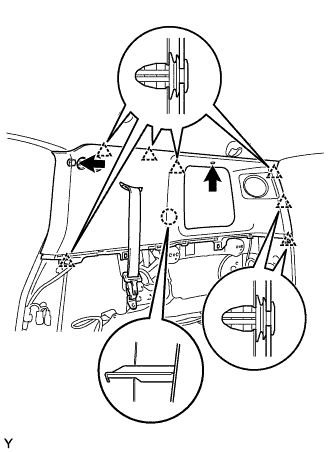
  1. Pass the rear seat outer belt through the slit in the roof side inner garnish.

  1. Engage the 7 clips and the claw and install the roof side inner garnish.

  1. Tighten the bolt.

    Torque:
    5.5 N*m{ 56 kgf*cm , 49 in.*lbf }

  1. Install the clip.


    B130621
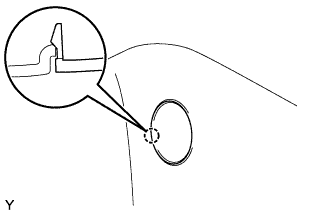
  1. Engage the claw and close the cover.


3. INSTALL DECK TRIM SIDE PANEL ASSEMBLY


    B130617
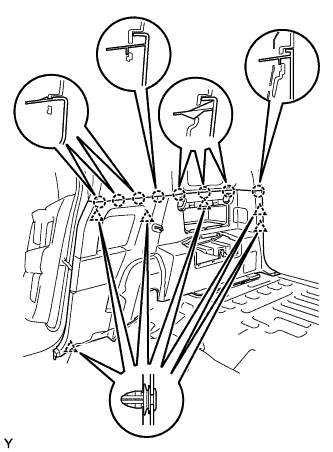
  1. for RH Side:

    1. Engage the 6 clips and the 8 claws and install the deck trim side panel.


    2. B130616
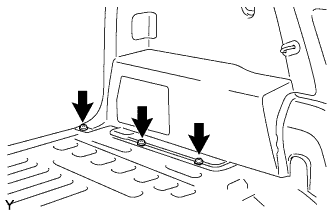
    3. Tighten the 4 screws.


    B130619
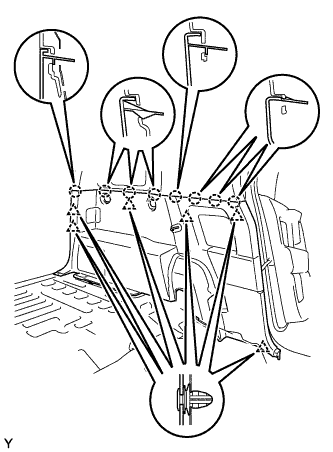
  1. for LH Side:

    1. Engage the 6 clips and the 8 claws and install the deck trim side panel.


    2. B130618
    3. Tighten the 3 screws.


    B130615
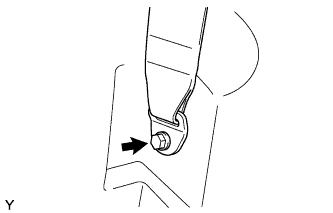
  1. Install the anchor plate with the bolt.

    Torque:
    42 N*m{ 428 kgf*cm , 31 ft.*lbf }

  1. Make sure that the shoulder anchor plate rotates smoothly.


4. INSTALL REAR DECK TRIM COVER (w/ Power Outlet Socket)


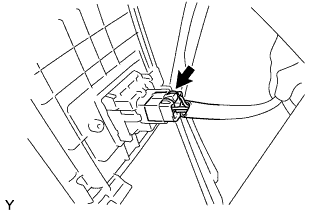
    B138600
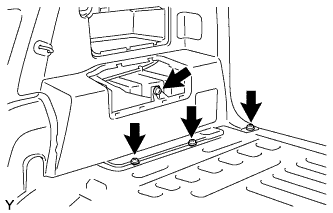
  1. Connect the power outlet connector.


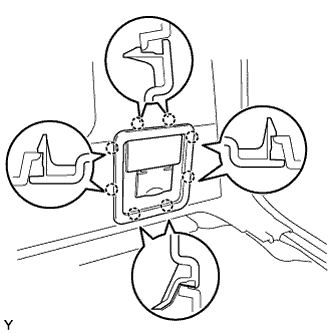
    B135130
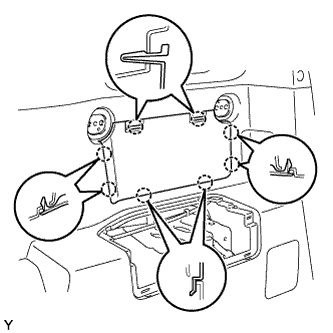
  1. Engage the 8 claws and install the rear deck trim cover.


5. INSTALL LAP BELT OUTER ANCHOR COVER


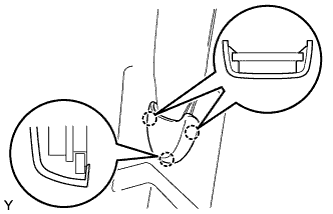
    B138385
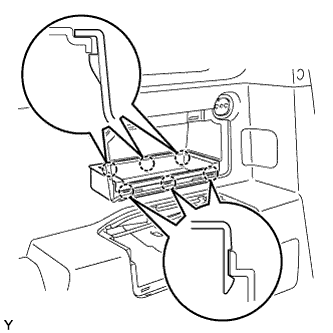
  1. Engage the 3 claws and install the lap belt outer anchor cover.


6. INSTALL AMPLIFIER BOX SPEAKER ASSEMBLY (w/ Woofer)


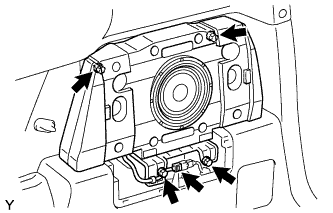
    B134990
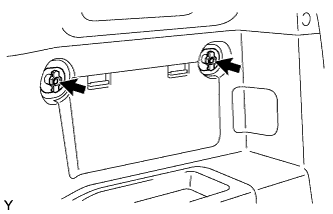
  1. Install the amplifier box speaker with the 4 screws.

    Torque:
    8.1 N*m{ 85 kgf*cm , 72 in.*lbf }

  1. Connect the speaker connector.


7. INSTALL SPEAKER MOUNTING COVER (w/ Woofer)


    B134991
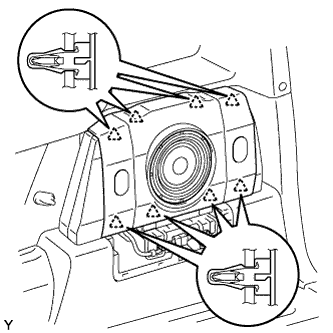
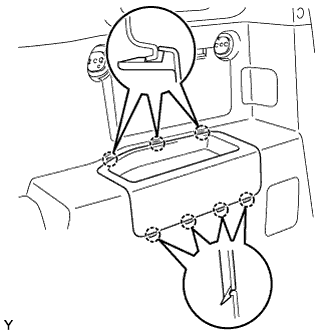
  1. Engage the 8 clips and install the speaker mounting cover.


8. INSTALL DECK SIDE GARNISH (w/ Woofer)


    B134992
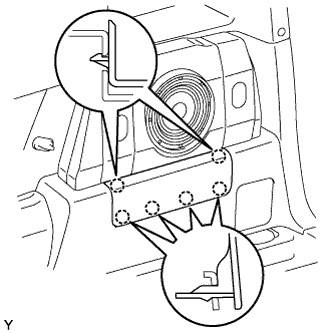
  1. Engage the 6 claws and install the deck side garnish.


9. INSTALL QUARTER TRIM POCKET (w/o Woofer)


    B130613
  1. Engage the 6 claws and install the quarter trim pocket.


10. INSTALL SIDE TRIM COVER (w/o Woofer)


    B130612
  1. Engage the 8 claws and install the side trim cover.


11. INSTALL QUARTER TRIM POCKET TRAY (w/o Woofer)


    B130611
  1. Engage the 7 claws and install the quarter trim pocket tray.


12. INSTALL PACKAGE HOLDER NET HOOK (w/o Woofer)


B138474

HINT:
Use the same procedure for both sides.

  1. Install the package holder net hook with the screw.


13. INSTALL FRONT DOOR OPENING TRIM WEATHERSTRIP


    B138384
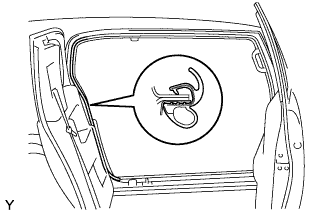
  1. Install the front door opening trim weatherstrip.


14. INSTALL ACCESS DOOR SCUFF PLATE


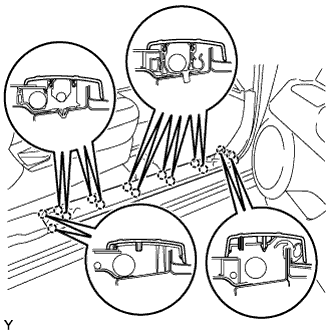
    B130598
  1. Engage the 6 claws and install the access door scuff plate.


15. INSTALL FRONT DOOR SCUFF PLATE


    B130597
  1. Engage the 14 claws and install the door scuff plate.


16. INSTALL REAR FLOOR MAT ASSEMBLY


    B130594
  1. Install the rear floor mat with the 2 clips.


17. INSTALL LUGGAGE HOLD BELT STRIKER ASSEMBLY


B179163E01

HINT:
Use the same procedure for both sides.

  1. Install the luggage hold belt striker with the bolt.

    Torque:
    18 N*m{ 184 kgf*cm , 13 ft.*lbf }

  1. Install the cap.


18. INSTALL REAR FLOOR MAT SUPPORT PLATE


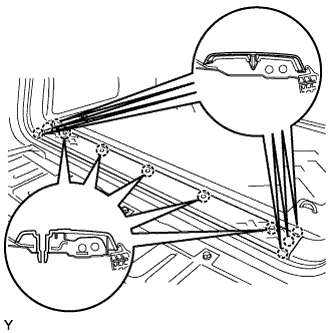
    B130593
  1. Engage the 11 claws and install the rear floor mat support plate.


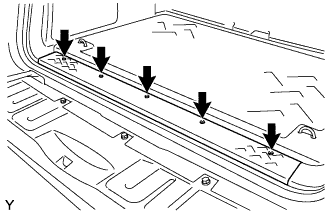
    B130592
  1. Tighten the 5 screws.


19. INSTALL REAR FLOOR BOARD


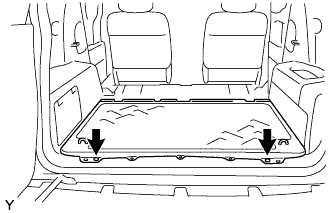
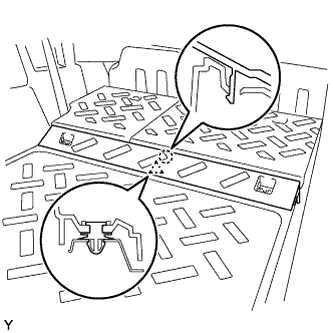
    B135075
  1. Engage the clip and claw and install the rear floor board.


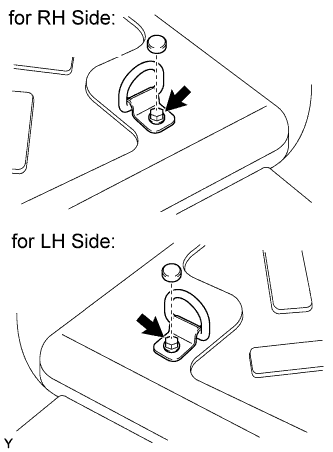
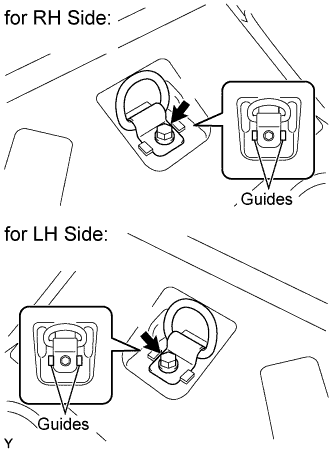
    B135074E02
  1. Install the luggage hold belt striker with the bolt.

    Torque:
    18 N*m{ 184 kgf*cm , 13 ft.*lbf }

    HINT:
    Use the same procedure for both sides.


20. INSTALL REAR SEATBACK ASSEMBLY
  1. for RH Side:

    1. Install the rear seatback assembly .

  1. for LH Side:

    1. Install the rear seatback assembly .


21. INSTALL REAR SEATBACK BOARD CARPET ASSEMBLY
  1. for RH Side:

    1. Install the rear seatback board carpet assembly .

  1. for LH Side:

    1. Install the rear seatback board carpet assembly .


22. CONNECT CABLE TO NEGATIVE BATTERY TERMINAL

Torque:
3.9 N*m{ 40 kgf*cm , 35 in.*lbf }