Home › BODY ELECTRICAL › AUDIO / VISUAL › INSTRUMENT PANEL SPEAKER

INSTRUMENT PANEL SPEAKER > ON-VEHICLE INSPECTION

for Preparation Click here


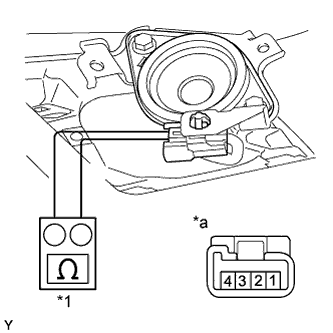
1. INSPECT FRONT NO. 2 SPEAKER ASSEMBLY


B138497E02

HINT:
Remove interior parts so that the front No. 2 speaker can be seen.

Text in Illustration 
*1
Ohmmeter
*a
Component without harness connected
(Front No. 2 Speaker Assembly)
  1. Check the speaker installation.

    OK:
    The speaker is securely installed.

    If the result is not as specified, reinstall the front No. 2 speaker.

  1. Visually check the speaker.

    OK:
    The cone paper of the speaker is not torn.

    If the result is not as specified, replace the front No. 2 speaker.

  1. Check the resistance.

    1. Disconnect the speaker connector.

    2. Measure the resistance according to the value(s) in the table below.

      Standard Resistance (except 10 Speakers):
      Tester Connection
      Condition
      Specified Condition
      3 - 4
      Always
      Approximately 8 Ω

      Standard Resistance (for 10 Speakers):
      Tester Connection
      Condition
      Specified Condition
      3 - 4
      Always
      Approximately 1.9 Ω

      If the result is not as specified, replace the front No. 2 speaker.