 |
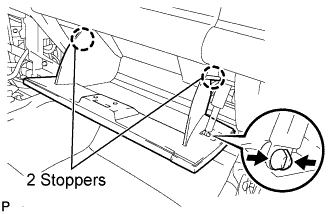
Disengage the claw and separate the glove compartment door stoppers from the glove compartment door.
RADIO ANTENNA HOLDER > REMOVAL |
| 1. DISCONNECT CABLE FROM NEGATIVE BATTERY TERMINAL |
| 2. REMOVE GLOVE COMPARTMENT DOOR ASSEMBLY |
|
Disengage the claw and separate the glove compartment door stoppers from the glove compartment door.
Slightly flex the upper part of the glove compartment door assembly to release the 2 stoppers and open the glove compartment door until it becomes horizontal.
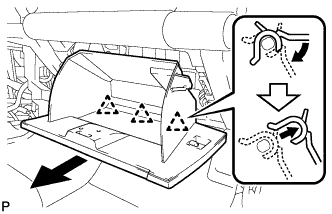 |
Pull the glove compartment door assembly toward the rear of the vehicle to release the 3 hinges and remove the glove compartment door assembly.
| 3. REMOVE FRONT DOOR OPENING TRIM WEATHERSTRIP |
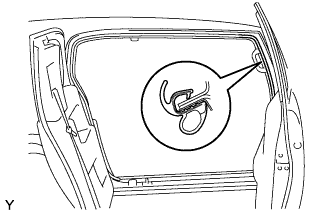 |
Remove the front door opening trim weatherstrip to the extent that the front pillar garnish can be removed.
| 4. REMOVE ASSIST GRIP PLUG |
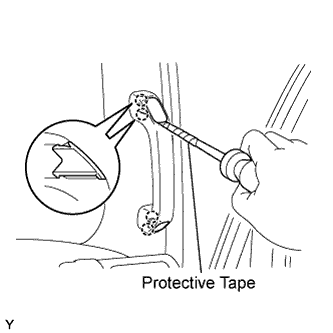 |
Using a screwdriver with its tip wrapped in protective tape, disengage the 2 claws and remove the assist grip plug.
| 5. REMOVE ASSIST GRIP ASSEMBLY |
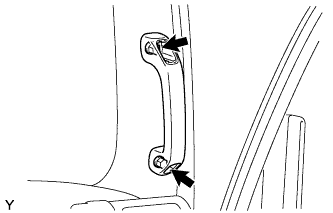 |
Remove the 2 screws and the assist grip.
| 6. REMOVE FRONT PILLAR GARNISH |
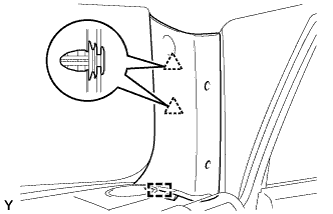 |
Disengage the 2 clips and the guide and remove the front pillar garnish.
| 7. REMOVE RADIATOR GRILLE |
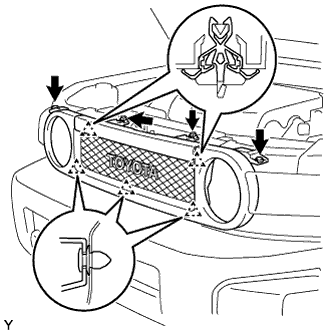 |
Using a clip remover, remove the 2 clips.
Remove the 2 screws.
Disengage the 5 clips and remove the radiator grille.
| 8. REMOVE FRONT BUMPER COVER |
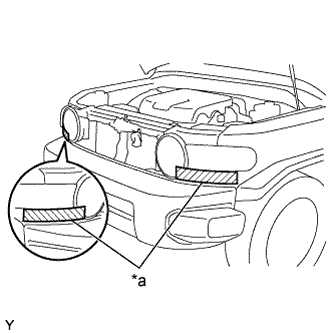 |
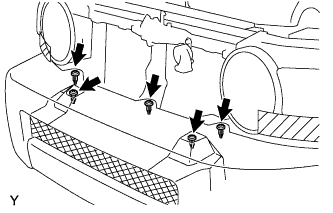
Apply protective tape as shown in the illustration.
| *a | Protective Tape |
 |
Using a clip remover, remove the 5 clips.
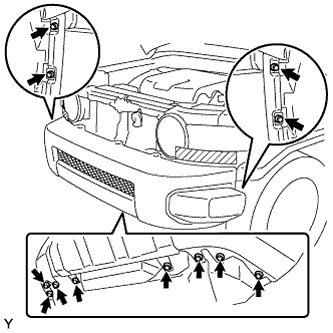 |
Remove the 8 screws and the 4 bolts.
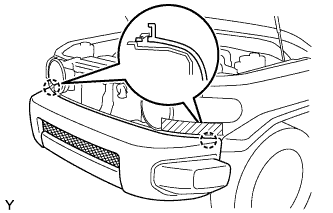 |
Disengage the 2 claws and remove the front bumper cover.
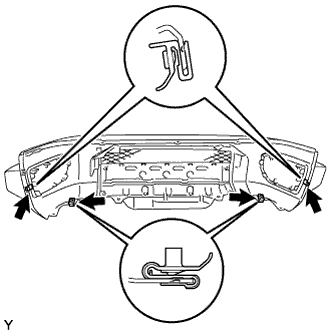 |
Remove the 4 clips.
| 9. REMOVE SIDE STEP SUB-ASSEMBLY (w/ Side Step) |
| 10. REMOVE ROCKER PANEL MOULDING |
| 11. REMOVE FRONT FENDER MUDGUARD |
| 12. REMOVE FRONT BUMPER SIDE SUPPORT |
| 13. REMOVE FRONT FENDER MOULDING SUB-ASSEMBLY |
| 14. REMOVE RADIO ANTENNA POLE SUB-ASSEMBLY |
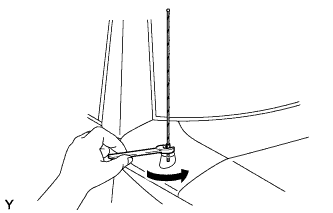 |
Using a 8 mm (5/16 inch) wrench, remove the radio antenna pole sub-assembly by turning it counterclockwise.
| 15. REMOVE ANTENNA ORNAMENT |
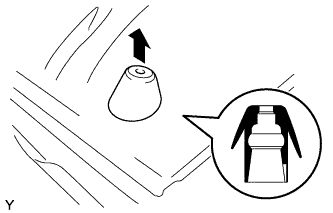 |
Pull out the antenna ornament vertically.
| 16. REMOVE FRONT FENDER SIDE UPPER PANEL |
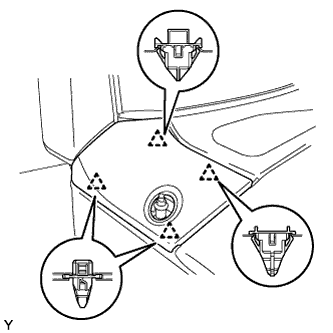 |
Disengage the 4 clips and remove the front fender side panel upper RH.
Remove the 4 clips from the front fender side panel upper RH.
| 17. REMOVE FENDER SPLASH REAR SHIELD SUB-ASSEMBLY |
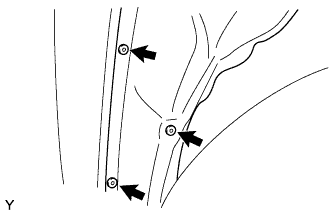 |
Remove the 3 clips and the fender splash rear shield to the extent that the radio antenna holder can be removed.
| 18. REMOVE RADIO ANTENNA HOLDER ASSEMBLY |
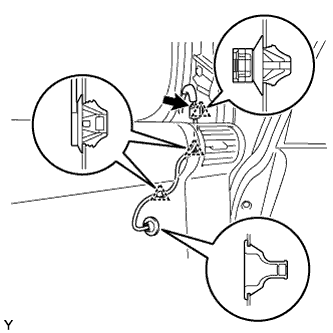 |
Disconnect the connector.
Using a clip remover, remove the 2 clamps and the connector.
Remove the grommet and insert the feeder line through the body hole.
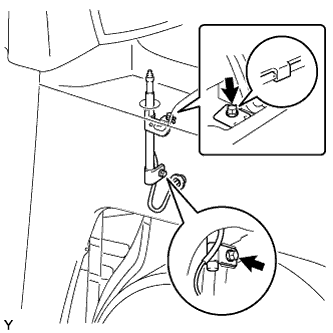 |
Remove the 2 bolts, the hook and the radio antenna holder.