ROOF DRIP SIDE FINISH MOULDING > REMOVAL |
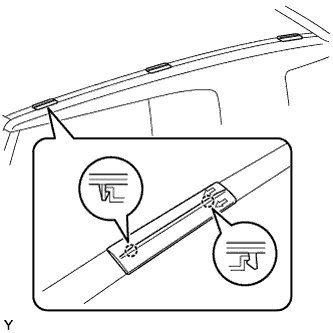
| 1. REMOVE ROOF DRIP SIDE FINISH MOULDING JOINT COVER |
|
Disengage the 2 claws and remove the roof drip moulding joint cover.
| 2. REMOVE NO. 1 ROOF DRIP SIDE FINISH MOULDING |
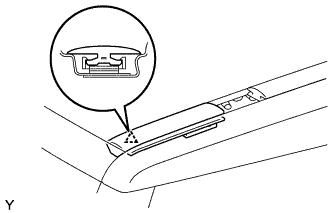 |
Disengage the clip and remove the No. 1 roof drip side finish moulding.
| 3. REMOVE NO. 2 ROOF DRIP SIDE FINISH MOULDING |
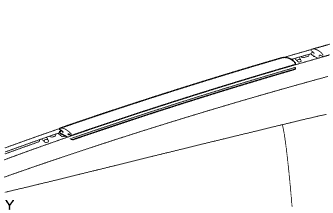 |
Remove the No. 2 roof drip side finish moulding.
| 4. REMOVE NO. 3 ROOF DRIP SIDE FINISH MOULDING |
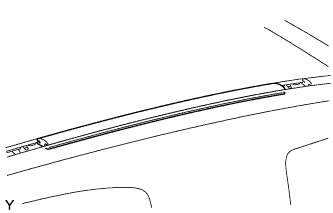 |
Remove the No. 3 roof drip side finish moulding.
| 5. REMOVE NO. 4 ROOF DRIP SIDE FINISH MOULDING |
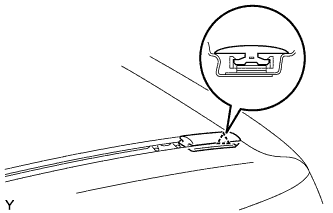 |
Disengage the clip and remove the No. 4 roof drip side finish moulding.
| 6. REMOVE WINDSHIELD OUTSIDE UPPER MOULDING SUB-ASSEMBLY |
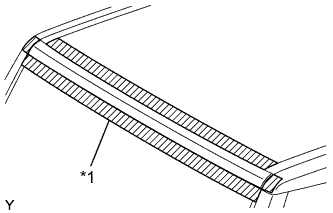 |
Apply protective tape to the roof panel in the area around the windshield outside upper moulding.
| *1 | Protective Tape |
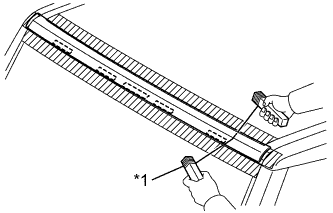 |
Insert the piano wires between the vehicle body and the windshield outside upper moulding, as shown in the illustration.
| *1 | Wooden Block |
Tie objects that can serve as handles (for example, wooden blocks) to all wire ends.
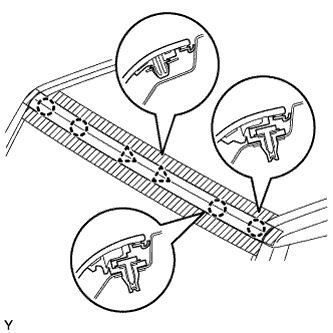 |
Disengage the 4 claws and the 2 clips and remove the windshield outside upper moulding.
| 7. REMOVE ROOF DRIP SIDE FINISH MOULDING RETAINER |
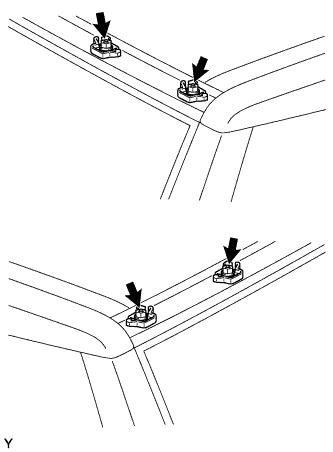 |
Remove the screw and the roof drip side finish moulding retainer.
| 8. REMOVE FRONT DOOR OPENING TRIM WEATHERSTRIP |
| 9. REMOVE ASSIST GRIP PLUG |
| 10. REMOVE ASSIST GRIP ASSEMBLY |
| 11. REMOVE FRONT PILLAR GARNISH |
| 12. REMOVE FRONT PILLAR OUTER GARNISH |
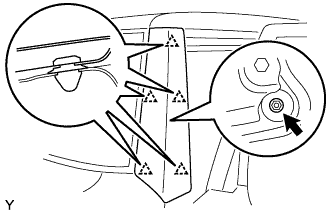 |
Remove the nut.
Disengage the 5 clips and remove the front pillar outer garnish.
| 13. REMOVE ROOF SIDE GARNISH PROTECTOR |
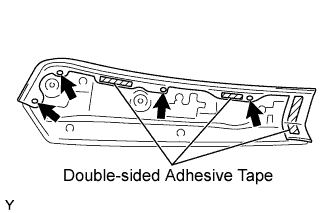 |
Using a clip remover, remove the 4 clips.
Remove the 3 pieces of double-sided adhesive tape and the roof side garnish protector.