Apply new No. 5 black out tape to the positions shown in the illustration.
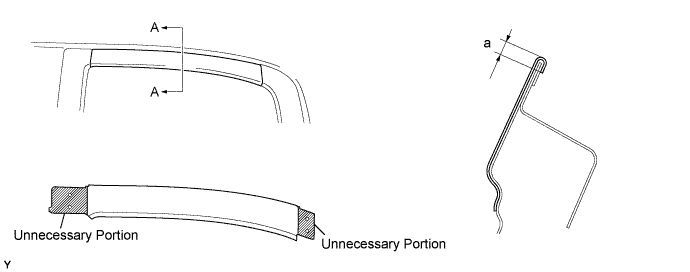
| Mark | Measurement |
| a | 2 to 4 mm (0.079 to 0.157 in.) |
ACCESS DOOR BLACK OUT TAPE > INSTALLATION |
| 1. INSTALL NO. 5 BLACK OUT TAPE |
Application precautions .
Clean the attachment surface (Using an infrared light) .
Clean the attachment surface (Using a tape removal disc) .
Apply new No. 5 black out tape to the positions shown in the illustration.
| Mark | Measurement |
| a | 2 to 4 mm (0.079 to 0.157 in.) |
| 2. INSTALL NO. 6 BLACK OUT TAPE |
Application precautions .
Clean the attachment surface (Using an infrared light) .
Clean the attachment surface (Using a tape removal disc) .
Apply new No. 6 black out tape to the positions shown in the illustration.
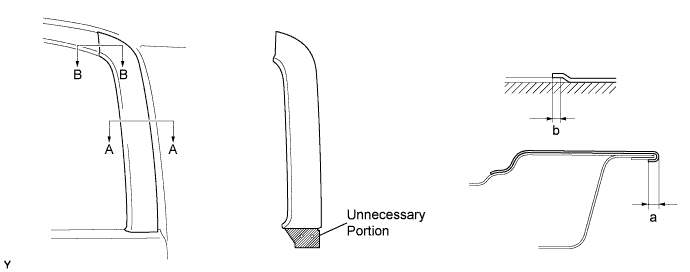
| Mark | Measurement |
| a | 2 to 4 mm (0.079 to 0.157 in.) |
| b | 2 mm (0.079 in.) |
| 3. INSTALL NO. 4 BLACK OUT TAPE |
Application precautions .
Clean the attachment surface (Using an infrared light) .
Clean the attachment surface (Using a tape removal disc) .
Apply new No. 4 black out tape to the positions shown in the illustration.
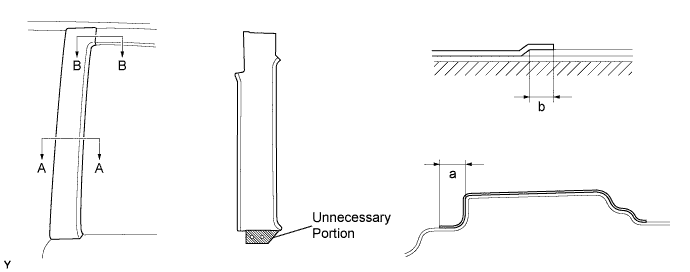
| Mark | Measurement |
| a | 10 mm (0.394 in.) |
| b | 2 mm (0.079 in.) |
| 4. INSTALL ACCESS DOOR GLASS SUB-ASSEMBLY |
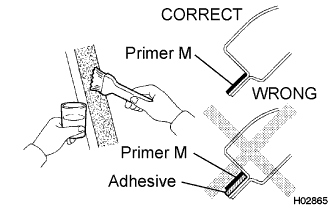 |
Using a brush, apply Primer M to the exposed part of the vehicle body.
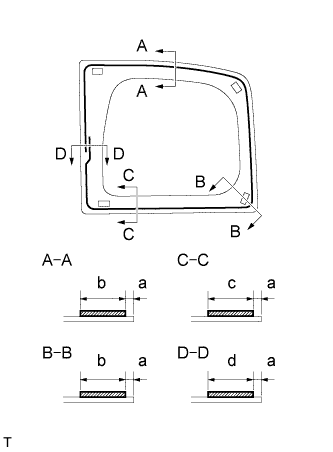 |
Using a brush or sponge, apply Primer G to the edge of the rear door glass and contact surface.
| Area | Measurement |
| a | 5.0 mm (0.197 in.) |
| b | 20 mm (0.787 in.) |
| c | 15 mm (0.591 in.) |
| d | 26 mm (1.024 in.) |
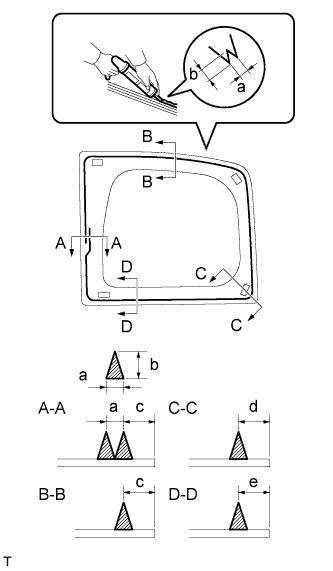 |
Apply adhesive.
Cut the tip off the cartridge nozzle, as shown in the illustration.
| Temperature | Usage Time Frame |
| 35°C (95°F) | 15 minutes |
| 20°C (68°F) | 1 hour 40 minutes |
| 5°C (41°F) | 8 hours |
Load the sealer gun with the cartridge.
Apply adhesive to the rear door glass as shown in the illustration.
| Area | Measurement |
| a | 8 mm (0.315 in.) |
| b | 12 mm (0.472 in.) |
| c | 13 mm (0.512 in.) |
| d | 14.2 mm (0.559 in.) |
| e | 11.6 mm (0.457 in.) |
Install the rear door glass onto the body.
Hold the quarter window glass in place securely with protective tape or the equivalent until the adhesive hardens.
Lightly press the front surface of the glass to ensure a close fit.
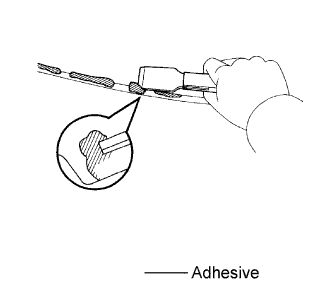 |
Using a scraper, remove any excessive or protruding adhesive.
| Temperature | Minimum time prior to driving vehicle |
| 35°C (95°F) | 1 hour 30 minutes |
| 20°C (68°F) | 5 hours |
| 5°C (41°F) | 24 hours |
| 5. INSTALL ACCESS DOOR GLASS OUTER WEATHERSTRIP |
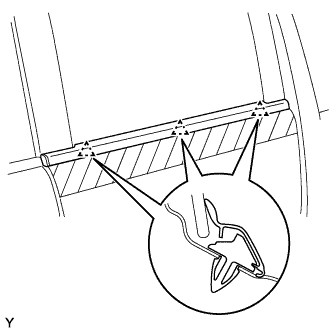 |
Engage the 3 clips and install a new access door glass outer weatherstrip.
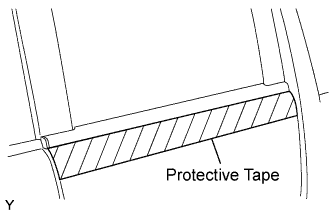 |
Remove the protective tape.
| 6. INSTALL ACCESS PANEL WEATHERSTRIP |
| 7. INSTALL ACCESS DOOR OPENING TRIM |
| 8. INSTALL CENTER PILLAR UPPER GARNISH |
| 9. INSTALL ACCESS DOOR TRIM BOARD SUB-ASSEMBLY |
| 10. INSTALL CUP HOLDER |
| 11. INSTALL ACCESS DOOR INSIDE HANDLE SUB-ASSEMBLY |
| 12. INSTALL LAP BELT OUTER ANCHOR COVER |
| 13. INSTALL ACCESS PANEL REAR WEATHERSTRIP |