 |
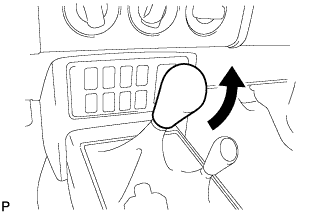
Remove the shift lever knob.
STEREO JACK ADAPTER ASSEMBLY > REMOVAL |
| 1. DISCONNECT CABLE FROM NEGATIVE BATTERY TERMINAL |
| 2. REMOVE SHIFT LEVER KNOB SUB-ASSEMBLY (for Manual Transmission) |
|
Remove the shift lever knob.
| 3. REMOVE SHIFT LEVER KNOB SUB-ASSEMBLY (for 4WD) |
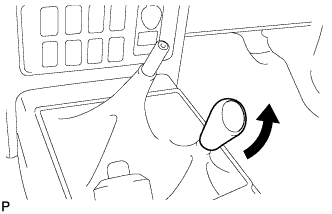 |
Remove the shift lever knob.
| 4. REMOVE PARKING BRAKE HOLE COVER SUB-ASSEMBLY |
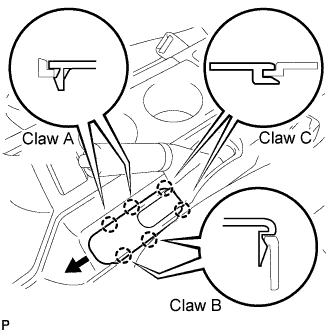 |
Disengage the 2 A claws and 2 B claws.
Slide the parking brake hole cover toward the front of the vehicle, disengage the 2 C claws and remove the parking brake hole cover.
| 5. REMOVE FRONT CONSOLE BOX UPPER PANEL SUB-ASSEMBLY |
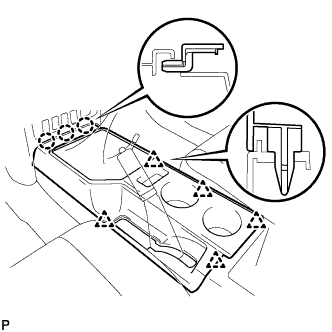 |
Shift the shift lever into the N position.
Disengage the 5 clips and 3 claws and remove the console upper rear panel.
| 6. REMOVE FRONT CONSOLE BOX BOTTOM MAT |
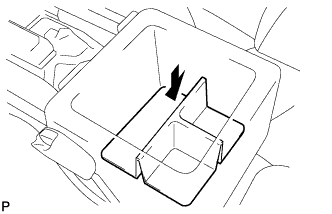 |
Remove the box bottom mat.
| 7. REMOVE FRONT CONSOLE BOX |
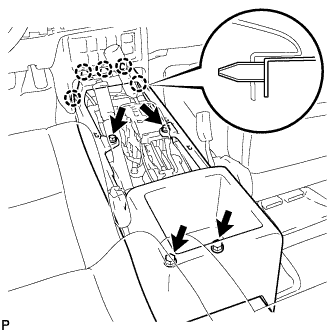 |
Remove the 4 <D> bolts.
Disengage the 5 claws and remove the console box.
| 8. REMOVE INSTRUMENT LOWER COVER SUB-ASSEMBLY |
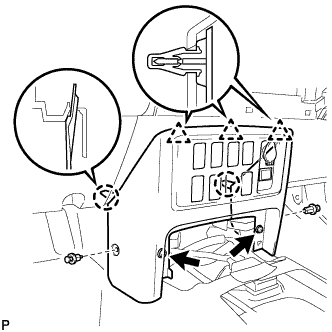 |
Remove the 2 clips and 2 <F> bolts.
Disengage the 3 clips and 2 claws and remove the instrument lower cover.
| 9. REMOVE STEREO JACK ADAPTER ASSEMBLY |
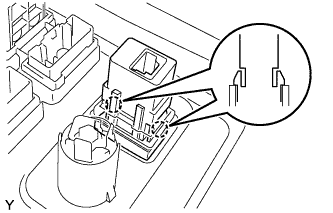 |
Disengage the 2 claws and remove the stereo jack adapter.