 |
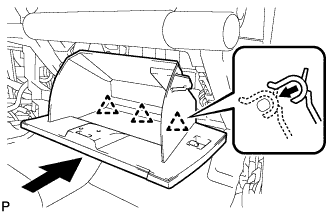
Install the glove compartment door assembly with the 3 hinges while holding it horizontal.
ECM > INSTALLATION |
| 1. INSTALL NO. 2 ECM BRACKET |
Install the No. 2 ECM bracket with the 2 screws.
| 2. INSTALL ECM BRACKET |
Install the ECM bracket with the 2 screws.
| 3. INSTALL ECM |
Install the ECM with the 3 nuts.
Connect the 6 connectors.
| 4. INSTALL 4 WHEEL DRIVE CONTROL ECU NO.2 (for Automatic Transmission 4WD) |
Install the four wheel drive control ECU with the bolt.
Connect the connector.
| 5. INSTALL GLOVE COMPARTMENT DOOR ASSEMBLY |
|
Install the glove compartment door assembly with the 3 hinges while holding it horizontal.
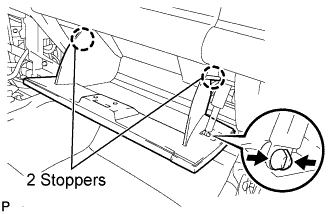 |
Slightly flex the upper part of the glove compartment door assembly, and install the glove compartment door assembly.
Install the glove compartment door stoppers onto the glove compartment door.
| 6. PERFORM INITIALIZATION |
Disconnect the cable from the negative (-) battery terminal. Wait at least 60 seconds and reconnect the cable.
Turn the ignition switch to ON without operating the accelerator pedal.
Connect the Techstream to the DLC3 and clear the DTCs (Click here).
Perform the "Inspection After Repairs" (Click here).
Start the engine and check that the MIL is not illuminated and that the idle speed is within the specified range when the A/C is switched off after the engine is warmed up.
| Condition | Engine Idle Speed |
| A/C switched off | 580 to 680 rpm |
Enter the following menus: Powertrain / Engine and ECT / Data List / Throttle Sensor Position. Fully depress the accelerator pedal and check that the value is 60% or more.
Perform a road test and confirm that there are no abnormalities.