 |
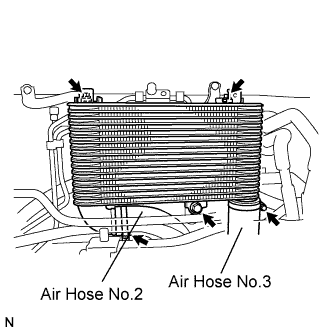
Temporarily install the intercooler assembly with the 3 bolts.
INTERCOOLER > INSTALLATION |
| 1. INSTALL INTERCOOLER ASSEMBLY |
|
Temporarily install the intercooler assembly with the 3 bolts.
Connect the air hose No.2, and tighten the clamp.
Connect the air hose No.3, and tighten the clamp.
Tighten the intercooler assembly.
| 2. INSTALL RADIATOR UPPER SUPPORT |
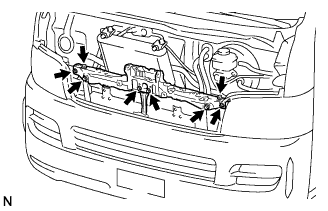 |
Install the radiator upper support with the 6 bolts and 2 screws.
| 3. INSTALL HOOD LOCK ASSEMBLY |
Connect the hood lock cable assembly to the hood lock assembly.
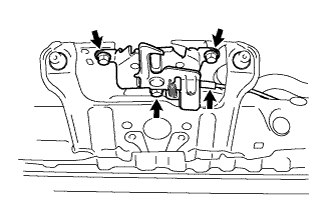 |
Temporarily tighten the hood lock assembly with the 3 bolts from the radiator upper support.
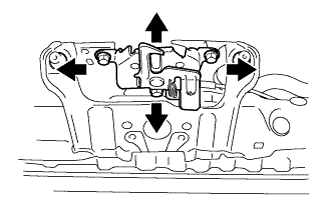 |
Check the hood position and adjust the hood lock assembly position.
Tighten the hood lock assembly with the 3 bolts.
| 4. INSTALL RADIATOR RESERVE TANK ASSEMBLY |
Connect the water by-pass hose No.2 with the clip.
Connect the water by-pass hose No.1 with the clip.
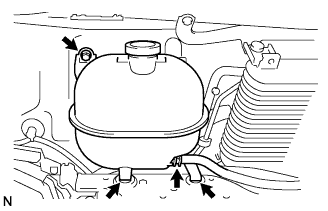 |
Place the reserve tank in the 2 grommets of the radiator upper support, and install the radiator reserve tank assembly with the bolt.
| 5. INSTALL WINDSHIELD WASHER JAR ASSEMBLY (w/o Rear Wiper) |
Connect the connector and hose.
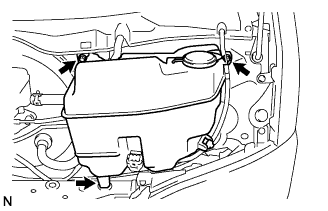 |
Install the wind washer jar assembly with the 2 bolts.
| 6. INSTALL WINDSHIELD WASHER JAR ASSEMBLY (w/ Rear Wiper) |
Connect the 2 connectors and 2 hoses.
|
Install the wind washer jar assembly with the 2 bolts.
| 7. ADD WINDSHIELD WASHER FLUID |
| 8. INSTALL AIR INLET DUCT |
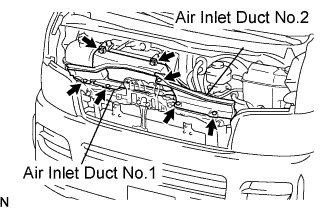 |
Install the air inlet duct No.1 with the 2 bolts and 2 clips.
Install the air inlet duct No.2 with the 3 clips.
| 9. INSTALL RADIATOR GRILLE |
| 10. ADD ENGINE COOLANT |
Firmly tighten the drain plugs and fill the radiator reserve tank assembly with coolant to the top of the inlet.
Loosen the bleeder plug of outlet housing.
When air is bled and the coolant drains out, firmly install the bleeder plug.
Add coolant up to the B line mark in the radiator reserve tank assembly and install the radiator cap.
| Condition | Capacity |
| w/ rear heater | 17.0 liters (18.0 US qts, 15.0 imp. qts) |
| w/o rear heater | 15.0 liters (15.9 US qts, 13.2 imp. qts) |
Warm up the engine.
After the engine cools down check that the coolant level is between the LOW and FULL level marks.
| 11. CHECK FOR ENGINE COOLANT LEAKS |
| 12. INSTALL ENGINE UNDER COVER NO.1 (w/ Engine Under Cover No.1) |