CAMSHAFT > REMOVAL |
| 1. REMOVE ENGINE UNDER COVER NO.1 (w/ Engine Under Cover No.1) |
| 2. REMOVE FRONT SEAT ASSEMBLY RH (for Hi-back Seat Type) |
Perform the same procedure as above on the opposite side.
| 3. REMOVE FRONT SEAT ASSEMBLY RH (for Low-back Seat Type) |
Perform the same procedure as above on the opposite side.
| 4. REMOVE FRONT DOOR SCUFF PLATE RH |
| 5. REMOVE ENGINE SERVICE HOLE SUB COVER SUB-ASSEMBLY |
Roll up the carpet, and remove the 5 bolts and engine service hole sub cover.
| 6. REMOVE FAN AND GENERATOR V BELT |
![]() |
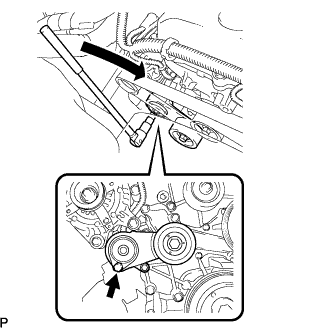
Use the hexagon-shaped part indicated by the arrow in the illustration to move the tensioner pulley downward and decrease the tension in the drive belt. Then remove the drive belt.
| 7. REMOVE INTAKE AIR CONNECTOR |
![]() |
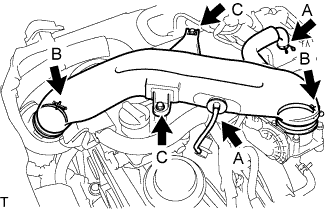
Disconnect the ventilation hose No.2 and the vacuum hose.(A)
Loosen the 2 hose clamp bolts.(B)
Remove the 2 bolts, then remove the intake air connector.(C)
| 8. REMOVE IGNITION COIL ASSEMBLY |
Remove the bolts and ignition coil assembly.
| 9. REMOVE CYLINDER HEAD COVER SUB-ASSEMBLY |
Disconnect the ventilation hose No.1.
![]() |
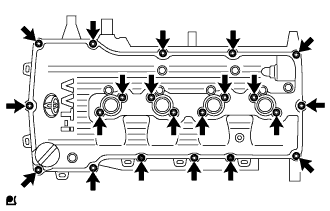
Remove the 19 bolts, 2 nuts, head cover and 2 gaskets.
Remove the cylinder head cover gasket and cylinder head cover gasket No.2 from the cylinder head cover.
| 10. REMOVE TIMING CHAIN GUIDE |
![]() |
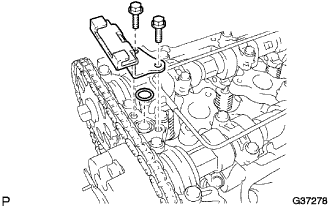
Remove the 2 bolts, timing chain guide and O-ring.
| 11. REMOVE CAMSHAFT TIMING GEAR OR SPROCKET |
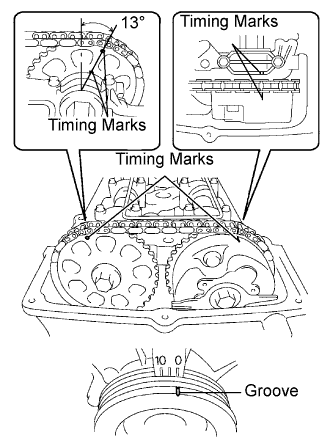
Set No.1 cylinder to TDC/compression.
![]() |
Turn the crankshaft pulley, and align its groove with timing mark 0 of the timing chain cover.
Check that the timing marks of the camshaft timing gear and sprocket are aligned with the timing marks of bearing cap No.1, as shown in the illustration.
![]() |
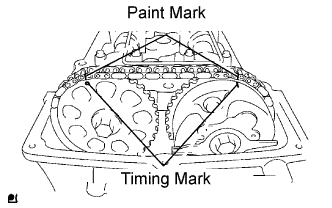
Put paint marks on the timing chain and camshaft timing gear/sprocket.
![]() |
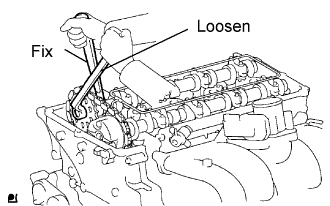
Fix the camshaft with a wrench and then loosen the sprocket bolt.
![]() |
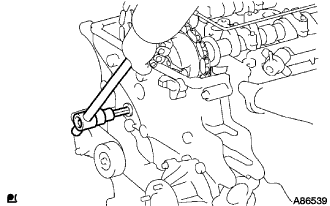
Using a 10 mm socket hexagon wrench, remove the timing chain cover plug.
![]() |
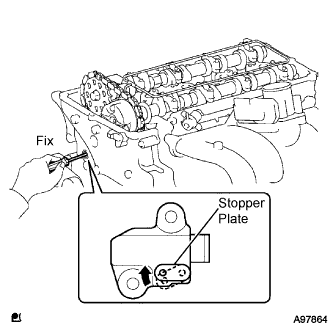
Using a screwdriver, access the tensioner stopper plate through the chain tensioner service hole. Move the stopper plate upward to release the lock. Then hold the plate in that position as shown in the illustration.
![]() |
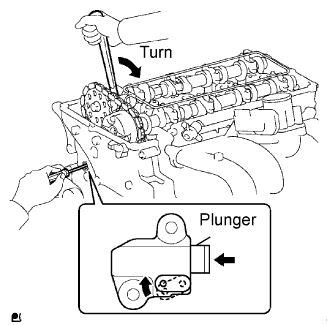
With the stopper plate's lock released, slightly rotate the camshaft to the right. Then maintain it in that position.
![]() |
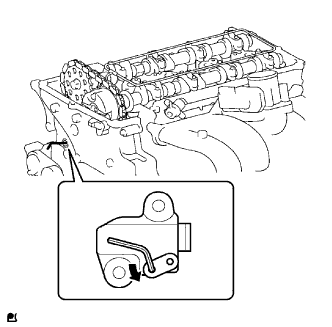
Remove the screwdriver from the chain tensioner service hole. Move the stopper plate to the position shown in the illustration. Then insert a hexagon wrench into the hole.
Remove the camshaft timing sprocket from the camshaft.
| 12. REMOVE CAMSHAFT BEARING CAP |
![]() |
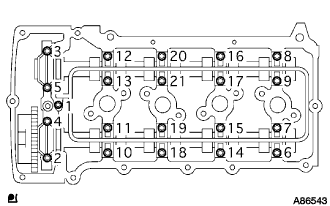
Uniformly loosen the 21 bearing cap bolts in several steps in the sequence shown in the illustration.
Remove the 9 bearing caps, oil delivery pipe, O-ring and camshaft.
| 13. REMOVE NO.2 CAMSHAFT |
| 14. REMOVE CAMSHAFT |
![]() |
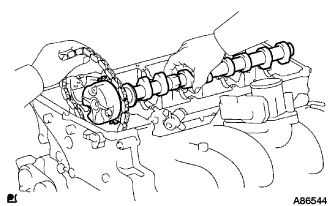
Remove the camshaft while holding the timing chain.
![]() |
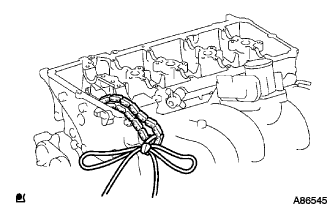
Tie the timing chain with a string as shown in the illustration.
| 15. INSPECT CAMSHAFT TIMING GEAR ASSEMBLY |
![]() |
Check the lock of the camshaft timing gear.
Clamp the camshaft in a vise, and confirm that the camshaft timing gear is locked.
Release the lock pin.
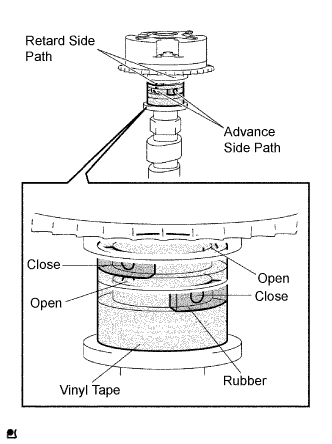
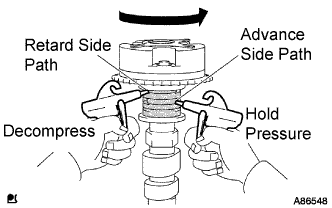
Cover the 4 oil paths of the cam journal with vinyl tape as shown in the illustration.
![]() |
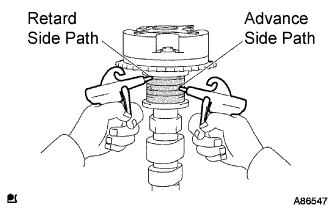
Break through the tape of the advance side path and the retard side path on the opposite side to the hole of the advance side path.
Apply approximately 200 kPa (2.0 kgf/cm2, 28 psi) of air pressure to the two broken paths.
![]() |
Check that the camshaft timing gear revolves in the advance direction when reducing the air pressure applied to the retard side path.
When the camshaft timing gear reaches the most advanced position, release the air pressure from the retard side path and advance side path, in that order.
Check for smooth rotation.
Rotate the camshaft timing gear within its movable range several times, but do not turn it to the most retarded position. Check that the gear rotates smoothly.
Check the lock in the most retarded position.
Confirm that the camshaft timing gear is locked at the most retarded position.
| 16. REMOVE CAMSHAFT TIMING GEAR ASSEMBLY |
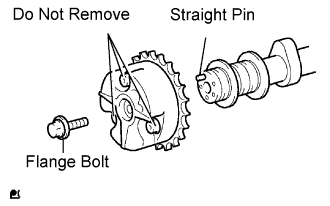
Check that the camshaft timing gear assembly does not turn by mounting the hexagon wrench head portion of the camshaft in a vise through aluminium metal cap and so on.
![]() |
Remove the flange bolt and camshaft timing gear.