 |
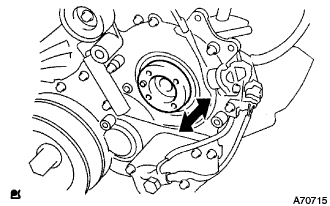
Confirm that the supply pump gear in the timing gear case moves back and forth smoothly.
FUEL PUMP > INSTALLATION |
| 1. INSTALL INJECTION OR SUPPLY PUMP ASSEMBLY |
|
Confirm that the supply pump gear in the timing gear case moves back and forth smoothly.
Install a new O-ring and the pulley key to the supply pump.
Aligning the projecting edge of the supply pump head to the key-slot of the supply pump gear, install the pump to the timing gear case.
While holding the supply pump by hand, push the supply pump gear rearward to engage the pump gear and drive shaft.
Temporarily install the supply pump with the 2 nuts.
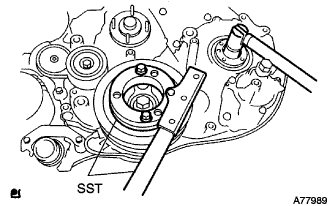 |
Using SST, hold the crankshaft.
Install the supply pump gear set nut.
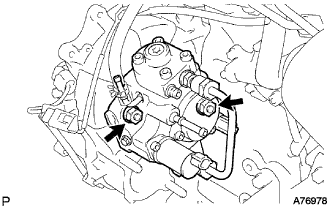 |
Temporarily install the supply pump stay with the 2 bolts on the engine block side.
Tighten the 2 nuts for the injection pump.
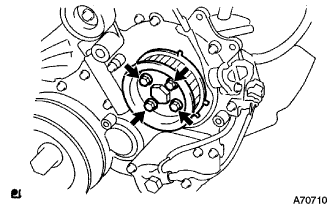 |
Install the camshaft timing pulley flange No.2 and pump drive shaft pulley with the 4 bolts.
| 2. CHECK PUMP DRIVE SHAFT THRUST CLEARANCE |
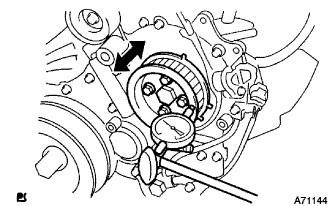 |
Push the pump drive shaft pulley back and forth to check a thrust clearance of the injection pump drive shaft.
| 3. INSTALL FUEL INLET PIPE SUB-ASSEMBLY |
Temporarily install the fuel inlet pipe.
Using SST, tighten the injection pipe on the common rail side.
Using SST, tighten the injection pipe on the supply pump side.
| 4. INSTALL INJECTION PIPE |
Install the injection pipes.
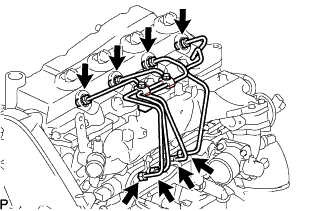 |
Temporarily install the 4 injection pipes.
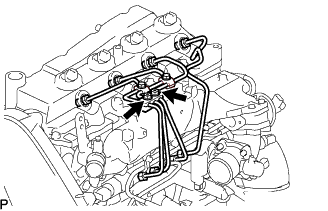 |
Install the injection pipe clamp No.3 in 2 nuts.
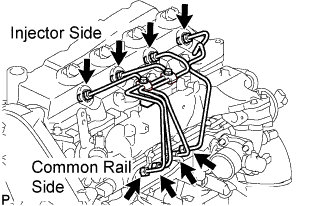 |
Fasten the union sequentially, from the injection pipe common rail to the injector, using SST.
| 5. INSTALL OIL LEVEL GAGE GUIDE |
Install a new O-ring to the oil level gauge guide.
Apply a light coat of engine oil to the O-ring.
Install the oil level gauge guide with the bolt.
Install the oil level gauge.
| 6. INSTALL INTAKE AIR CONNECTOR (w/o EGR Valve) |
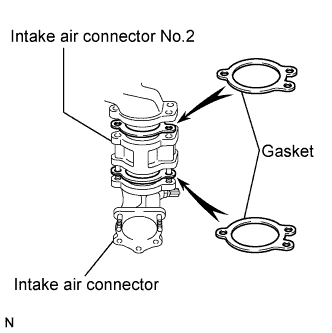 |
Temporarily install 2 new gaskets and intake air connector No.2 to the intake air connector.
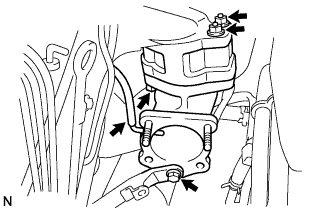 |
Temporarily tighten the intake air connector assembly with the bolt and 2 nuts.
Tighten the manifold stay with the bolt.
Tighten the intake air connector with the bolt and 2 nuts.
Install the vacuum hose to the intake air connector.
| 7. TEMPORARILY TIGHTEN ELECTRIC EGR CONTROL VALVE ASSEMBLY (w/ EGR Valve) |
Temporarily tighten the EGR valve assembly with the sensor.
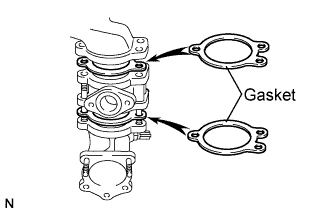 |
Install 2 new gaskets and the EGR valve to the intake air connector as shown in the illustration.
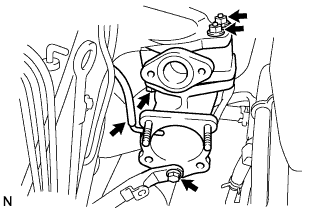 |
Temporarily tighten the intake air connector with EGR valve assembly to the intake manifold with the bolt and the 2 nuts.
Install the vacuum hose to the intake air connector.
Temporarily tighten the manifold stay with the bolt.
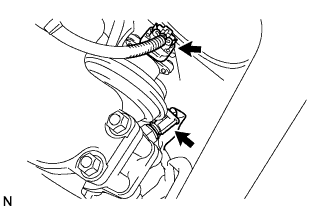 |
Connect the EGR valve position sensor connector.
Connect the intake air temperature sensor connector.
Install the vacuum regulating valve.
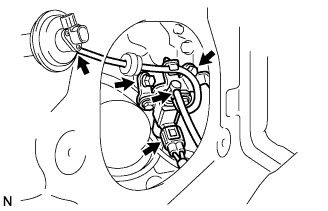 |
Install the vacuum regulating valve with the 2 bolts.
Connect the 2 vacuum hoses and the regulating valve connector.
| 8. INSTALL EGR PIPE SUB-ASSEMBLY NO.1 (w/ EGR Valve) |
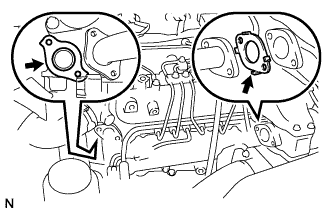 |
Install the 2 gaskets to the cylinder head and EGR pipe sub-assembly as shown in the illustration.
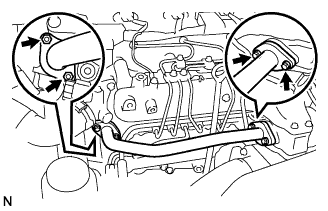 |
Install the EGR pipe sub-assembly with the 2 bolts and 2 nuts.
Tighten the intake air connector with the bolt and the 2 nuts.
Tighten the manifold stay.
| 9. REMOVE EGR PIPE SUB-ASSEMBLY NO.1 (w/ EGR Valve) |
Remove the 3 bolts, the 2 nuts, and the EGR pipe sub-assembly.
Remove the 2 gaskets.
| 10. INSTALL DIESEL THROTTLE BODY ASSEMBLY |
Install a new gasket to intake air connector.
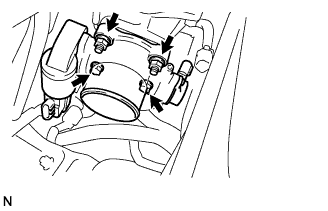 |
Install the throttle body with the 2 bolts and the 2 nuts.
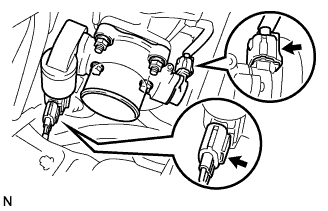 |
Connect the 2 throttle body connectors.
| 11. INSTALL AIR HOSE NO.4 |
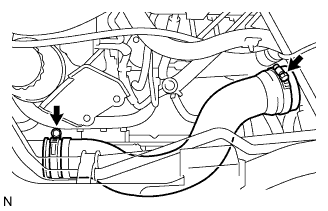 |
Install the air hose No.4 with the 2 clamps.
| 12. INSTALL EGR PIPE SUB-ASSEMBLY NO.1 (w/ EGR Valve) |
|
Install 2 new gaskets to the cylinder head and the EGR pipe sub-assembly No.1 as shown in the illustration.
|
Install the EGR pipe with the 2 bolts and the 2 nuts.
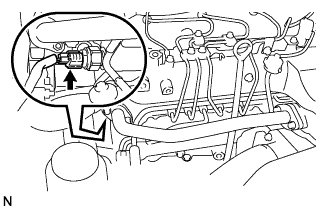 |
Connect the fuel pressure sensor connector.
| 13. INSTALL OIL RETURN HOSE (w/ Inter cooler) |
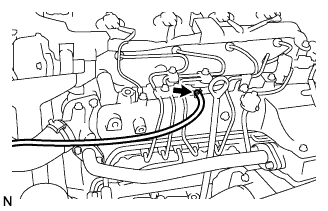 |
Connect the oil return hose with the clip.
| 14. INSTALL VANE PUMP OIL RESERVOIR ASSEMBLY |
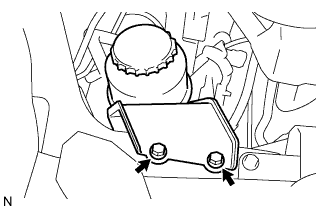 |
Install the vane pump oil reservoir assembly with the 2 bolts.
| 15. INSTALL ENGINE SERVICE HOLE COVER NO.2 |
Install the engine service hole cover No.2 with the 3 bolts.
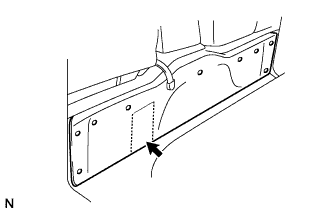 |
Return the carpet.
| 16. INSTALL TIMING BELT |
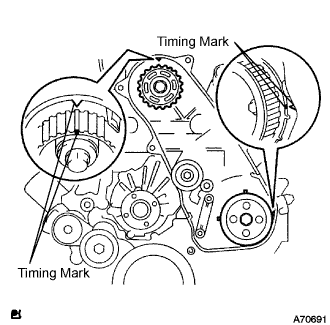 |
Check that the timing marks are aligned as shown in the illustration.
Install the timing belt to pump drive shaft pulley, camshaft timing pulley and timing belt idler No.1 in sequence.
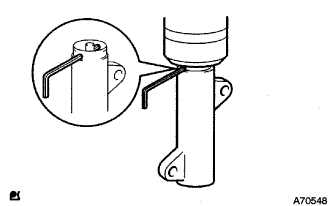 |
Set the tensioner to the press upright.
Using a press, slowly apply 981 to 9,807 N (100 to 1,000 kgf, 220 to 2,205 lbf) of force to the push rod.
Align the holes of push rod and housing, pass a 1.27 mm hexagon wrench through the holes to keep the setting position of the push rod.
Temporarily install the timing belt tensioner with the 2 bolts while pushing the idler pulley toward the timing belt.
Tighten the 2 bolts.
Remove the 1.5 mm hexagon wrench from the tensioner.
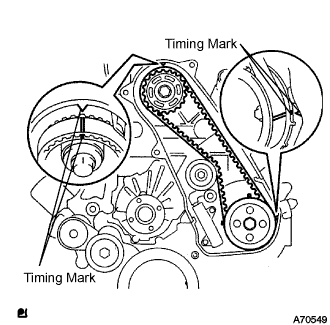 |
Turn the crankshaft in the clockwise direction twice, check that the timing marks are aligned as shown in the illustration.
| 17. INSTALL TIMING BELT NO.1 COVER |
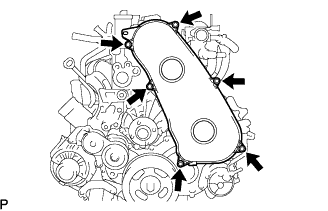 |
Install the timing belt No.1 cover with the 6 bolts.
Install the wire harness clamp.
| 18. INSTALL FAN AND GENERATOR V BELT |
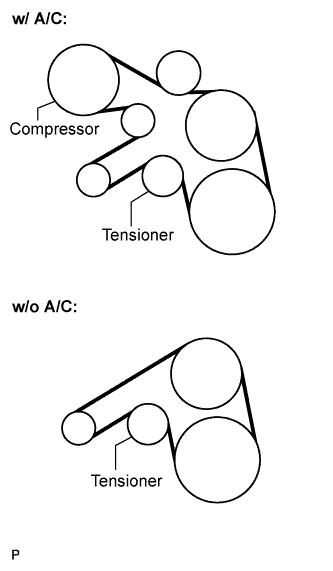 |
Install the drive belt by rotating the tensioner pulley in clockwise direction with the pulley set bolt of the tensioner.
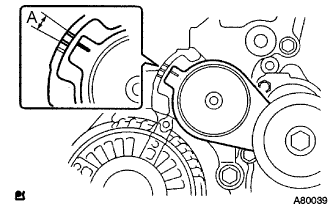 |
Make sure that the indicator mark of the tensioner is within range A.
| 19. INSTALL ENGINE SERVICE HOLE SUB COVER SUB-ASSEMBLY |
Install the engine service hole sub cover with the 5 bolts.
| 20. INSTALL FRONT DOOR SCUFF PLATE RH |
| 21. INSTALL FRONT SEAT ASSEMBLY RH (for Hi-back Seat Type) |
Perform the same procedure as above on the opposite side.
| 22. INSTALL FRONT SEAT ASSEMBLY RH (for Low-back Seat Type) |
Perform the same procedure as above on the opposite side.
| 23. CONNECT BATTERY NEGATIVE CABLE |
| 24. BLEED FUEL LINE |
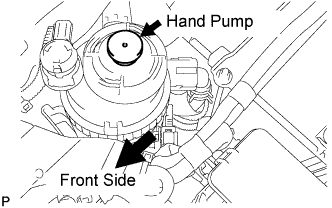 |
Using the hand pump, bleed air from the fuel system until pumping becomes difficult.
| 25. CHECK FOR FUEL LEAKAGE |
When using the intelligent tester
Connect the intelligent tester to the DLC3.
Turn the ignition switch to the on position and intelligent tester main switch ON.
Select the Active Test mode on the intelligent tester.
When not using the intelligent tester.
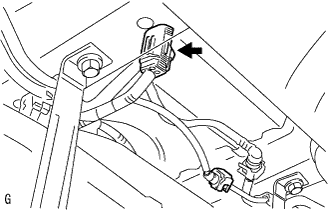 |
Disconnect the fuel pump connector.
Using a service wire, connect terminals FP and +B of the relay block.
Turn the ignition switch to the ON position, and check that the fuel pump operates.
Check that there are no fuel leaks anywhere on the fuel system after doing maintenance.
Check that the pulsation damper screw rises up when the fuel pump operates.
If operation is not as specified, check the following parts:
Turn the ignition switch off.
Disconnect the intelligent tester from the DLC3.