 |
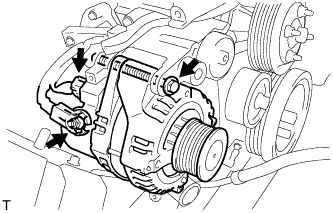
Install the generator assembly with the bolt.
- Torque:
- 62 N*m{ 632 kgf*cm , 46 ft.*lbf }
GENERATOR > INSTALLATION |
| 1. INSTALL GENERATOR ASSEMBLY |
|
Install the generator assembly with the bolt.
Install the generator wire to terminal B with the nut.
Install the terminal cap.
Connect the generator connector.
| 2. INSTALL GENERATOR BRACKET |
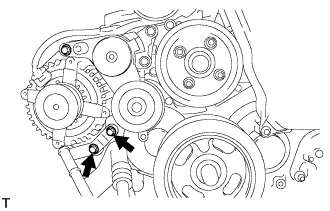 |
Install the generator bracket with the 2 bolts.
| 3. INSTALL IDLE NO.2 PULLEY ASSEMBLY (w/ Air Conditioning) |
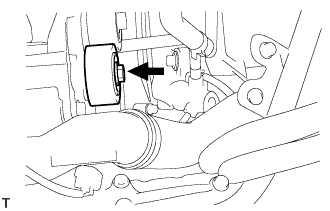 |
Install the idle No.2 pulley assembly and washer with the bolt.
| 4. INSTALL AIR CLEANER HOSE ASSEMBLY |
Install the air cleaner hose assembly with the clamp.
| 5. INSTALL AIR TUBE ASSEMBLY |
Install the air tube assembly with the 2 clamps and 2 bolts.
| 6. INSTALL VENTILATION PIPE |
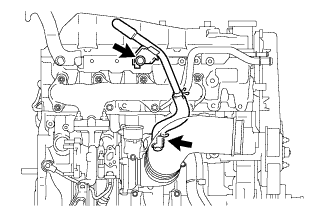 |
Install the ventilation pipe with the bolt and clip.
| 7. INSTALL COMPRESSOR OUTLET ELBOW |
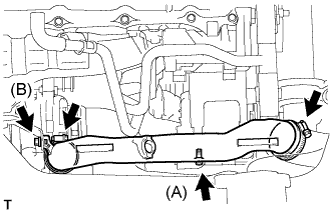 |
Install the compressor outlet elbow with the 2 bolts and 2 clamps.
| 8. INSTALL COMPRESSOR AND MAGNETIC CLUTCH (w/ Air Conditioning) |
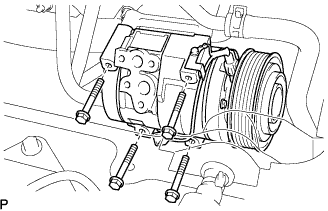 |
Install the compressor and magnetic clutch with the 4 bolts.
| 9. INSTALL FAN AND GENERATOR V BELT |
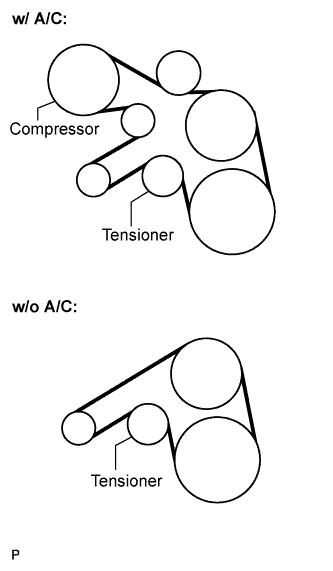 |
Install the drive belt by rotating the tensioner pulley in clockwise direction with the pulley set bolt of the tensioner.
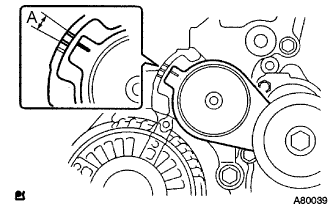 |
Make sure that the indicator mark of the tensioner is within range A.
| 10. INSTALL FENDER APRON MUDGUARD SEAL RH |
| 11. INSTALL ENGINE SERVICE HOLE SUB COVER ASSEMBLY |
Install the engine service hole sub cover with the 5 bolts.
| 12. INSTALL FRONT SEAT ASSEMBLY RH (for Hi-back Seat Type) |
| 13. INSTALL FRONT SEAT ASSEMBLY RH (for Low-back Seat Type) |
| 14. INSTALL FRONT DOOR SCUFF PLATE RH |
| 15. CONNECT NEGATIVE BATTERY CABLE |
| 16. INSTALL ENGINE UNDER COVER NO.1 (w/ Engine Under Cover No.1) |
| 17. PERFORM INITIALIZATION |
Some system need initialization when reconnecting the battery cable. (Click here)