 |
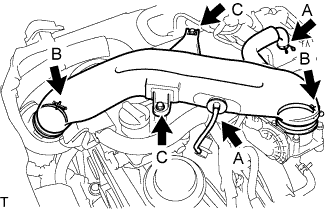
Disconnect the ventilation hose No.2 and the vacuum hose.(A)
WATER PUMP > REMOVAL |
| 1. DISCONNECT CABLE FROM NEGATIVE BATTERY TERMINAL |
| 2. REMOVE ENGINE UNDER COVER NO.1 |
| 3. DRAIN ENGINE COOLANT |
Firmly tighten the drain plugs and fill the reservoir tank with coolant to the top of the inlet.
Remove the 2-way that is located near the throttle body.
When air is bled and the coolant drains out, firmly install the 2-way.
Add coolant up to the B line mark in the reservoir tank and install the radiator cap.
| Condition | Capacity |
| w/ rear heater | 15.0 liters (15.8 US qts, 13.2 lmp. qts) |
| w/o rear heater | 13.0 liters (13.7 US qts, 11.4 lmp. qts) |
Warm up the engine.
After the engine cools down, check that the coolant level is between the LOW and FULL level marks.
| 4. REMOVE FRONT DOOR SCUFF PLATE RH |
| 5. REMOVE FRONT SEAT ASSEMBLY RH (for Hi-back Seat Type) |
| 6. REMOVE FRONT SEAT ASSEMBLY RH (for Low-back Seat Type) |
| 7. REMOVE ENGINE SERVICE HOLE SUB COVER SUB-ASSEMBLY |
Roll up the carpet, and remove the 5 bolts and engine service hole sub cover.
| 8. REMOVE INTAKE AIR CONNECTOR |
|
Disconnect the ventilation hose No.2 and the vacuum hose.(A)
Loosen the 2 hose clamp bolts.(B)
Remove the 2 bolts, then remove the intake air connector.(C)
| 9. REMOVE FAN AND GENERATOR V BELT |
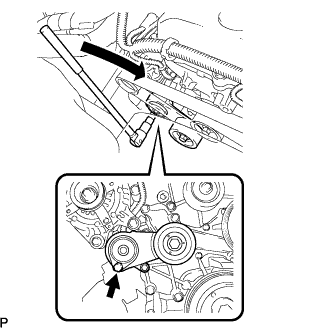 |
Use the hexagon-shaped part indicated by the arrow in the illustration to move the tensioner pulley downward and decrease the tension in the drive belt. Then remove the drive belt.
| 10. REMOVE FAN PULLEY |
Remove the 4 nuts, fan pulley and fan spacer.
| 11. REMOVE GENERATOR ASSEMBLY |
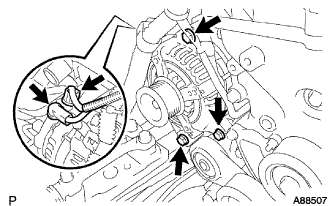 |
Disconnect the generator connector.
Remove the terminal cap.
Remove the nut and disconnect the wire harness from terminal B.
Remove the 3 bolts and generator assembly.
| 12. REMOVE V-RIBBED BELT TENSIONER ASSEMBLY |
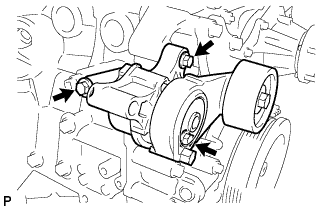 |
Remove the 3 bolts and belt tensioner.
| 13. DISCONNECT VANE PUMP ASSEMBLY |
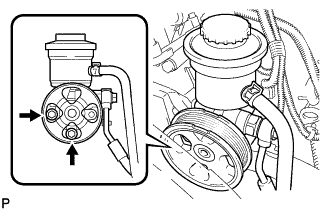 |
Disconnect the PS fluid pressure switch connector.
Remove the 2 bolts and disconnect the pump from the engine.
Support the vane pump securely.
| 14. REMOVE WATER PUMP ASSEMBLY |
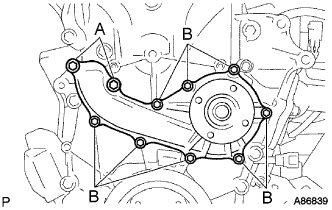 |
Remove the 10 bolts, water pump assembly and gasket.