 |
Install a new gasket and the intake manifold with the 4 bolts and 2 nuts.
- Torque:
- 29 N*m{ 296 kgf*cm , 21 ft.*lbf }
GLOW PLUG > INSTALLATION |
| 1. INSTALL GLOW PLUG |
Using a deep socket wrench (12 mm), install the 4 glow plugs.
| 2. INSTALL GLOW PLUG NO.1 CONNECTOR |
Install the glow plug No.1 connectors with the 4 nuts.
Install the 4 grommets.
| 3. INSTALL INTAKE MANIFOLD |
|
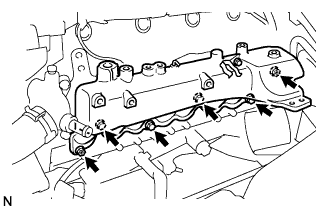
Install a new gasket and the intake manifold with the 4 bolts and 2 nuts.
Install the manifold stay with the bolt and nut.
Connect the ground cable with the bolt.
| 4. INSTALL NOZZLE LEAKAGE PIPE ASSEMBLY NO.2 |
Temporarily install the nozzle leakage pipe with the 2 bolts.
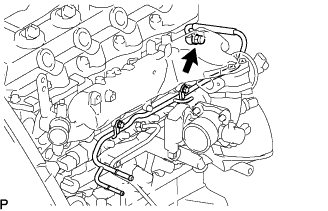 |
Install the new gasket and union bolt to the nozzle leakage pipe.
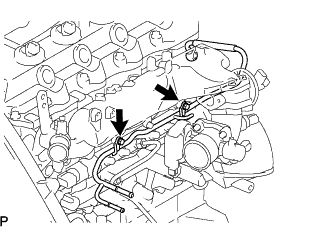 |
Tighten the 2 bolts.
| 5. INSTALL FUEL INLET PIPE SUB-ASSEMBLY |
Temporarily install the fuel inlet pipe.
Using SST, tighten the injection pipe on the common rail side.
Using SST, tighten the injection pipe on the supply pump side.
| 6. INSTALL INJECTION PIPE |
Install the injection pipes.
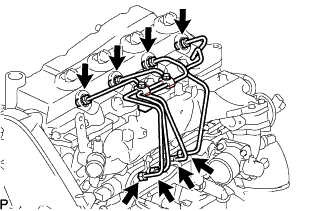 |
Temporarily install the 4 injection pipes.
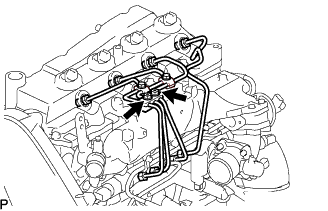 |
Install the injection pipe clamp No.3 in 2 nuts.
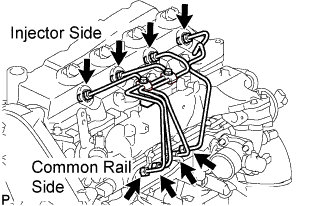 |
Fasten the union sequentially, from the injection pipe common rail to the injector, using SST.
| 7. INSTALL OIL LEVEL GAUGE GUIDE |
Install a new O-ring to the oil level gauge guide.
Apply a light coat of engine oil to the O-ring.
Install the oil level gauge guide with the bolt.
Install the oil level gauge.
| 8. INSTALL INTAKE AIR CONNECTOR (w/o EGR Valve) |
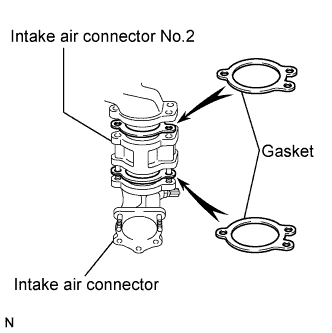 |
Temporarily install 2 new gaskets and intake air connector No.2 to the intake air connector.
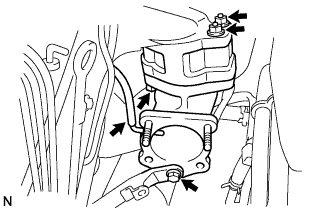 |
Temporarily tighten the intake air connector assembly with the bolt and 2 nuts.
Tighten the manifold stay with the bolt.
Tighten the intake air connector with the bolt and 2 nuts.
Install the vacuum hose to the intake air connector.
| 9. INSTALL ELECTRIC EGR CONTROL VALVE ASSEMBLY (w/ EGR Valve) |
Temporarily tighten the EGR valve assembly with the sensor.
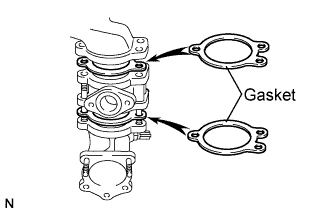 |
Install 2 new gaskets and the EGR valve to the intake air connector as shown in the illustration.
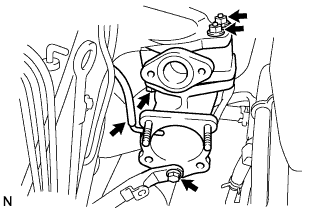 |
Temporarily tighten the intake air connector with EGR valve assembly to the intake manifold with the bolt and the 2 nuts.
Install the vacuum hose to the intake air connector.
Temporarily tighten the manifold stay with the bolt.
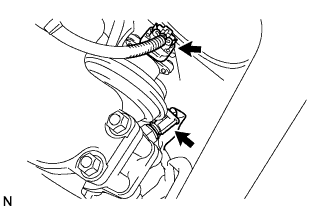 |
Connect the EGR valve position sensor connector.
Connect the intake air temperature sensor connector.
Install the vacuum regulating valve.
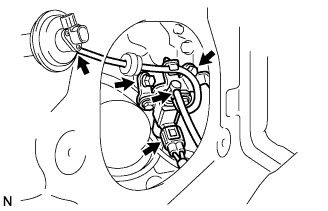 |
Install the vacuum regulating valve with the 2 bolts.
Connect the 2 vacuum hoses and the regulating valve connector.
| 10. INSTALL ENGINE SERVICE HOLE COVER NO.2 |
Install the engine service hole cover No.2 with the 3 bolts.
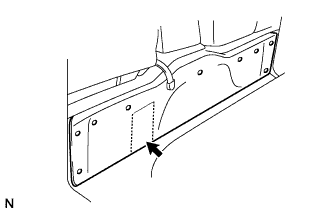 |
Return the carpet.
| 11. INSTALL EGR PIPE SUB-ASSEMBLY NO.1 (w/ EGR Valve) |
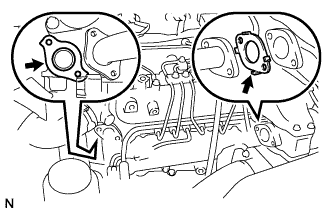 |
Install 2 new gaskets to the cylinder head and the EGR pipe sub-assembly No.1 as shown in the illustration.
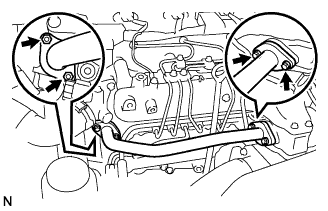 |
Install the EGR pipe with the 2 bolts and the 2 nuts.
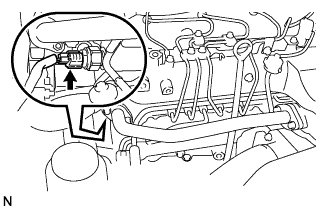 |
Connect the fuel pressure sensor connector.
| 12. INSTALL DIESEL THROTTLE BODY ASSEMBLY |
Install a new gasket to intake air connector.
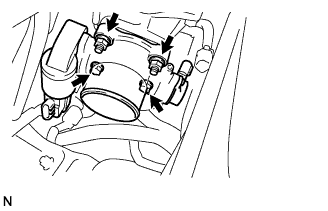 |
Install the throttle body with the 2 bolts and the 2 nuts.
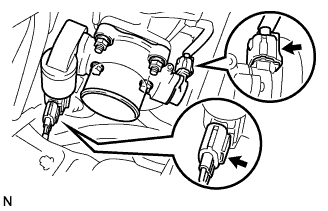 |
Connect the 2 throttle body connectors.
| 13. INSTALL AIR HOSE NO.4 |
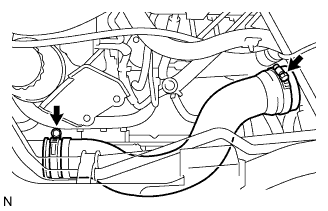 |
Install the air hose No.4 with the 2 clamps.
| 14. CONNECT OIL RETURN HOSE (w/ Inter Cooler) |
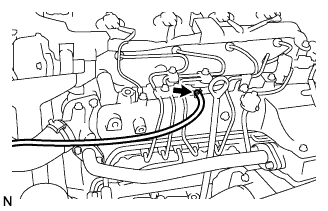 |
Connect the oil return hose with the clip.
| 15. INSTALL VANE PUMP OIL RESERVOIR ASSEMBLY |
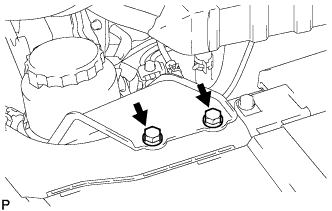 |
Install the vane pump oil reservoir assembly with the 2 bolts.
| 16. INSTALL ENGINE SERVICE HOLE SUB COVER ASSEMBLY |
Install the engine service hole sub cover with the 5 bolts.
| 17. INSTALL FRONT DOOR SCUFF PLATE RH |
| 18. INSTALL FRONT SEAT ASSEMBLY RH (for Hi-back Seat Type) |
Perform the same procedure as above on the opposite side. (Click here)
| 19. INSTALL FRONT SEAT ASSEMBLY RH (for Low-back Seat Type) |
Perform the same procedure as above on the opposite side. (Click here)
| 20. CONNECT NEGATIVE BATTERY CABLE |
| 21. INSPECT FUEL LEAKAGE |
PERFORM ACTIVE TEST
Connect the intelligent tester to the DLC3.
Turn the ignition switch on.
Turn the intelligent tester on.
Enter the following menus: Powertrain / ECD / Active Test.
Perform the Active Test.
| Intelligent Tester Display | Test Details | Control Range | Diagnostic Notes |
| Test the Fuel Leak | Pressurizes common rail internal fuel pressure, and checks for fuel leaks | Stop/Start |
|
| 22. INSPECT FUNCTION OF THROTTLE BODY |
Inspect the throttle control motor.
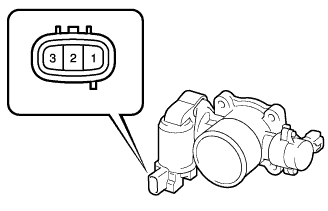 |
Using an ohmmeter, measure the resistance between the terminals.
| Tester Connection | Specified Condition |
| 1 (DUTY) - Body ground | 2 Ω to 10 kΩ |
| 23. PERFORM INITIALIZATION |
Some system need initialization when reconnecting the battery cable. (Click here)