 |
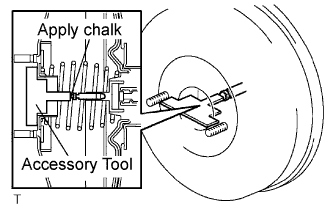
Apply chalk to the tip of the accessory tool.
- HINT:
- The accessory tool is enclosed with a new brake master cylinder sub-assembly.
BRAKE MASTER CYLINDER > INSTALLATION |
| 1. INSPECT AND ADJUST BRAKE BOOSTER PUSH ROD |
|
Apply chalk to the tip of the accessory tool.
Place the accessory tool on the brake booster assembly.
Measure the clearance between the brake booster push rod and accessory tool.
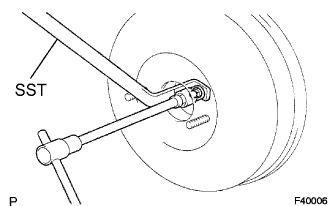 |
If clearance is not within the specified range, fix the push rod using SST and adjust the length of the protruding adjusting bolt.
| 2. INSTALL BRAKE MASTER LESS RESERVOIR TANK CYLINDER SUB-ASSEMBLY |
Install the 2 grommets to the brake master cylinder reservoir.
Install the brake master cylinder reservoir with the retainer to the brake master cylinder.
| 3. INSTALL BRAKE MASTER CYLINDER |
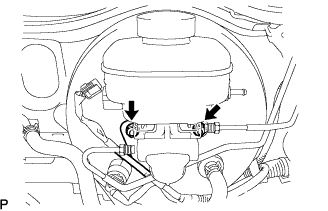 |
Install the brake master cylinder and harness clamp bracket to the booster with the 2 nuts.
Manual Transmission:
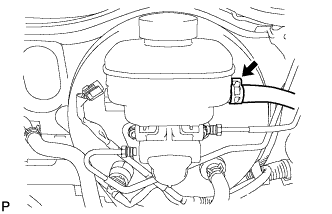 |
Install the clutch reservoir tube with the clip.
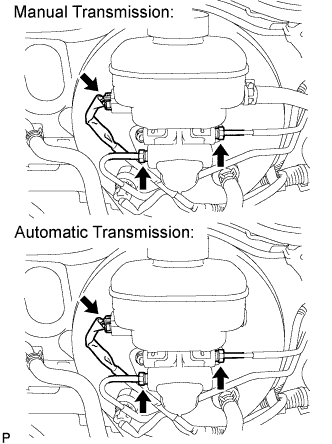 |
Using SST, connect the 2 brake tubes to the master cylinder.
Connect the level warning light switch connector.
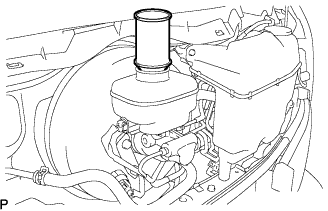
| 4. ADD BRAKE FLUID |
 |
| 5. BLEED BRAKE MASTER CYLINDER |
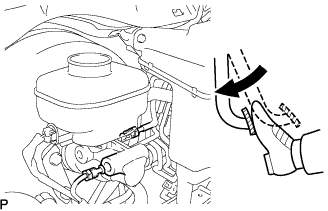 |
Using SST, disconnect the brake lines from the master cylinder.
Slowly depress the brake pedal and hold it there.
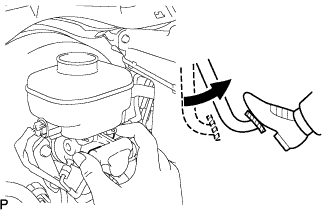 |
Block the outer holes with your fingers, and release the brake pedal.
Remove your fingers. Slowly depress the brake pedal and hold it again. Block the outer holes with your fingers and release the brake pedal. Repeat this procedure 3 or 4 times.
Using SST, connect the brake lines to the master cylinder.
| 6. BLEED BRAKE LINE |
Connect the vinyl tube to the bleeder plug.
Depress the brake pedal several times and loosen the bleeder plug with the pedal held down.
At the point where the fluid stops coming out, tighten the bleeder plug and release the brake pedal.
Repeat this procedure until the air in the brake fluid is completely bled out.
Tighten the bleeder plug.
Front bleeder plug:
Rear bleeder plug:
Repeat the above procedure to bleed the air out of the brake line for each wheel.
| 7. CHECK BRAKE FLUID LEVEL |
Check the fluid level and add fluid if necessary.
| 8. CHECK BRAKE FLUID LEAKAGE |