 |
Remove the 2 clips and 2 screws.
AIR CONDITIONING UNIT > REMOVAL |
| 1. REMOVE BATTERY NEGATIVE TERMINAL |
| 2. REMOVE ENGINE UNDER COVER NO.1 (w/ Under Cover and Intercooler) |
| 3. DRAIN ENGINE COOLANT (w/ Intercooler) |
| 4. REMOVE RADIATOR GRILLE (w/ Intercooler) |
|
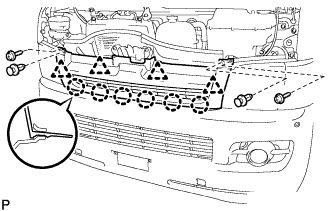
Remove the 2 clips and 2 screws.
Release the 6 claws and 4 clips and remove the radiator grille.
| 5. REMOVE AIR INLET DUCT (w/ Intercooler) |
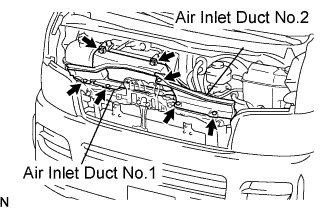 |
Remove the 3 clips and the air inlet duct No.2.
Remove the 2 bolts, 2 clips and the air inlet duct No.1.
| 6. REMOVE WINDSHIELD WASHER FLUID (w/ Intercooler) |
| 7. REMOVE WINDSHIELD WASHER JAR ASSEMBLY (w/o Rear Wiper and w/ Intercooler) |
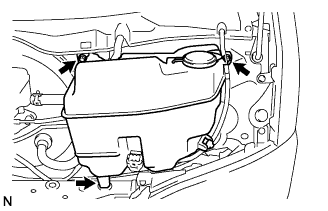 |
Remove the 2 bolts.
Separate the hose and connector, and remove the windshield washer jar assembly.
| 8. REMOVE WINDSHIELD WASHER JAR ASSEMBLY (w/ Rear Wiper and Intercooler) |
|
Remove the 2 bolts.
Separate the 2 hoses and 2 connectors, and remove the windshield washer jar assembly.
| 9. REMOVE RADIATOR RESERVE TANK ASSEMBLY (w/ Intercooler) |
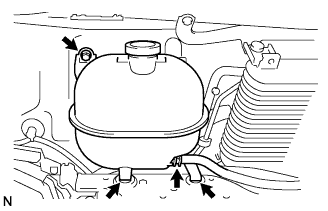 |
Remove the bolt, and separate the radiator reserve tank assembly from the body panel.
Remove the clip, and disconnect the water by-pass hose No.1.
Remove the clip, and disconnect the water by-pass hose No.2.
Remove the radiator reserve tank assembly.
| 10. REMOVE HOOD LOCK ASSEMBLY (w/ Intercooler) |
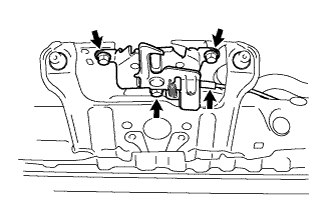 |
Remove the 3 bolts, hood lock control cable and the hood lock assembly.
| 11. REMOVE RADIATOR SUPPORT SUB-ASSEMBLY (w/ Intercooler) |
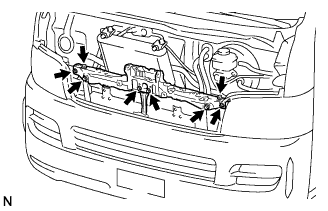 |
Remove the 6 bolts, 2 screws and the radiator upper support.
| 12. REMOVE INTERCOOLER ASSEMBLY (w/ Intercooler) |
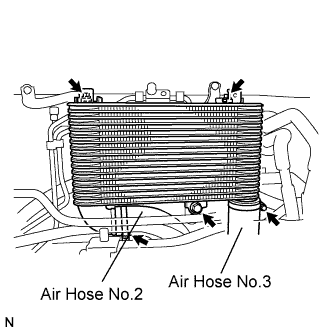 |
Loosen the clamp, and disconnect the air hose No.2.
Loosen the clamp, and disconnect the air hose No.3.
Remove the 3 bolts and the intercooler assembly.
| 13. DISCONNECT COOLER REFRIGERANT SUCTION PIPE A |
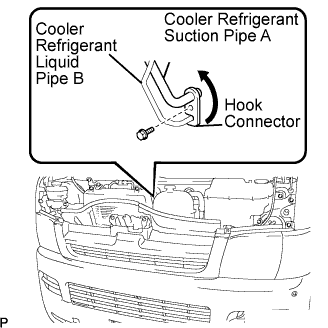 |
Remove the bolt, and slide the hook connector.
Disconnect the cooler refrigerant suction pipe A.
Remove the O-ring from the cooler refrigerant suction pipe A.
| 14. DISCONNECT COOLER REFRIGERANT LIQUID PIPE B |
Disconnect the cooler refrigerant liquid pipe B.
Remove the O-ring from the cooler refrigerant liquid pipe B.
| 15. DISCONNECT HEATER OUTLET WATER HOSE |
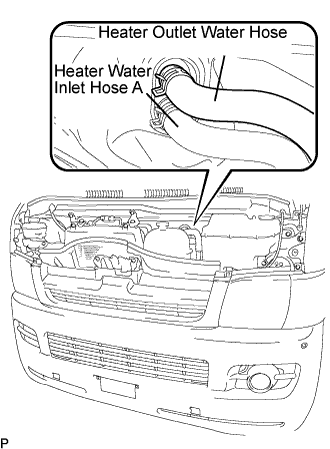 |
Using pliers, grip the claws of the clip and slide the clip to disconnect the heater outlet water hose.
| 16. DISCONNECT HEATER WATER INLET HOSE A |
| 17. REMOVE INSTRUMENT PANEL ASSEMBLY |
| 18. REMOVE STEERING INTERMEDIATE SHAFT |
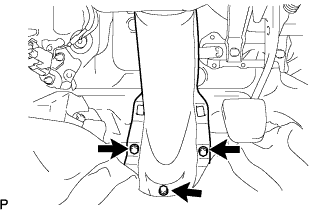 |
Remove the 3 bolts and the steering shaft cover.
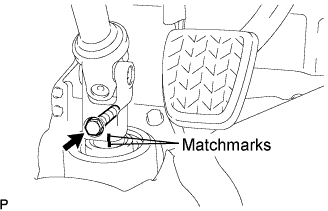 |
Remove the bolt.
Slide the steering intermediate shaft assembly No.2 and put matchmarks on the steering gear assembly and the steering intermediate shaft assembly No.2.
| 19. REMOVE STEERING COLUMN ASSEMBLY |
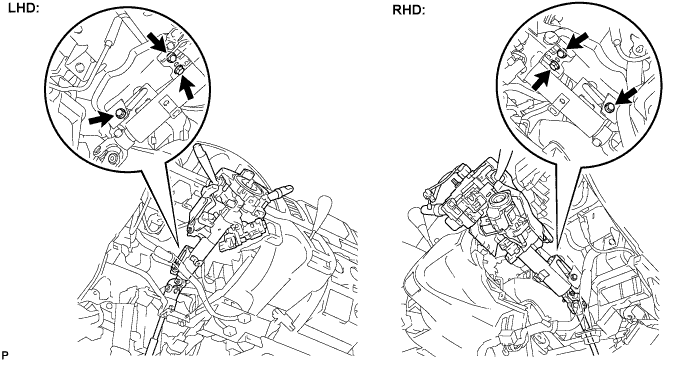
Disconnect the connectors and wire harness clamps from the steering column assembly.
Remove the 3 bolts and the steering column assembly.
| 20. REMOVE AIR DUCT NO.1 |
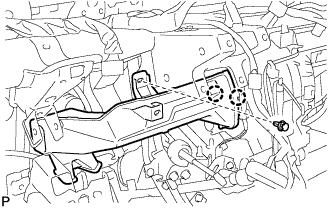 |
Remove the clip.
Release the 2 claws and remove the air duct No.1.
| 21. DISCONNECT PARKING BRAKE CONTROL HANDLE SUB-ASSEMBLY |
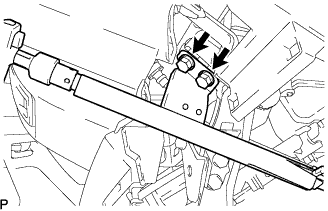 |
Remove the 2 bolts and disconnect the parking brake control handle sub-assembly.
| 22. REMOVE INSTRUMENT PANEL TO FLOOR BRACE SUB-ASSEMBLY |
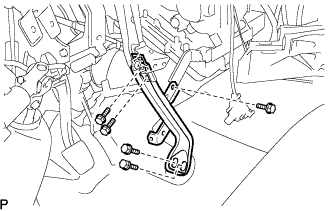 |
Remove the 5 bolts and the instrument panel to floor brace sub-assembly.
| 23. REMOVE INSTRUMENT PANEL REINFORCEMENT ASSEMBLY |
Remove the clamps and connectors, and then disconnect the wire harness.
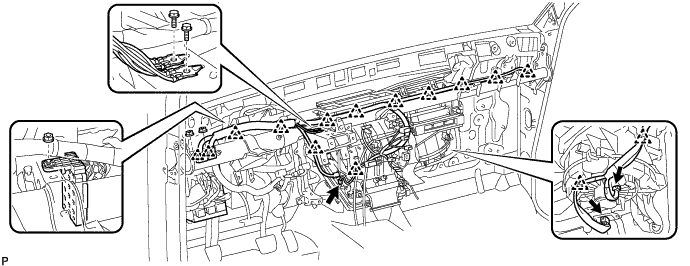
Remove the bolts, nuts and junction blocks.
Remove the 2 caps and 2 bolts.
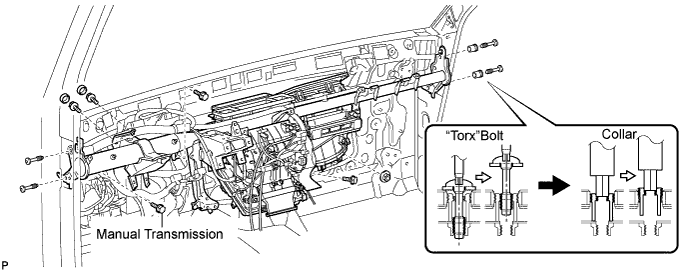
Remove the 2 bolts and nut. (AUTOMATIC TRANSMISSION)
Remove the 3bolts and nut. (MANUAL TRANSMISSION)
Using a"Torx" socket wrench (T40), remove the 4 "Torx" bolts.
Using a hexagon wrench 12 mm, remove the 2 collars and instrument panel reinforcement assembly.
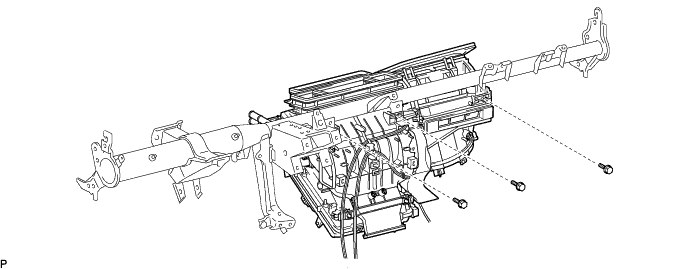
| 24. REMOVE AIR CONDITIONER UNIT ASSEMBLY |
Remove the 3 bolts and air conditioner unit assembly.
| 25. REMOVE AIR DUCT NO.2 |
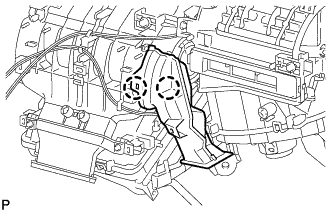 |
Release the 2 claws and remove the air duct No.2.
| 26. REMOVE AIR CONDITIONING RADIATOR ASSEMBLY |
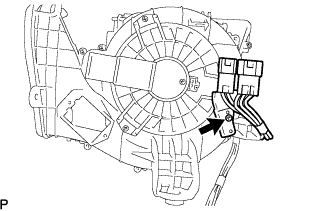 |
w/ PTC
Remove the screw and then disconnect the wire harness.
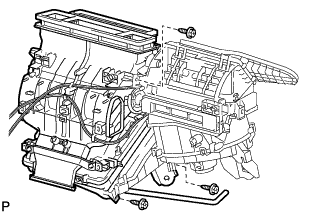 |
Remove the 3 screws and air conditioning radiator assembly.