 |
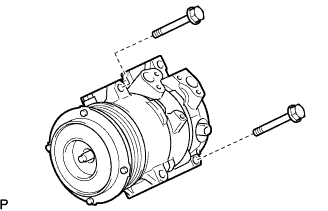
Temporarily tighten the compressor and pulley with the 2 bolts.
2TR-FE COMPRESSOR AND PULLEY > INSTALLATION |
| 1. ADJUST COMPRESSOR OIL |
When replacing the compressor and pulley with a new one, gradually discharge the refrigerant gas from the service valve, and drain the following amount of oil from the new compressor and pulley before installation.
| 2. TEMPORARILY TIGHTEN COMPRESSOR AND PULLEY |
|
Temporarily tighten the compressor and pulley with the 2 bolts.
| 3. FULLY TIGHTEN COMPRESSOR AND PULLEY |
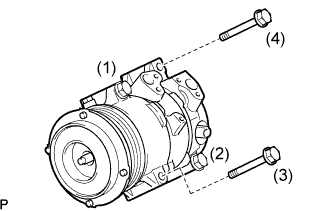 |
fully tighten the compressor and pulley with the 2 bolts.
| 4. INSTALL COOLER REFRIGERANT DISCHARGE HOSE NO.1 |
Remove the attached vinyl tape from the hose.
Apply sufficient compressor oil (ND-OIL 8) to a new O-ring and the fitting surface of the compressor and pulley.
Install the O-ring onto the cooler refrigerant discharge hose No.1.
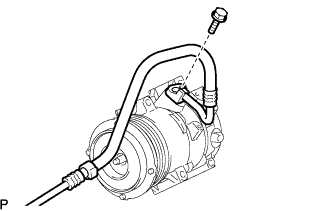 |
Install the cooler refrigerant discharge hose No.1 onto the compressor and pulley with the bolt.
| 5. INSTALL COOLER REFRIGERANT SUCTION HOSE NO.1 |
Remove the attached vinyl tape from the hose.
Apply sufficient compressor oil (ND-OIL 8) to a new O-ring and the fitting surface of the compressor and pulley.
Install the O-ring onto the cooler refrigerant suction hose No.1.
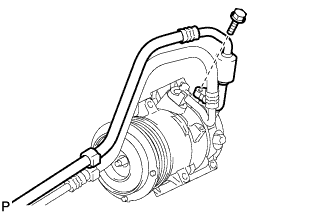 |
Install the cooler refrigerant suction hose No.1 onto the compressor and pulley with the bolt.
| 6. INSTALL OIL LEVEL GAUGE GUIDE |
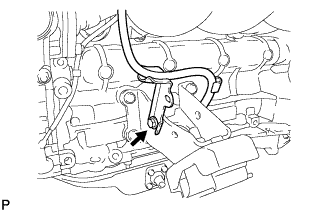 |
Install the gauge guide with the bolt.
| 7. INSTALL OIL LEVEL GAUGE SUB-ASSEMBLY |
| 8. INSTALL FAN AND GENERATOR V BELT |
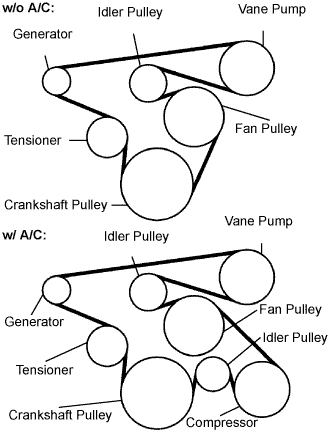 |
Install the drive belt to the pulleys except the drive belt tensioner pulley.
Use the hexagon-shaped part indicated by the arrow in the illustration to move the tensioner pulley downward and then install the drive belt to the tensioner pulley.
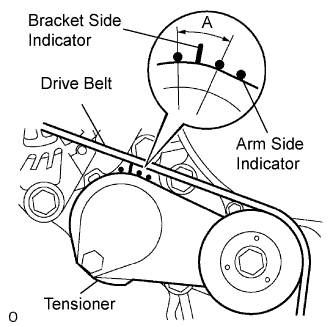 |
After a new belt has been installed, check that the tensioner indicator mark is within range A shown in the illustration.
| 9. INSTALL ENGINE SERVICE HOLE SUB COVER SUB-ASSEMBLY |
Install the engine service hole sub cover with the 5 bolts.
| 10. INSTALL FRONT SEAT ASSEMBLY RH (for Low-back Seat Type) |
Perform the same procedure as above on the opposite side.
| 11. REMOVE FRONT SEAT ASSEMBLY RH (for Hi-back Seat Type) |
Perform the same procedure as above on the opposite side.
| 12. INSTALL FRONT DOOR SCUFF PLATE RH |
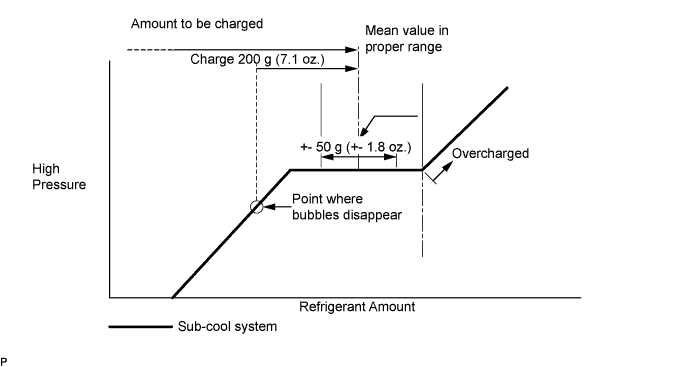
| 13. CHARGE REFRIGERANT |
Perform vacuum purging using a vacuum pump.
Charge with refrigerant HFC-134a (R134a).
| 14. WARM UP ENGINE |
Warm up the engine at less than 1,850 rpm for 2 minutes or more after charging refrigerant.
| 15. CHECK FOR LEAKAGE OF REFRIGERANT |
After recharging refrigerant gas, check for leakage of refrigerant gas using a halogen leak detector.
Carry out the test under the following conditions:
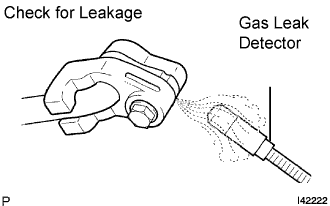 |
Using a gas leak detector, check for leakage of the refrigerant line.
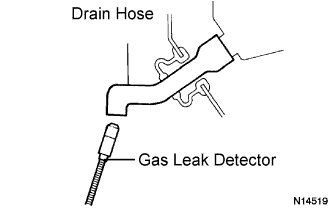 |
Bring the gas leak detector close to the drain hose with the detector's power off.
If a gas leak is not detected on the drain hose, remove the blower motor control from the cooling unit. Insert the gas leak detector sensor into the unit and perform the test.
Disconnect the pressure switch connector and leave it for approximately 20 minutes. Bring the gas leak detector close to the pressure switch and perform the test.