 |
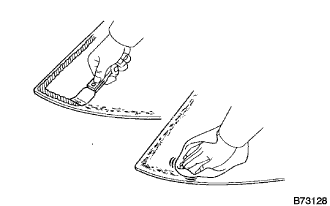
Using a scraper, remove the spacers, moulding and adhesive from the back door glass.
REAR SIDE WINDOW GLASS > INSTALLATION |
| 1. CLEAN REAR SIDE WINDOW GLASS |
|
Using a scraper, remove the spacers, moulding and adhesive from the back door glass.
Clean the outer edge of the back door glass with white gasoline.
| 2. CLEAN VEHICLE BODY |
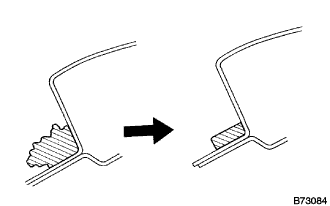 |
Clean and shape the contact surface of the vehicle body.
On the contact surface of the vehicle body, use a knife to cut away excess adhesive as shown in the illustration.
Clean the contact surface of the vehicle body with cleaner.
| 3. INSTALL REAR SIDE WINDOW GLASS STOPPER |
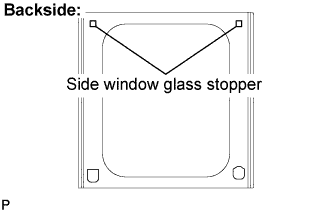 |
Apply Primer G to the glass where the spacers will be installed.
| 4. INSTALL REAR SIDE WINDOW GLASS |
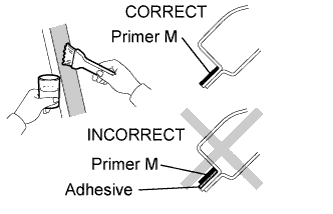 |
Using a brush or sponge, apply Primer M to the exposed part of the vehicle body.
Using a brush or sponge, apply Primer G to the contact surface of the glass.
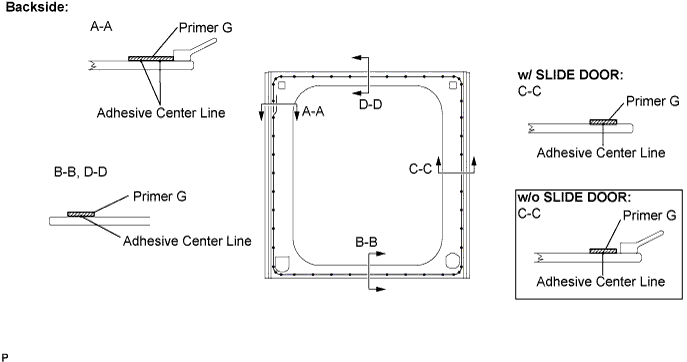
Apply adhesive to the back door glass.
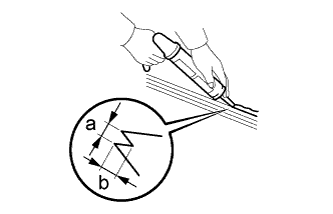 |
Cut off the tip of cartridge nozzle as shown in the illustration.
| Area | Measurement |
| a | 12.0 mm (0.472 in.) |
| b | 8.0 mm (0.315 in.) |
| Temperature | Usage Timeframe |
| 35°C (95°F) | 15 minutes |
| 20°C (68°F) | 1 hour 40 minutes |
| 5°C (41°F) | 8 hours |
Load the sealer gun with the cartridge.
Apply adhesive to the back door glass as shown in the illustration.
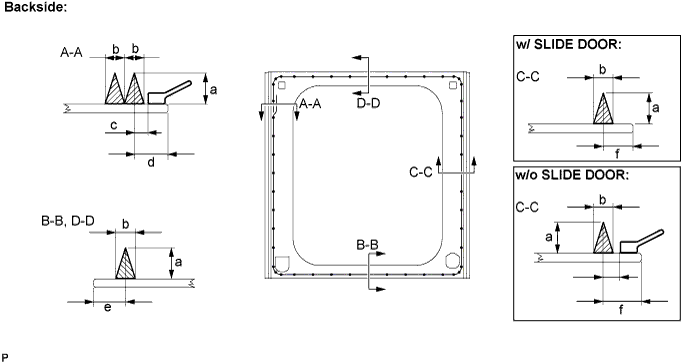
| Area | Measurement |
| a | 12.0 mm (0.472 in.) |
| b | 8.0 mm (0.315 in.) |
| c | 6.1 mm (0.24 in.) |
| d | 14.1 mm (0.587 in.) |
| e | 11.5 mm (0.452 in.) |
| f | 14.6 mm (0.574 in.) |
Install the back door glass to the vehicle body.
Lightly press the front surface of the back door glass to ensure that the back door glass is securely fit to the vehicle body.
Hold the back door glass in place securely with protective tape or equivalent until the adhesive hardens.
| Temperature | Minimum time prior to driving vehicle |
| 35 °C (95°F) | 1 hour 30 minutes |
| 20°C (68°F) | 5 hours |
| 5 °C(41°F) | 24 hours |
| 5. CHECK FOR LEAKS AND REPAIR |
Conduct a leak test after the adhesive has completely hardened.
| 6. INSTALL ROOF SIDE GARNISH INNER UPPER LH |
| 7. INSTALL QUARTER PILLAR GARNISH LH |
| 8. INSTALL QUARTER TRIM PANEL ASSEMBLY REAR LH |
| 9. INSTALL FRONT SEAT OUTER BELT ASSEMBLY LH |
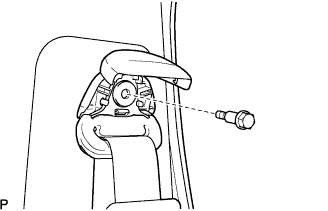 |
Install the front seat outer belt assembly LH with the bolt.
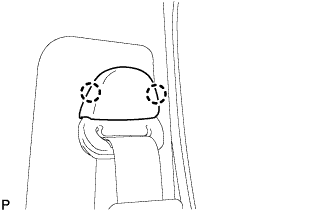 |
Engage the 2 claws to install the cover.
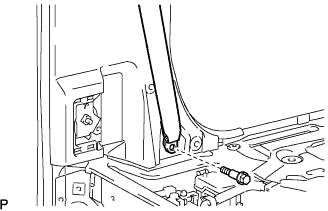 |
Install the front seat outer belt assembly LH with the bolt.
| 10. INSTALL BACK DOOR WEATHERSTRIP |
| 11. INSTALL BACK DOOR SCUFF PLATE |