 |
Remove the 2 clips and 2 screws.
CONDENSER > REMOVAL |
| 1. DISCHARGE REFRIGERANT FROM REFRIGERATION SYSTEM |
Start up the engine.
Turn the A/C switch on.
Operate the cooler compressor at an engine rpm of approximately 1,000 for 5 to 6 minutes to circulate the refrigerant and collect compressor oil remaining in each component into the cooler compressor as much as possible.
Stop the engine.
Using SST, let the refrigerant gas out.
| 2. REMOVE RADIATOR GRILLE |
|
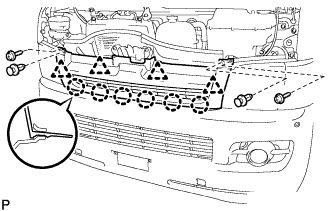
Remove the 2 clips and 2 screws.
Release the 6 claws and 4 clips and remove the radiator grille.
| 3. REMOVE STEP PLATE COVER LH |
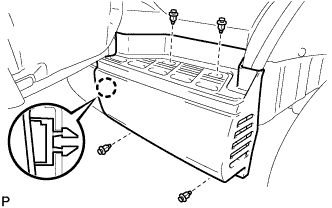 |
Remove the 4 clips.
Release the claw and remove the step plate cover.
| 4. REMOVE STEP PLATE COVER RH |
| 5. REMOVE FRONT BUMPER |
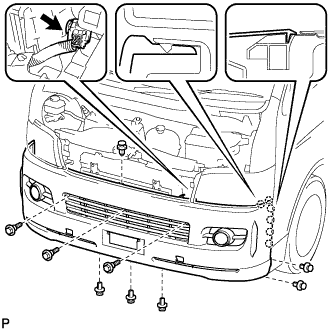 |
Remove the 8 clips and 3 bolts.
Release the 12 claws and remove the bumper.
Disconnect the connectors. (w/ fog light)
| 6. REMOVE HOOD LOCK SUPPORT BRACE SUB-ASSEMBLY |
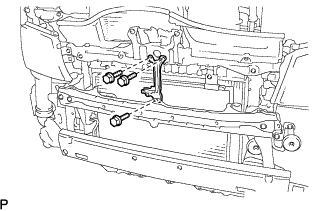 |
Remove the 3 bolts and hood lock support brace sub-assembly.
| 7. REMOVE FRONT FLOOR CROSS MEMBER REINFORCEMENT SUB-ASSEMBLY |
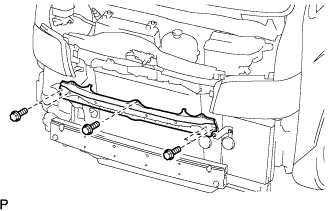 |
Remove the 5bolt and front floor cross member reinforcement sub-assembly.
| 8. REMOVE FRONT BUMPER REINFORCEMENT |
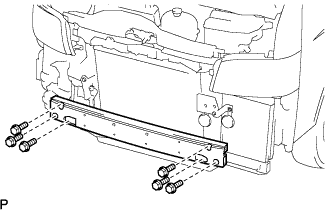 |
Remove the 6 bolts and front bumper reinforcement.
| 9. DISCONNECT COOLER REFRIGERANT DISCHARGE PIPE A |
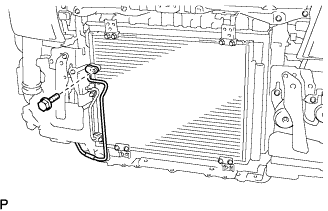 |
Remove the bolt and disconnect the cooler refrigerant discharge pipe A from the cooler condenser assembly.
Remove the O-ring from the cooler refrigerant discharge pipe A.
| 10. DISCONNECT COOLER REFRIGERANT LIQUID PIPE A |
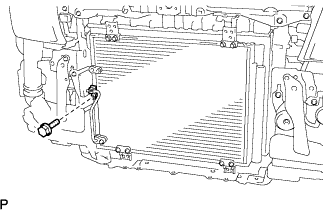 |
Remove the bolt and clamp.
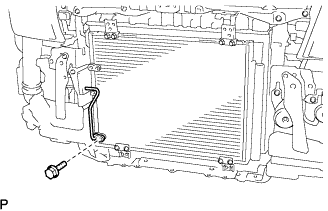 |
Remove the bolt and disconnect the cooler refrigerant liquid pipe A from the cooler condenser assembly.
Remove the O-ring from the cooler refrigerant liquid pipe A.
| 11. REMOVE W/ RECEIVER CONDENSER ASSEMBLY |
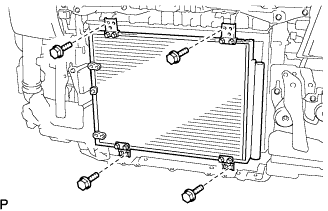 |
Remove the 4 bolts and w/ receiver condenser assembly.