Home › DRIVE LINE › PROPELLER SHAFT › PROPELLER SHAFT ASSEMBLY (for Super Long Wheelbase)

PROPELLER SHAFT ASSEMBLY (for Super Long Wheelbase) > DISASSEMBLY

for Preparation Click here


1. REMOVE PROPELLER SHAFT ASSEMBLY


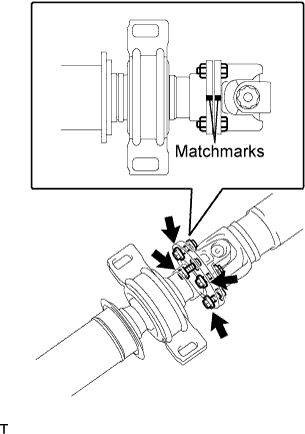
    C107080E01
  1. Put matchmarks on both flanges.

  1. Remove the 4 nuts, bolts, washers and propeller shaft assembly.


2. REMOVE CENTER SUPPORT BEARING ASSEMBLY NO.1
  1. Hold the intermediate shaft assembly in a vise between aluminium plates.
    NOTICE:
    Do not overtighten the vise.


    C104524E01
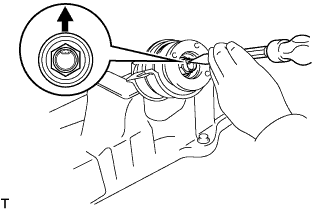
  1. Using a chisel and a hammer, release the staked part of the nut.
    NOTICE:
    Release the staked part of the nut completely, otherwise the threads of the intermediate shaft may be damaged.


    C115771E01
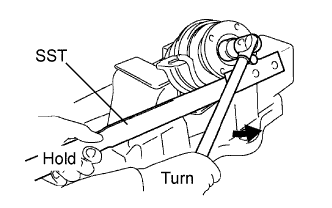
  1. Using SST to hold the universal joint flange, remove the nut and intermediate shaft washer.
    SST
    09330-00021  


    C115772E01
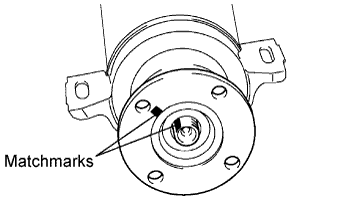
  1. Put matchmarks on the intermediate shaft assembly and universal joint flange.


    C115773E01
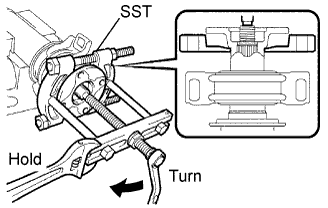
  1. Using SST, remove the universal joint flange from the intermediate shaft assembly.

    SST
    09950-00020  
    09950-00030  

    NOTICE:
    Apply grease to the threads and tip of the SST center bolt before use.

  1. Remove the center support bearing assembly No.1 and washer from the intermediate shaft assembly.


3. INSPECT PROPELLER SHAFT ASSEMBLY


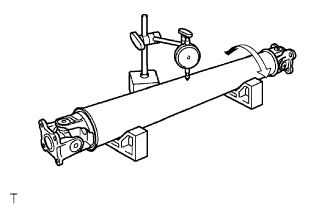
    C062537E02
  1. Using a dial indicator, inspect the runout of the propeller shaft.

    Maximum runout:
    0.3 mm (0.0118 in.)

    HINT:
    The dial indicator must be set at a right angle to the center of the propeller shaft.

    If the shaft runout exceeds the maximum, replace the propeller shaft.


4. INSPECT INTERMEDIATE SHAFT


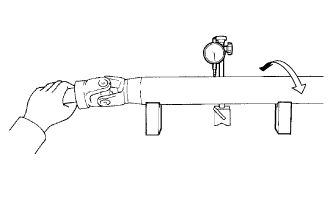
    C036277E03
  1. Using a dial indicator, inspect the runout of the intermediate shaft.

    Maximum runout:
    0.3 mm (0.0118 in.)

    HINT:
    The dial indicator must be set at a right angle to the center of the propeller shaft.

    If the shaft runout exceeds the maximum, replace the propeller shaft.


5. REMOVE UNIVERSAL JOINT SPIDER ASSEMBLY


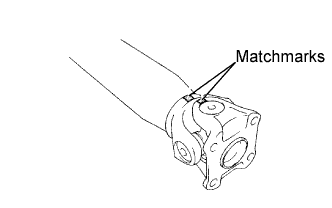
    C115683E02
  1. Put matchmarks on the flange yoke and propeller shaft assembly.


    C061264
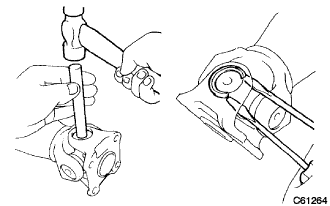
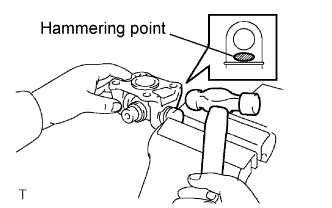
  1. Using a brass bar and a hammer, slightly tap in the spider bearing outer races.

  1. Using 2 screwdrivers, remove the 4 snap rings from the grooves.

  1. Hold the propeller shaft assembly in a vise between aluminium plates.
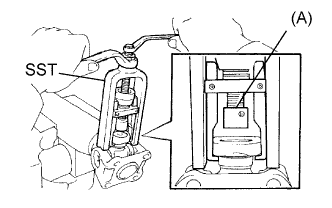
    NOTICE:
    Do not overtighten the vise.


    C115684E02
  1. Using SST, push out the spider bearing from the propeller shaft.
    SST
    09332-25010  

    NOTICE:
    Sufficiently raise the part indicated by (A) so that it does not come into contact with the spider bearing.


    C115685E02
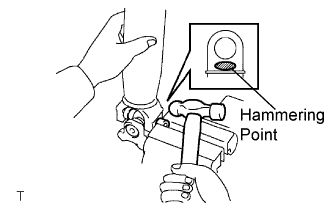
  1. Clamp the spider bearing outer race in a vise between aluminium plates and tap off the propeller shaft with a hammer.

    NOTICE:
    1. Do not overtighten the vise.
    2. Do not tap the shaft.

    HINT:
    Remove the spider bearing on the opposite side using the same procedure.

  1. Install the 2 removed spider bearing outer races to the spider.

  1. Hold the flange yoke in a vise between aluminium plates.
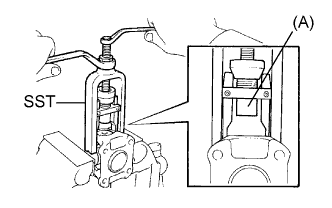
    NOTICE:
    Do not overtighten the vise.


    C115686E02
  1. Using SST, push out the spider bearing from the yoke.
    SST
    09332-25010  

    HINT:
    Sufficiently raise the part indicated by (A) so that it does not come into contact with the spider bearing.


    C115687E02
  1. Clamp the spider bearing outer race in a vise between aluminium plates and tap off the propeller shaft with a hammer.

    NOTICE:
    Do not overtighten the vise.

  1. Remove the spider.

    NOTICE:
    Do not damage the flange yoke.

    HINT:
    Remove the spider bearing on the opposite side using the same procedure.