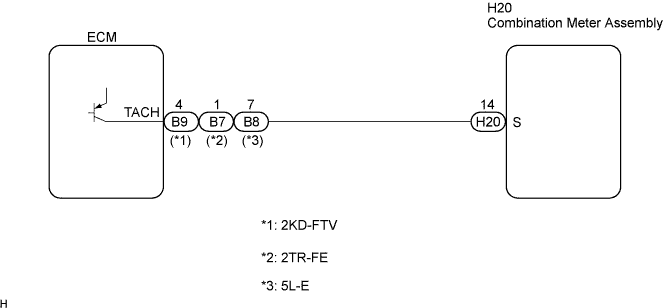
METER / GAUGE SYSTEM > Tachometer Malfunction |
| 1.INSPECT COMBINATION METER ASSEMBLY |
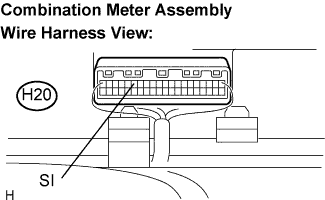 |
Check the input signal wave form using an oscilloscope.
Remove the combination meter assembly with the connector still connected.
Connect the oscilloscope to terminal S (H20-14) and body ground.
Start the engine.
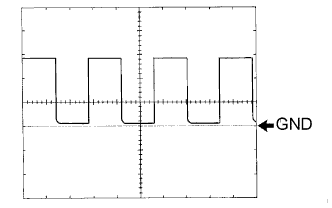 |
Check the signal wave form according to the condition(s) in the table below.
| Item | Condition |
| Tool setting | 5 V/DIV., 10 ms/DIV. |
| Vehicle condition | Driving at approx. 20 km/h (12 mph) |
|
| ||||
| OK | ||
 | ||
| ||
| 2.CHECK HARNESS AND CONNECTOR (BETWEEN ECM AND COMBINATION METER) |
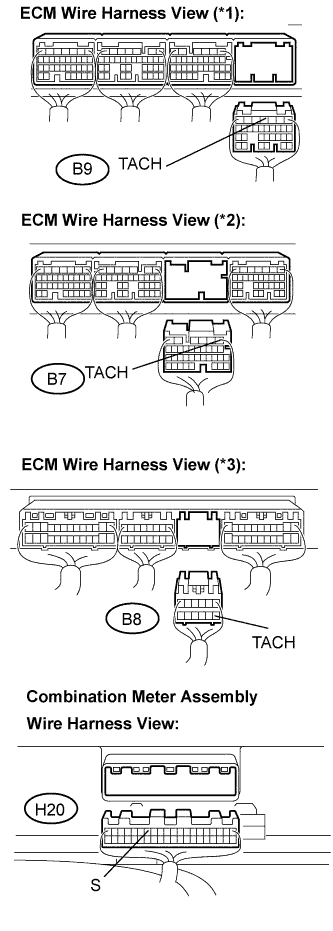 |
Disconnect the H20 and B9 (*1)/B7 (*2)/B8 (*3) connectors.
Measure the resistance according to the value(s) in the table below.
| Tester Connection | Condition | Specified Condition |
| TACH (B9-4) (*1) - S (H20-14) | Always | Below 1 Ω |
| TACH (B7-1) (*2) - S (H20-14) | Always | Below 1 Ω |
| TACH (B8-7) (*3) - S (H20-14) | Always | Below 1 Ω |
| S (H20-14) - Body ground | Always | 10 kΩ or higher |
|
| ||||
| OK | ||
| ||
| ||

