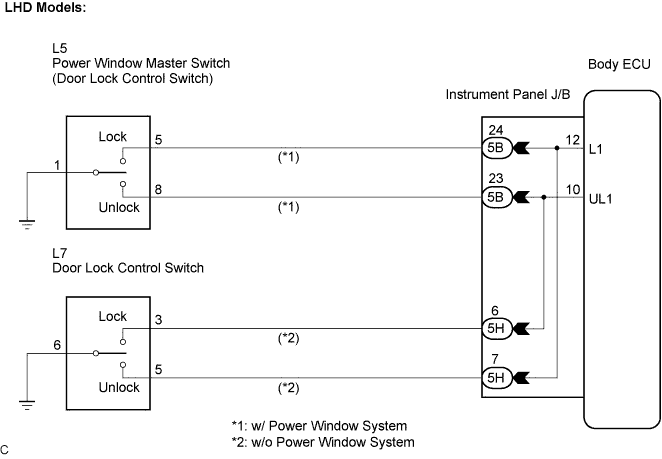
POWER DOOR LOCK CONTROL SYSTEM > Door Control Switch Circuit |
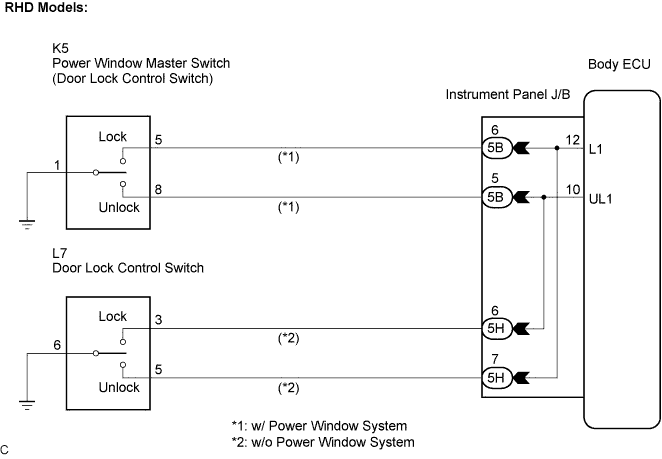
| 1.SYSTEM CIRCUIT CHECK |
System circuit check
| Door control circuit (w/ power window) | A |
| Door control circuit (w/o power window) | B |
|
| ||||
| A | |
 |
| 2.INSPECT POWER WINDOW MASTER SWITCH (DOOR CONTROL SWITCH) |
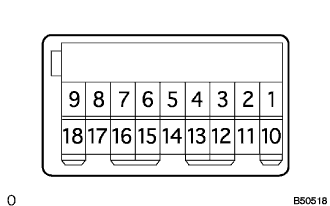 |
Disconnect the power window master switch assembly.
Measure the resistance when the switch is operated according to the value(s) in the table below.
| Tester Connection | Door Lock Condition | Specified Condition |
| 1 - 8 | ON (Door lock set to UNLOCK) | Below 1 Ω |
| 1 - 5 | OFF (Door Lock set to LOCK) | Below 1 Ω |
|
| ||||
| OK | |
|
| 3.CHECK WIRE HARNESS (POWER WINDOW MASTER SWITCH - INSTRUMENT PANEL J/B) |
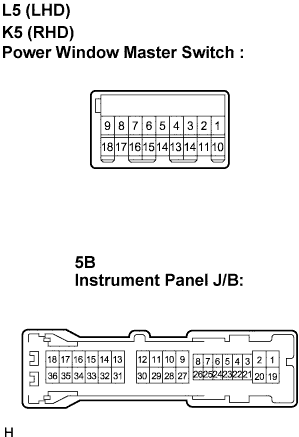 |
Disconnect the L5 (K5) connector.
Disconnect the instrument panel J/B connector.
Measure the resistance according to the value(s) in the table below.
| Tester Connection | Condition | Specified Condition |
| 5B-23 - L5-8 (UL1) | Always | Below 1 Ω |
| 5B-24 - L5-5 (L1) | Always | Below 1 Ω |
| L5-1 - Body ground | Always | Below 1 Ω |
| Tester Connection | Condition | Specified Condition |
| 5B-5 - K5-8 (UL1) | Always | Below 1 Ω |
| 5B-6 - K5-5 (L1) | Always | Below 1 Ω |
| K5-1 - Body ground | Always | Below 1 Ω |
|
| ||||
| OK | ||
 | ||
| ||
| 4.INSPECT DOOR CONTROL SWITCH ASSEMBLY |
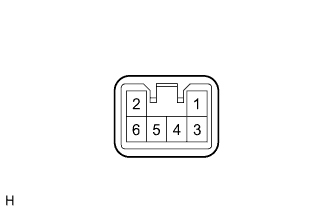 |
Disconnect the door control switch assembly.
Measure the resistance when the switch is operated according to the value(s) in the table below.
| Tester Connection | Condition | Specified Condition |
| 5 - 6 | ON (Door lock set to UNLOCK) | Below 1 Ω |
| 3 - 6 | OFF (Door Lock set to LOCK) | Below 1 Ω |
|
| ||||
| OK | |
|
| 5.CHECK WIRE HARNESS (DOOR CONTROL SWITCH ASSEMBLY - INSTRUMENT PANEL J/B) |
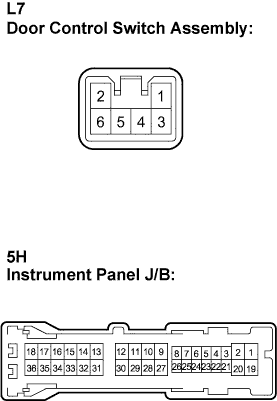 |
Disconnect the L7 connector.
Disconnect the instrument panel J/B connector.
Measure the resistance according to the value(s) in the table below.
| Tester Connection | Condition | Specified Condition |
| 5H-7 - L7-5 (L1) | Always | Below 1 Ω |
| 5H-6 - L7-3 (UL1) | Always | Below 1 Ω |
| L7-6 - Body ground | Always | Below 1 Ω |
|
| ||||
| OK | ||
| ||
| ||

